Wall Mounting
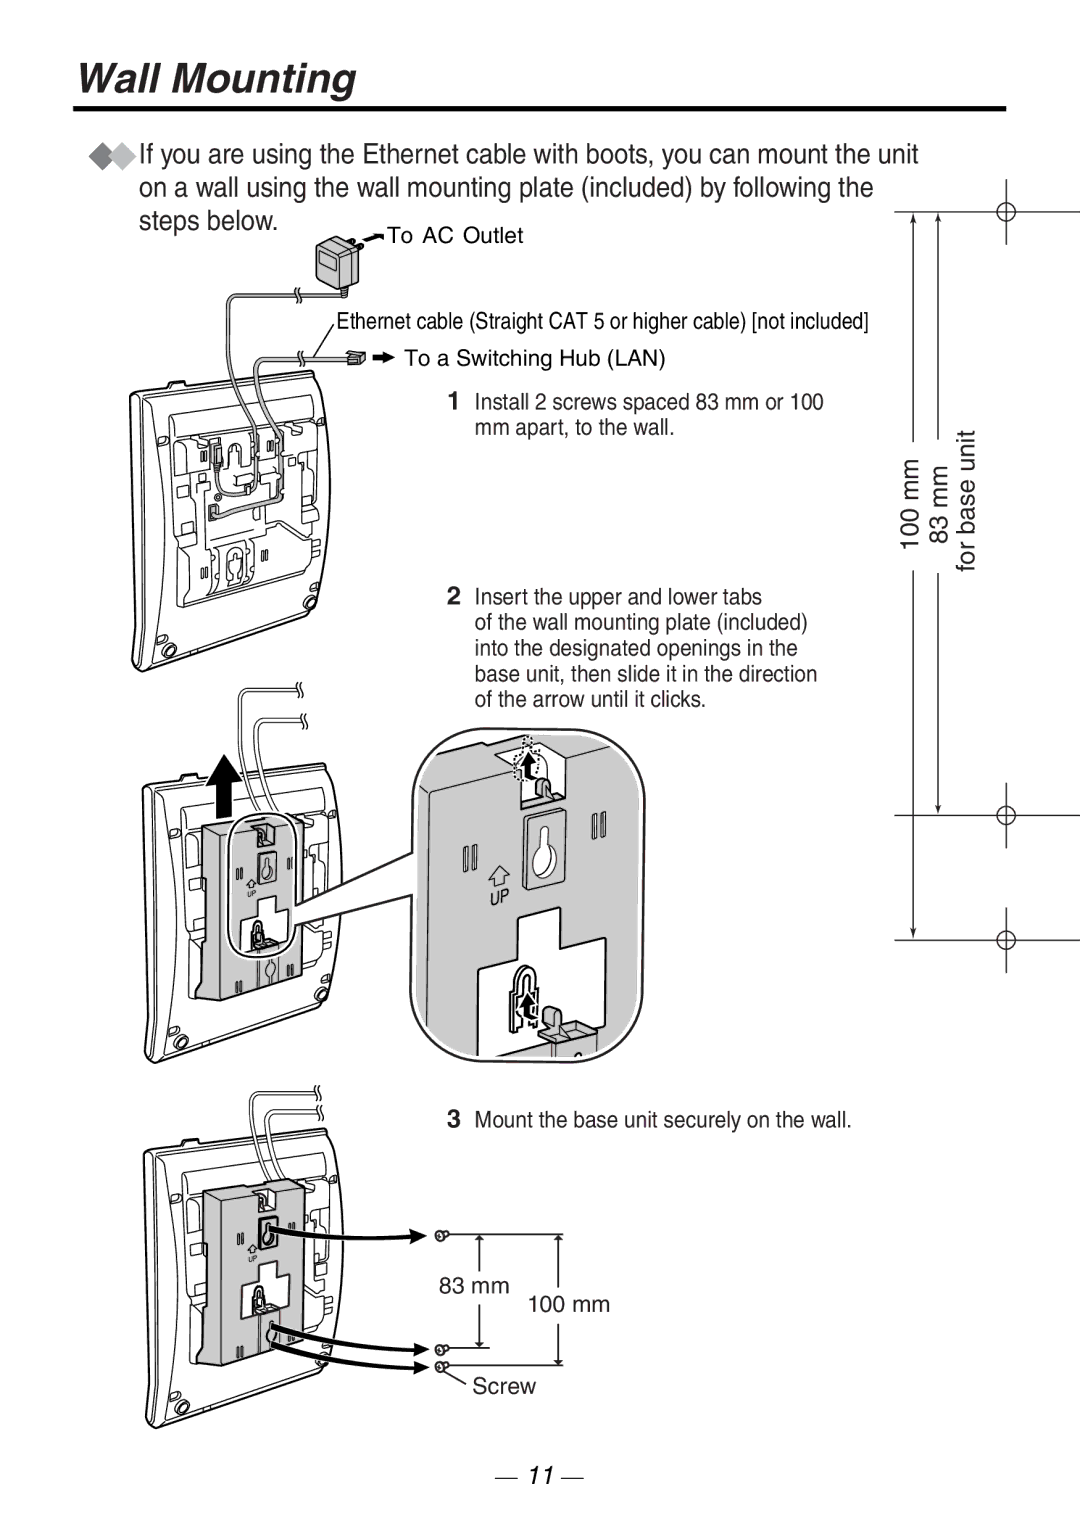
If you are using the Ethernet cable with boots, you can mount the unit | |
on a wall using the wall mounting plate (included) by following the | |
steps below. | To AC Outlet |
| |
| Ethernet cable (Straight CAT 5 or higher cable) [not included] |
| To a Switching Hub (LAN) |
| 1 Install 2 screws spaced 83 mm or 100 |
| mm apart, to the wall. |
| 100 mm 83 mm for base unit |
| 2 Insert the upper and lower tabs |
| of the wall mounting plate (included) |
| into the designated openings in the |
| base unit, then slide it in the direction |
| of the arrow until it clicks. |
3Mount the base unit securely on the wall.
83 mm
100 mm
Screw |
— 11 —