Step 1: Setting up TCP/IP on the Computer
If the TCP/IP of your computer is already set, proceed to the next step. If it is not set, consult with your network administrator. Regarding the configuration of TCP/IP, refer to the help menu or documentation for Windows.
Step 2: Setting up TCP/IP of the Printer
You need to set the IP Address, Subnet Mask and Default Gateway for the printer. It can be set by using one of the following two methods.
•Using the DHCP server
•Using the Network Setup Tool
If the administrator manages the network with a DHCP server, it will automatically assign an IP Address, Subnet Mask and Default Gateway. These can be viewed by printing out the configuration page (see below).
You may need to contact your network administrator to set up the TCP/IP address.
The following is the method using the Network Setup Tool.
1 Turn the printer on.
2 Press PRINT/RESET button on the printer panel
more than 2 seconds and less than 5 seconds to print the configuration page.
3 Confirm the MAC address on the configuration page.
4 Insert the printer
NOTE
•If the
(For Windows XP / Windows Server 2003, click [Start] and click My Computer, then double click the
5 (Click language and) click
6 Follow the instructions until the screen below is displayed.
7 Click on the Yes check button, and then click
[Finish].
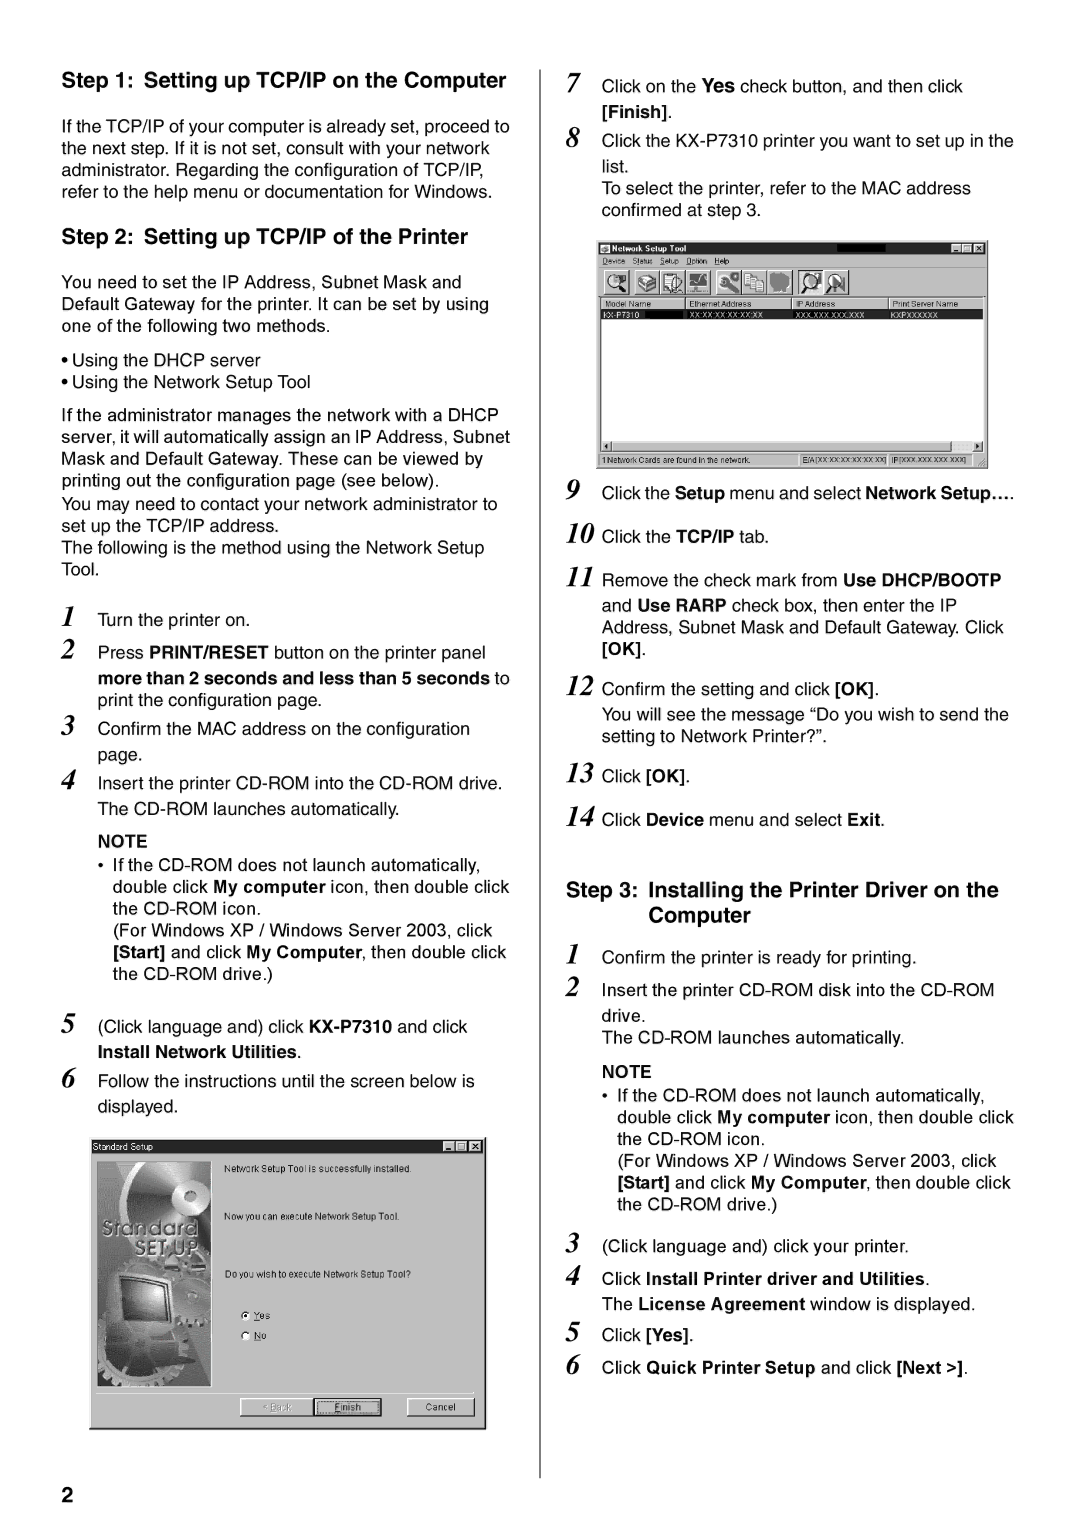
8 Click the
To select the printer, refer to the MAC address confirmed at step 3.
9 Click the Setup menu and select Network Setup…. 10 Click the TCP/IP tab.
11 Remove the check mark from Use DHCP/BOOTP and Use RARP check box, then enter the IP Address, Subnet Mask and Default Gateway. Click
[OK].
12 Confirm the setting and click [OK].
You will see the message “Do you wish to send the setting to Network Printer?”.
13 Click [OK].
14 Click Device menu and select Exit.
Step 3: Installing the Printer Driver on the Computer
1 Confirm the printer is ready for printing.
2 Insert the printer
drive.
The
NOTE
•If the
(For Windows XP / Windows Server 2003, click [Start] and click My Computer, then double click the
3 (Click language and) click your printer.
4 Click Install Printer driver and Utilities.
The License Agreement window is displayed.
5 Click [Yes].
6 Click Quick Printer Setup and click [Next >].
2