TGA939BX(e).fm Page 5 Thursday, October 29, 2009 11:23 AM
Wall mounting
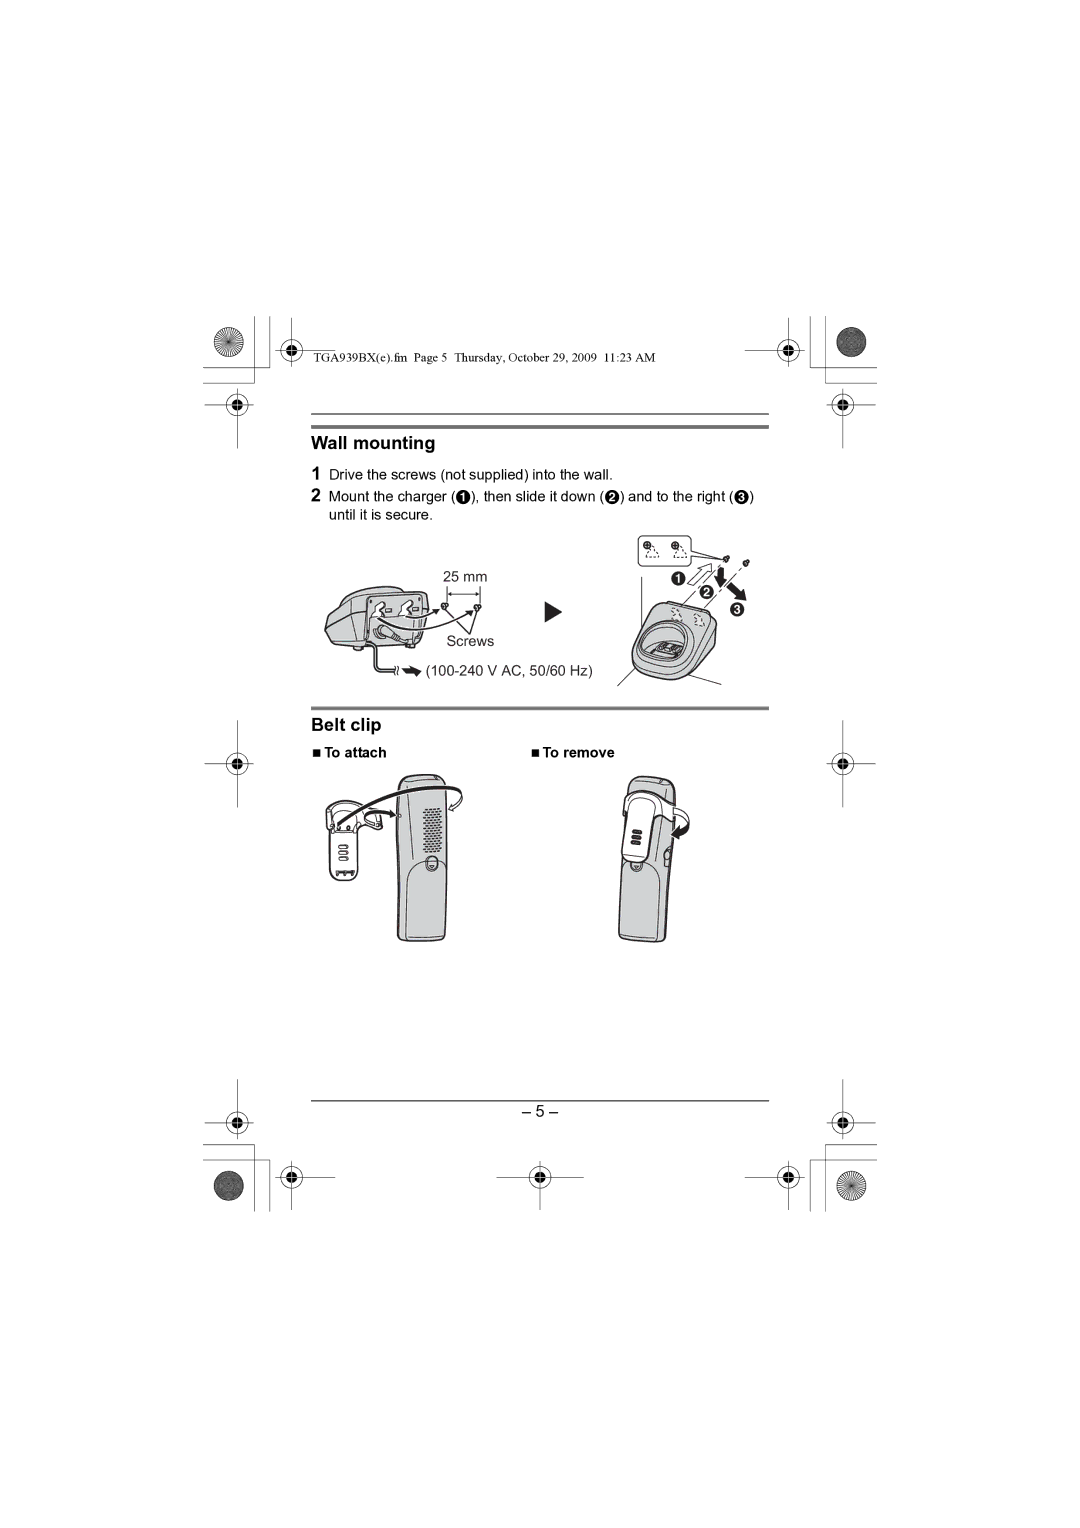
1Drive the screws (not supplied) into the wall.
2Mount the charger (A), then slide it down (B) and to the right (C) until it is secure.
25 mm | A |
B ![]()
C
Screws
![]() (100-240
(100-240
Belt clip
NTo attach | NTo remove |
– 5 –
