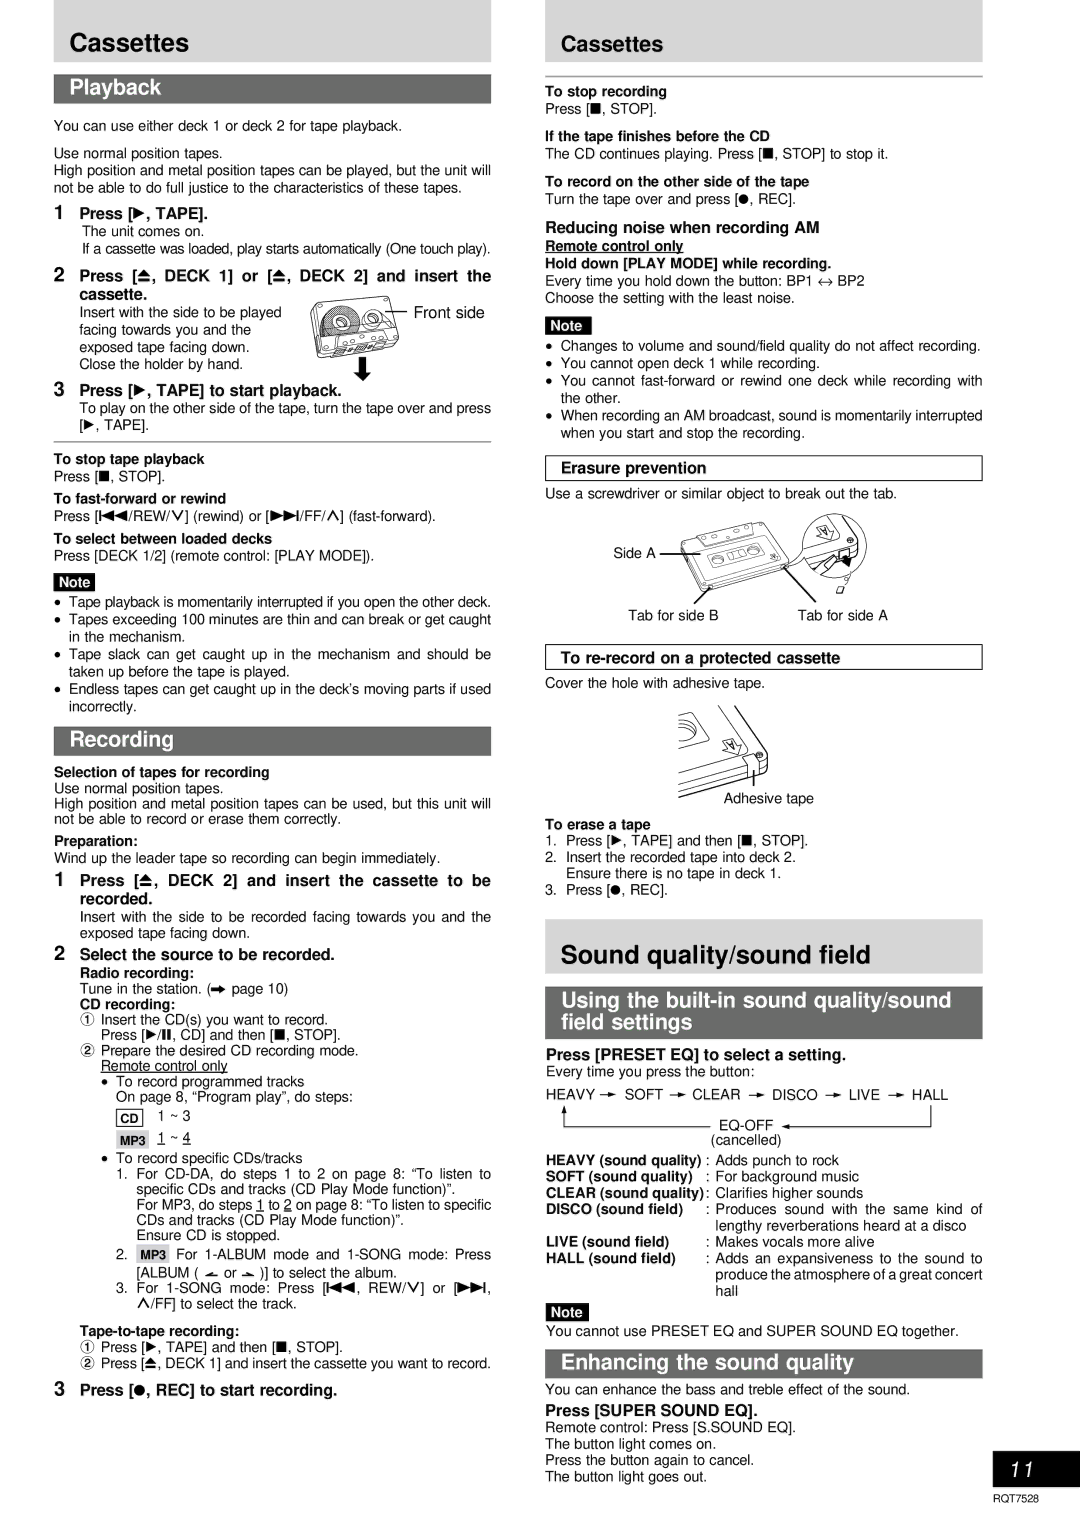
Panasonic SC-AK220 Cassettes, Sound quality/sound field, Playback, Recording

Models: SC-AK220

1 16
Download 16 pages 32.23 Kb
Page 11
Image 11
Cassettes

Cassettes

Playback

You can use either deck 1 or deck 2 for tape playback.

Use normal position tapes.

High position and metal position tapes can be played, but the unit will not be able to do full justice to the characteristics of these tapes.

1Press [:, TAPE].

The unit comes on.

If a cassette was loaded, play starts automatically (One touch play).

2Press [c, DECK 1] or [c, DECK 2] and insert the cassette.

Insert with the side to be played

Front side

facing towards you and the


exposed tape facing down.


Close the holder by hand.


3Press [:, TAPE] to start playback.

To play on the other side of the tape, turn the tape over and press [:, TAPE].

To stop tape playback

Press [L, STOP].

To fast-forward or rewind

Press [g/REW/3] (rewind) or [f/FF/4] (fast-forward).

To select between loaded decks

Press [DECK 1/2] (remote control: [PLAY MODE]).

Note

Tape playback is momentarily interrupted if you open the other deck.

Tapes exceeding 100 minutes are thin and can break or get caught in the mechanism.

Tape slack can get caught up in the mechanism and should be taken up before the tape is played.

Endless tapes can get caught up in the deck’s moving parts if used incorrectly.

Recording

Selection of tapes for recording

Use normal position tapes.

High position and metal position tapes can be used, but this unit will not be able to record or erase them correctly.

Preparation:

Wind up the leader tape so recording can begin immediately.

1Press [c, DECK 2] and insert the cassette to be recorded.

Insert with the side to be recorded facing towards you and the exposed tape facing down.

2Select the source to be recorded.

Radio recording:

Tune in the station. (A page 10)

CD recording:

1Insert the CD(s) you want to record. Press [:/J, CD] and then [L, STOP].

2Prepare the desired CD recording mode. Remote control only

To record programmed tracks

On page 8, “Program play”, do steps:

CD


1 ~ 3


1 ~ 4

MP3

To record specific CDs/tracks

1.For CD-DA, do steps 1 to 2 on page 8: “To listen to specific CDs and tracks (CD Play Mode function)”.

For MP3, do steps 1 to 2 on page 8: “To listen to specific CDs and tracks (CD Play Mode function)”.

Ensure CD is stopped.

2.MP3 For 1-ALBUM mode and 1-SONG mode: Press [ALBUM ( Playback or Recording )] to select the album.

3.For 1-SONG mode: Press [g, REW/3] or [f, 4/FF] to select the track.

Tape-to-tape recording:

1Press [:, TAPE] and then [L, STOP].

2Press [c, DECK 1] and insert the cassette you want to record.

3Press [a, REC] to start recording.

Cassettes

To stop recording

Press [L, STOP].

If the tape finishes before the CD

The CD continues playing. Press [L, STOP] to stop it.

To record on the other side of the tape

Turn the tape over and press [a, REC].

Reducing noise when recording AM

Remote control only

Hold down [PLAY MODE] while recording.

Every time you hold down the button: BP1 BP2

Choose the setting with the least noise.

Note

Changes to volume and sound/field quality do not affect recording.

You cannot open deck 1 while recording.

You cannot fast-forward or rewind one deck while recording with the other.

When recording an AM broadcast, sound is momentarily interrupted when you start and stop the recording.

Erasure prevention

Use a screwdriver or similar object to break out the tab.

Side A

Tab for side B

Tab for side A

To re-record on a protected cassette

Cover the hole with adhesive tape.

Adhesive tape

To erase a tape

1.Press [:, TAPE] and then [L, STOP].

2.Insert the recorded tape into deck 2. Ensure there is no tape in deck 1.

3.Press [a, REC].

Sound quality/sound field

Using the built-in sound quality/sound field settings

Press [PRESET EQ] to select a setting.

Every time you press the button:

HEAVY SOFT CLEAR DISCO LIVE HALL


EQ-OFF


(cancelled)

HEAVY (sound quality) : Adds punch to rock

SOFT (sound quality)

: For background music

CLEAR (sound quality) : Clarifies higher sounds

DISCO (sound field) : Produces sound with the same kind of

LIVE (sound field)


lengthy reverberations heard at a disco

: Makes vocals more alive

HALL (sound field)

: Adds an expansiveness to the sound to


produce the atmosphere of a great concert


hall


Note


You cannot use PRESET EQ and SUPER SOUND EQ together.

Enhancing the sound quality

You can enhance the bass and treble effect of the sound.

Press [SUPER SOUND EQ].

Remote control: Press [S.SOUND EQ].


The button light comes on.


Press the button again to cancel.

11

The button light goes out.

RQT7528

Page 11
Image 11
Panasonic SC-AK220 Cassettes, Sound quality/sound field, Playback, Recording, Enhancing the sound quality