Using the Wireless Remote Control
Preparation
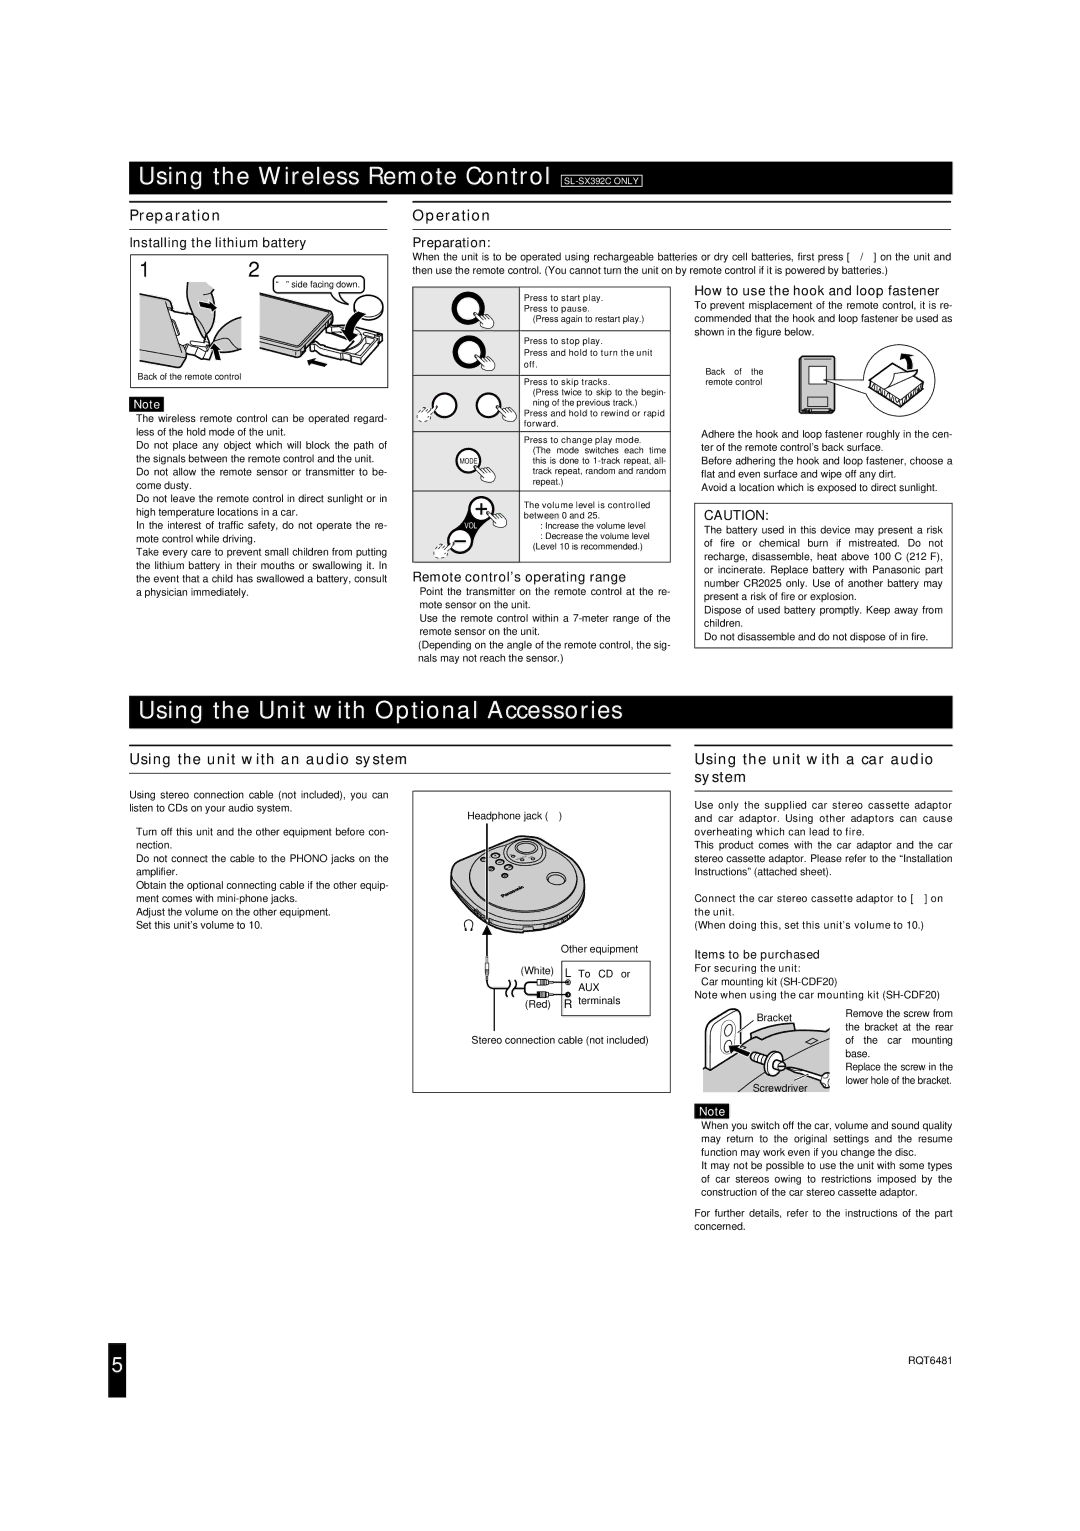
Installing the lithium battery
12
Operation
Preparation:
When the unit is to be operated using rechargeable batteries or dry cell batteries, first press [1/;] on the unit and then use the remote control. (You cannot turn the unit on by remote control if it is powered by batteries.)
“i” side facing down.
![]() 2
2
1
![]() 1
1
2
Back of the remote control
Note!
≥The wireless remote control can be operated regard- less of the hold mode of the unit.
≥Do not place any object which will block the path of the signals between the remote control and the unit.
≥Do not allow the remote sensor or transmitter to be- come dusty.
≥Do not leave the remote control in direct sunlight or in high temperature locations in a car.
≥In the interest of traffic safety, do not operate the re- mote control while driving.
≥Take every care to prevent small children from putting the lithium battery in their mouths or swallowing it. In the event that a child has swallowed a battery, consult a physician immediately.
| Press to start play. |
1; | Press to pause. |
(Press again to restart play.)
Press to stop play.
∫Press and hold to turn the unit off.
6 | 5 | Press to skip tracks. | |
(Press twice to skip to the begin- | |||
|
| ||
: | 9 | ning of the previous track.) | |
Press and hold to rewind or rapid | |||
|
| ||
|
| forward. | |
|
| Press to change play mode. | |
|
| (The mode switches each time | |
MODE |
| this is done to | |
|
| track repeat, random and random | |
|
| repeat.) | |
|
| The volume level is controlled | |
|
| between 0 and 25. | |
VOL |
| i: Increase the volume level | |
|
| j: Decrease the volume level | |
|
| (Level 10 is recommended.) |
Remote control’s operating range
≥Point the transmitter on the remote control at the re- mote sensor on the unit.
≥Use the remote control within a
≥(Depending on the angle of the remote control, the sig- nals may not reach the sensor.)
How to use the hook and loop fastener
To prevent misplacement of the remote control, it is re- commended that the hook and loop fastener be used as shown in the figure below.
Back of the remote control
≥Adhere the hook and loop fastener roughly in the cen- ter of the remote control’s back surface.
≥Before adhering the hook and loop fastener, choose a flat and even surface and wipe off any dirt.
≥Avoid a location which is exposed to direct sunlight.
CAUTION:
The battery used in this device may present a risk of fire or chemical burn if mistreated. Do not recharge, disassemble, heat above 100eC (212eF), or incinerate. Replace battery with Panasonic part number CR2025 only. Use of another battery may present a risk of fire or explosion.
Dispose of used battery promptly. Keep away from children.
Do not disassemble and do not dispose of in fire.
Using the Unit with Optional Accessories
Using the unit with an audio system
Using stereo connection cable (not included), you can listen to CDs on your audio system.
≥Turn off this unit and the other equipment before con- nection.
≥Do not connect the cable to the PHONO jacks on the amplifier.
≥Obtain the optional connecting cable if the other equip- ment comes with
≥Adjust the volume on the other equipment. ≥Set this unit’s volume to 10.
Headphone jack (Ë)
HOLD
OPEN
Other equipment
(White) L To CD or
AUX
(Red) R terminals
Using the unit with a car audio system
Use only the supplied car stereo cassette adaptor and car adaptor. Using other adaptors can cause overheating which can lead to fire.
This product comes with the car adaptor and the car stereo cassette adaptor. Please refer to the “Installation Instructions” (attached sheet).
Connect the car stereo cassette adaptor to [Ë] on the unit.
(When doing this, set this unit’s volume to 10.)
Items to be purchased
For securing the unit:
≥Car mounting kit
Note when using the car mounting kit
Stereo connection cable (not included)
Bracket | 1Remove the screw from | |
the bracket at the rear | ||
| ||
| of the car mounting | |
| base. | |
| 2Replace the screw in the | |
Screwdriver | lower hole of the bracket. | |
|
Note!
≥When you switch off the car, volume and sound quality may return to the original settings and the resume function may work even if you change the disc.
≥It may not be possible to use the unit with some types of car stereos owing to restrictions imposed by the construction of the car stereo cassette adaptor.
For further details, refer to the instructions of the part concerned.
5 | RQT6481 |
| |
|
|