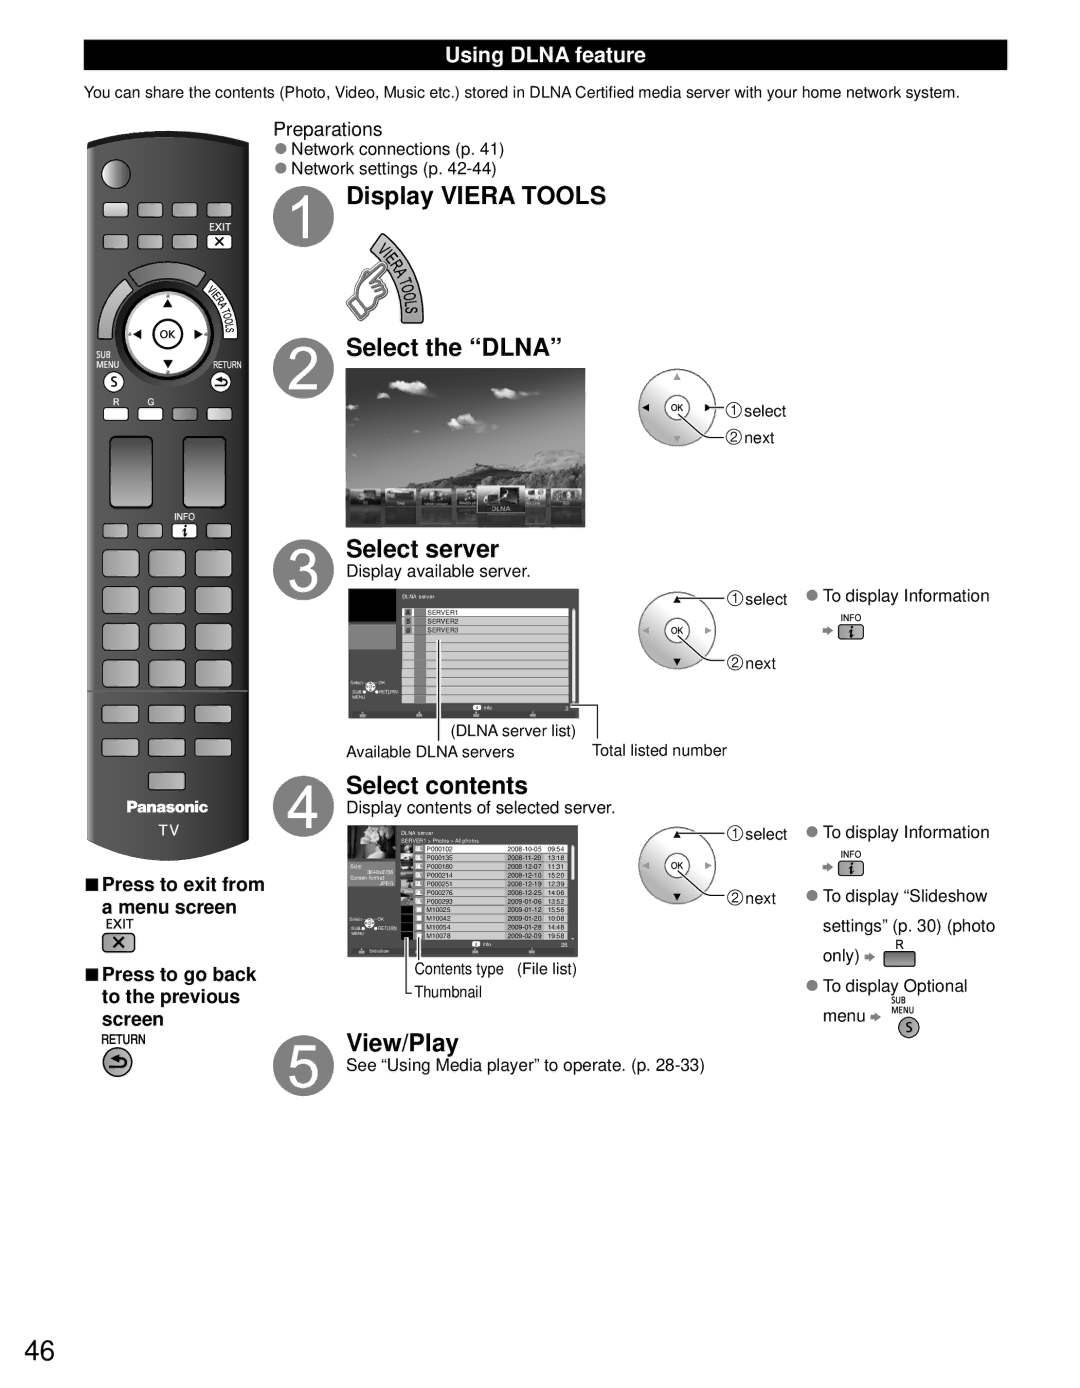
Using DLNA feature
You can share the contents (Photo, Video, Music etc.) stored in DLNA Certified media server with your home network system.
Preparations
●Network connections (p. 41)
●Network settings (p.
 Display VIERA TOOLS
 Select the “DLNA”
![]() select
select ![]() next
next
Select server
Display available server.
■Press to exit from a menu screen
■Press to go back to the previous screen
DLNA server | select |
|
A | SERVER1 |
5 | SERVER2 |
g | SERVER3 |
Select ![]() OK
OK
SUB ![]()
![]()
![]() RETURN
RETURN
MENU
Info | 3 |
(DLNA server list)
Available DLNA servers
![]() next
next
Total listed number
Select contents
Display contents of selected server.
|
| SERVER1 > Photos > All photos |
|
| select |
|
| DLNA server |
|
|
|
|
| P000102 | 09:54 |
| |
|
| P000135 |
| ||
Size: | 3648x2736 | P000180 | 11:31 |
| |
| P000214 |
| |||
Screen format |
| ||||
| JPEG | P000251 | next | ||
|
| P000276 | |||
|
| P000293 | 13:52 | ||
|
| M10025 |
| ||
Select | OK | M10042 |
| ||
SUB | RETURN | M10054 | 14:48 |
| |
MENU |
| M10078 |
| ||
|
|
| |||
| Slideshow | Info |
| 28 |
|
|
|
|
|
| |
Contents type (File list)
Thumbnail
View/Play
See “Using Media player” to operate. (p.
●To display Information
●To display “Slideshow settings” (p. 30) (photo only) ![]()
![]()
●To display Optional menu ![]()
![]()
![]()
![]()
![]()
46
