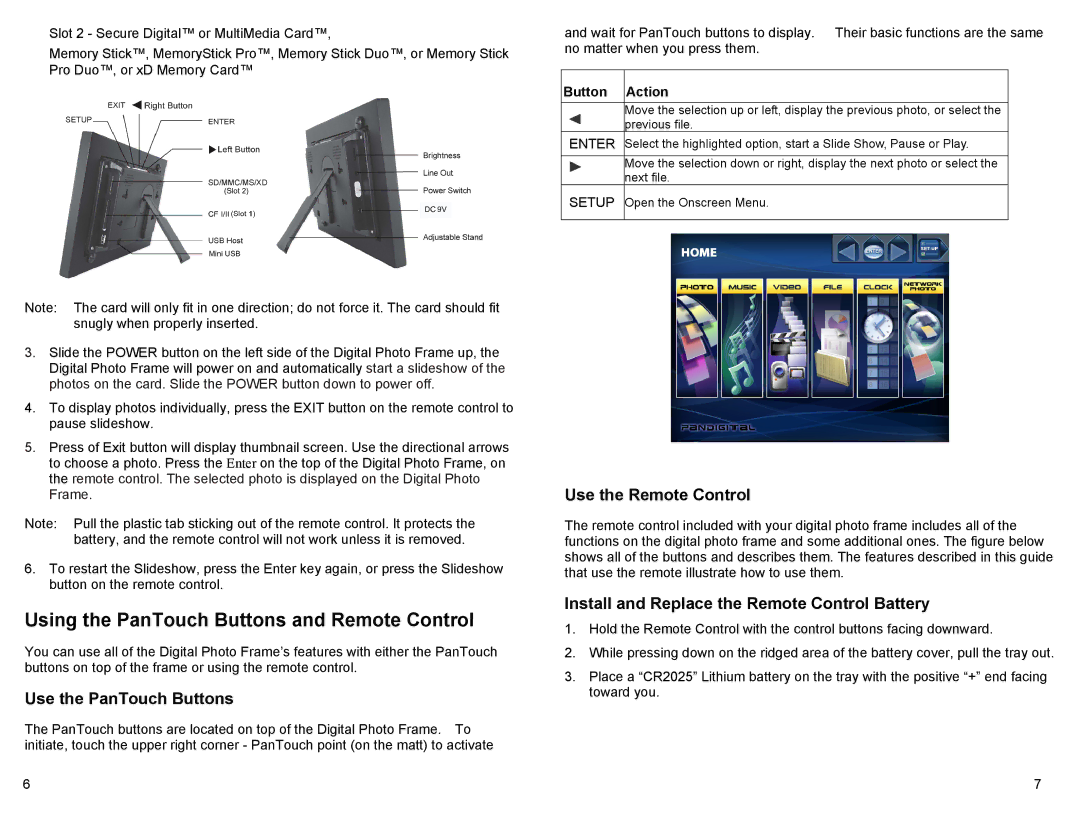
Slot 2 - Secure Digital™ or MultiMedia Card™,
Memory Stick™, MemoryStick Pro™, Memory Stick Duo™, or Memory Stick Pro Duo™, or xD Memory Card™
Note: The card will only fit in one direction; do not force it. The card should fit snugly when properly inserted.
3.Slide the POWER button on the left side of the Digital Photo Frame up, the Digital Photo Frame will power on and automatically start a slideshow of the photos on the card. Slide the POWER button down to power off.
4.To display photos individually, press the EXIT button on the remote control to pause slideshow.
5.Press of Exit button will display thumbnail screen. Use the directional arrows to choose a photo. Press the Enter on the top of the Digital Photo Frame, on the remote control. The selected photo is displayed on the Digital Photo Frame.
Note: Pull the plastic tab sticking out of the remote control. It protects the battery, and the remote control will not work unless it is removed.
6.To restart the Slideshow, press the Enter key again, or press the Slideshow button on the remote control.
Using the PanTouch Buttons and Remote Control
You can use all of the Digital Photo Frame’s features with either the PanTouch buttons on top of the frame or using the remote control.
Use the PanTouch Buttons
The PanTouch buttons are located on top of the Digital Photo Frame. To initiate, touch the upper right corner - PanTouch point (on the matt) to activate
6
and wait for PanTouch buttons to display. Their basic functions are the same no matter when you press them.
Button Action
Move the selection up or left, display the previous photo, or select the previous file.
ENTER Select the highlighted option, start a Slide Show, Pause or Play.
Move the selection down or right, display the next photo or select the next file.
SETUP Open the Onscreen Menu.
Use the Remote Control
The remote control included with your digital photo frame includes all of the functions on the digital photo frame and some additional ones. The figure below shows all of the buttons and describes them. The features described in this guide that use the remote illustrate how to use them.
Install and Replace the Remote Control Battery
1.Hold the Remote Control with the control buttons facing downward.
2.While pressing down on the ridged area of the battery cover, pull the tray out.
3.Place a “CR2025” Lithium battery on the tray with the positive “+” end facing toward you.
7