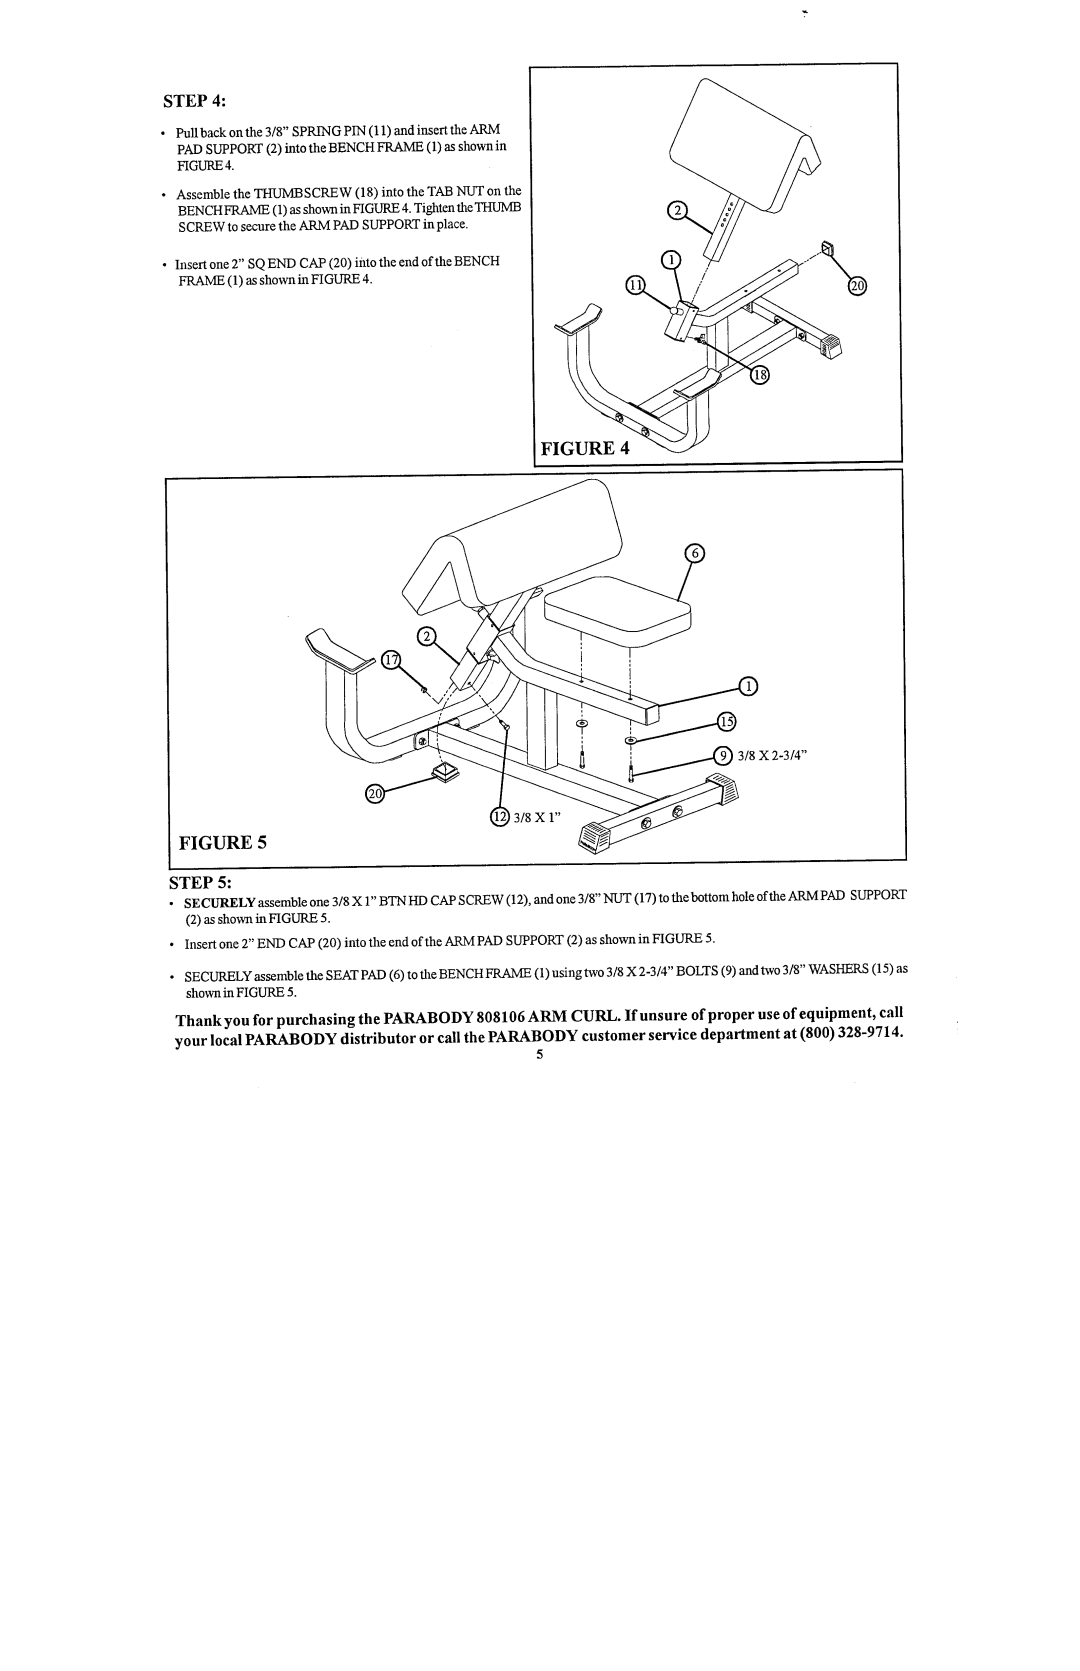
STEP4:
Pullback on the 3/8" SPRINGPIN (11) and insert the ARM
PADSUPPORT(2) into the BENCHFRAME(1) as shown
FIGURE4.
Assemble the THUMBSCREW(18) into the TABNUTon the
BENCHFRAME(1) as shown in FIGURE4. Tighten the THUMB
SCREWto secure the ARMPADSUPPORTin place.
¯Insert one 2" SQENDCAP(20) into the end of the BENCH FRAME(1) as shown in FIGURE
FIGURE 4
~ | 3/8 |
|
3/8 X 1"
FIGURE 5
STEP5:
¯SECURELYassemble one 3/8 X 1" BTNHDCAPSCREW(12), and one 3/8" NUT(17) to the bottom hole of the ARMPADSUPPORT
(2)as shownin FIGURE
¯Insert one 2" ENDCAP(20) into the end of the ARMPADSUPPORT(2) as shown in FIGURE
¯SECURELYassemble the SEATPAD(6) to the BENCHFRAME(1) using two 3/8 X
Thankyou for purchasingthe PARABODY808106ARMCURLIf. unsureof properuse of equipment,call yourlocal PARABODYdistributor or call the PARABODYcustomerservice departmentat (800)
5