PARTS LIST
KEY | PART # |
| DESCRIPTION | QTY |
| ||||
1 | LEA6215709 |
| FOOT BRACE ASSY | 1 |
2 | LEA6284710 |
| ADJUSTABLE TUBE ASSY | 1 |
3 | LEA6013709 |
| CONNECTOR PLATE | 1 |
4 | LEA3235214 |
| 3/8 X | 2 |
5 | LEA3114403 |
| 3/8” FLAT WASHER | 4 |
6 | LEA3114702 |
| 3/8” LOCK NUT | 2 |
|
|
|
|
|
KEY | PART # | DESCRIPTION | QTY |
7 | LEA6011401 | SAFETY LOCK PIN | 1 |
8 | LEA6405201 | 2” SQ. END CAP | 1 |
9 | LEA6236701 | 1 | |
10 | LEA6177001 | 4 | |
|
|
|
|
|
|
|
|
FRONT |
BENCH |
FRAME |
4 |
5 |
10 |
3 |
9 |
2 |
1 |
6 |
7 |
8 |
FIGURE 5 |
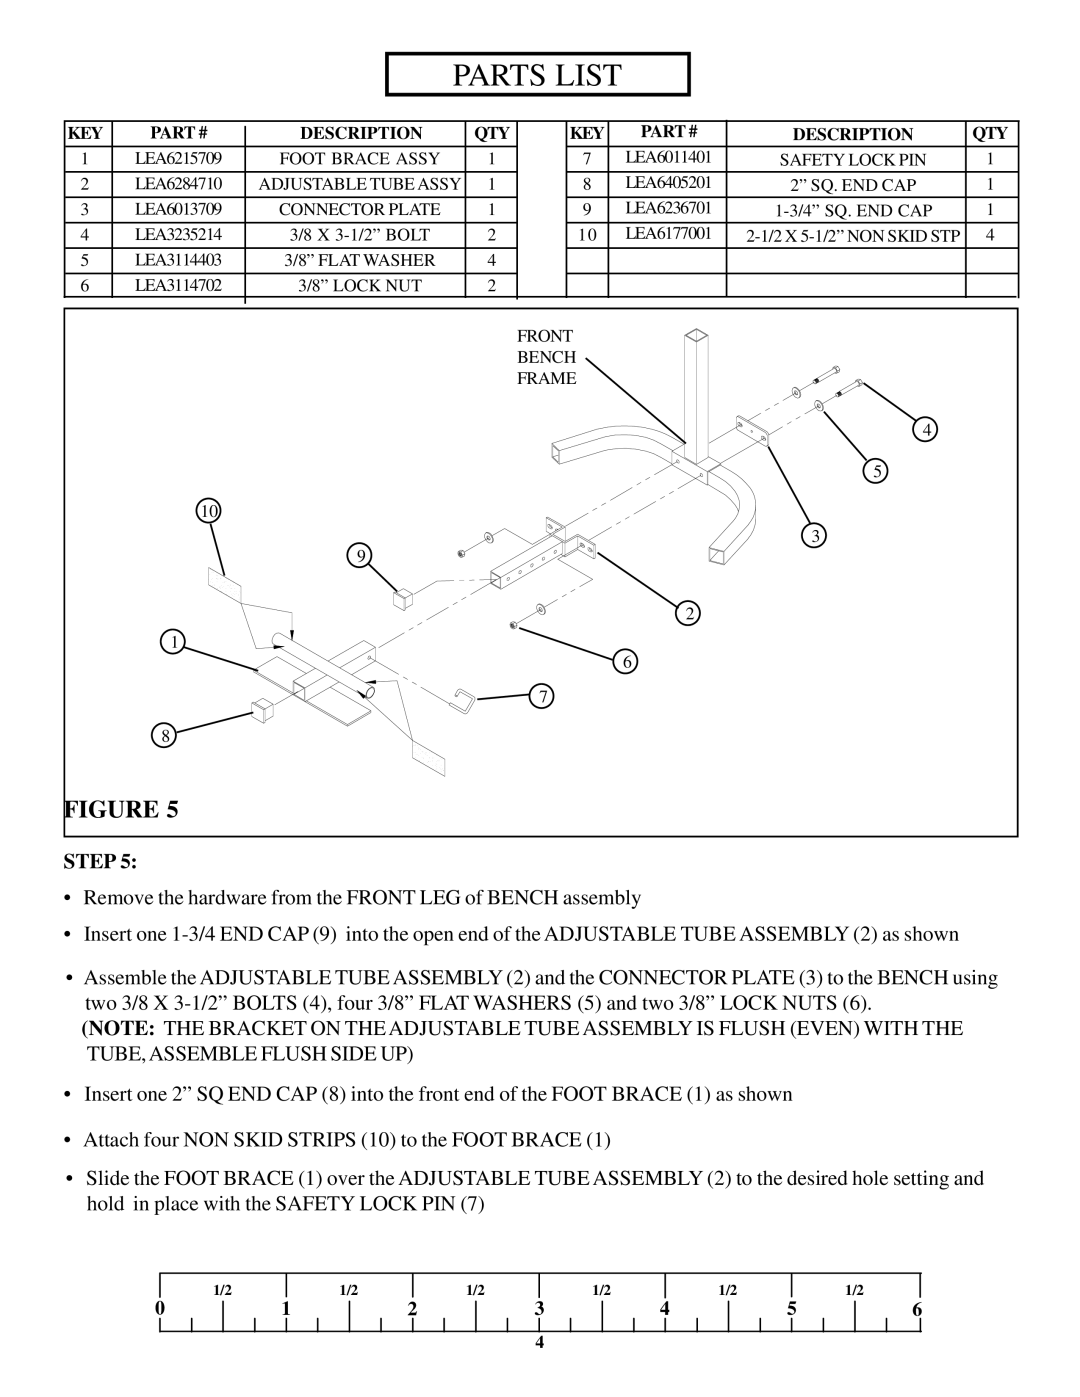
STEP 5:
•Remove the hardware from the FRONT LEG of BENCH assembly
•Insert one
•Assemble the ADJUSTABLE TUBE ASSEMBLY (2) and the CONNECTOR PLATE (3) to the BENCH using two 3/8 X
(NOTE: THE BRACKET ON THE ADJUSTABLE TUBE ASSEMBLY IS FLUSH (EVEN) WITH THE TUBE, ASSEMBLE FLUSH SIDE UP)
•Insert one 2” SQ END CAP (8) into the front end of the FOOT BRACE (1) as shown
•Attach four NON SKID STRIPS (10) to the FOOT BRACE (1)
•Slide the FOOT BRACE (1) over the ADJUSTABLE TUBE ASSEMBLY (2) to the desired hole setting and hold in place with the SAFETY LOCK PIN (7)
| 1/2 |
| 1/2 |
| 1/2 |
| 1/2 |
| 1/2 |
|
| 1/2 |
0 | 1 | 2 | 3 | 4 | 5 | 6 | ||||||
4
