FIGURE 2 |
|
3/8 X 1” | 5 |
BUTTON | |
HEAD | 6 |
| |
2 |
|
| 1 |
STEP 2:
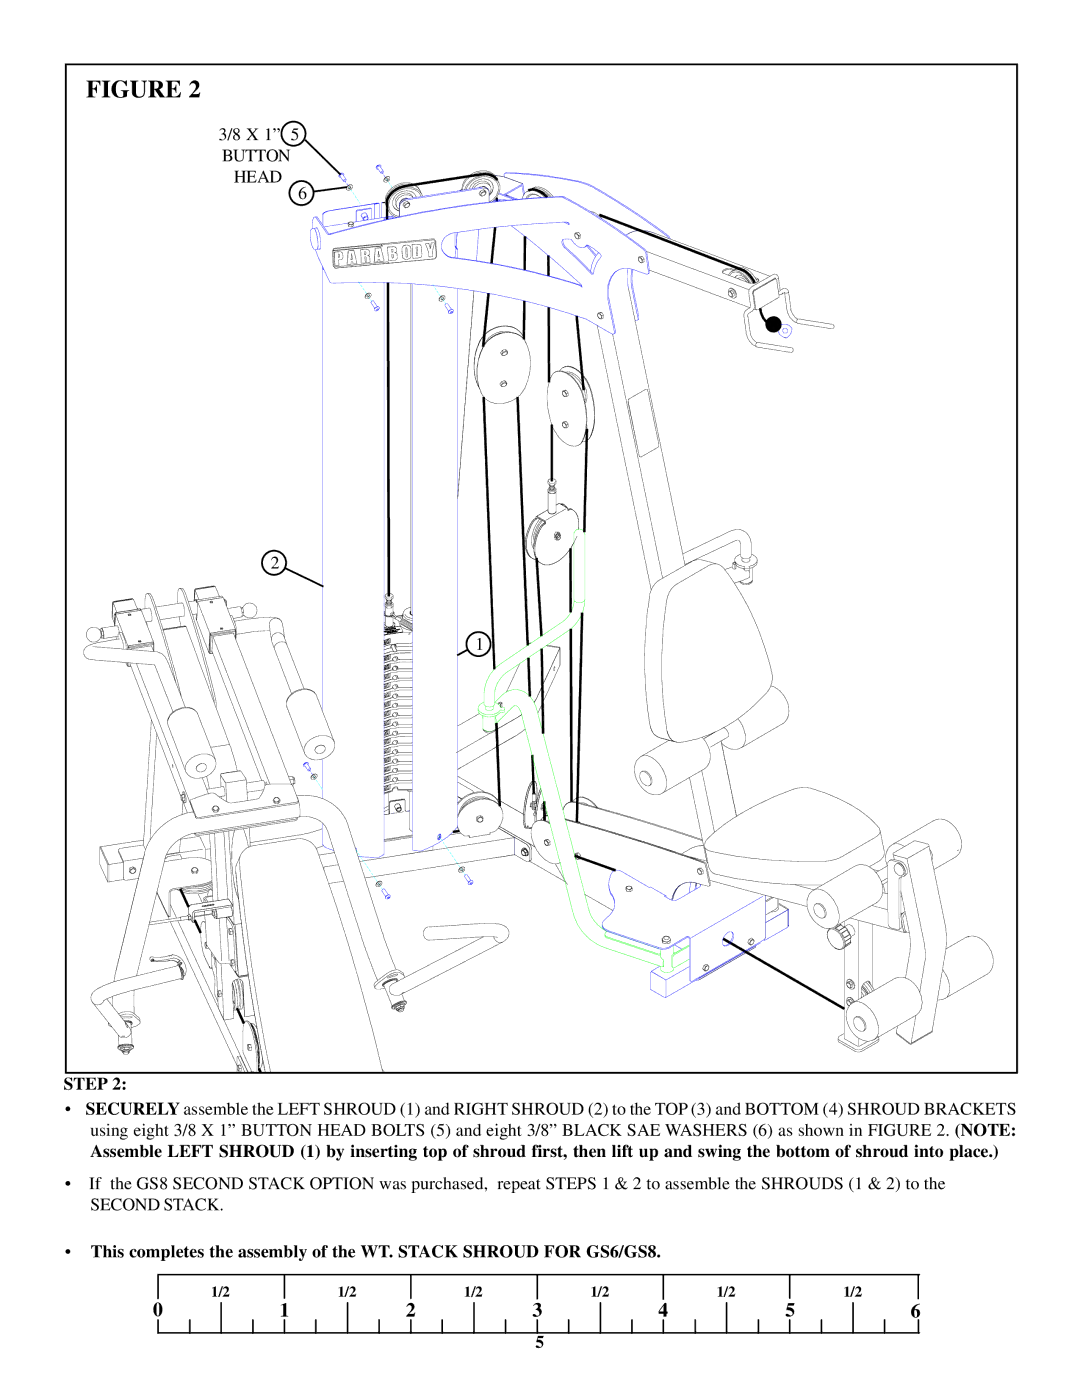
•SECURELY assemble the LEFT SHROUD (1) and RIGHT SHROUD (2) to the TOP (3) and BOTTOM (4) SHROUD BRACKETS using eight 3/8 X 1” BUTTON HEAD BOLTS (5) and eight 3/8” BLACK SAE WASHERS (6) as shown in FIGURE 2. (NOTE:
Assemble LEFT SHROUD (1) by inserting top of shroud first, then lift up and swing the bottom of shroud into place.)
•If the GS8 SECOND STACK OPTION was purchased, repeat STEPS 1 & 2 to assemble the SHROUDS (1 & 2) to the
SECOND STACK.
•This completes the assembly of the WT. STACK SHROUD FOR GS6/GS8.
| 1/2 |
| 1/2 |
| 1/2 |
| 1/2 |
| 1/2 |
|
| 1/2 |
0 | 1 | 2 | 3 | 4 | 5 | 6 | ||||||
5
