Depth (18)
Adjusting this control clockwise will result in an increase in the depth or intensity of the chorus effect. This control adjusts the amount of chorus you actually hear from the output of the amp.
T. Dynamics¨ (19)
This control adjusts the usable power of the internal power amps from 10% (counter clockwise) to 100% (clockwise). Rotating this control clockwise will result in more available power. This effect is often set to lower levels in order for the power amp compression simulation to be more apparent, allowing you to overdrive the power amp at lower volume levels, achieving a tube power amp clipping/compression quality.
Power LED (20)
Illuminates when power is supplied to the amp. If this LED is lit, the amp is on.
REAR PANEL
21 | 22 | 23 | 24 | 23 | 24 | 25 | |
|
|
|
|
|
|
|
|
|
|
|
|
|
|
|
|
|
|
|
|
|
|
|
|
|
|
|
|
|
|
|
|
|
|
|
|
|
|
|
|
26
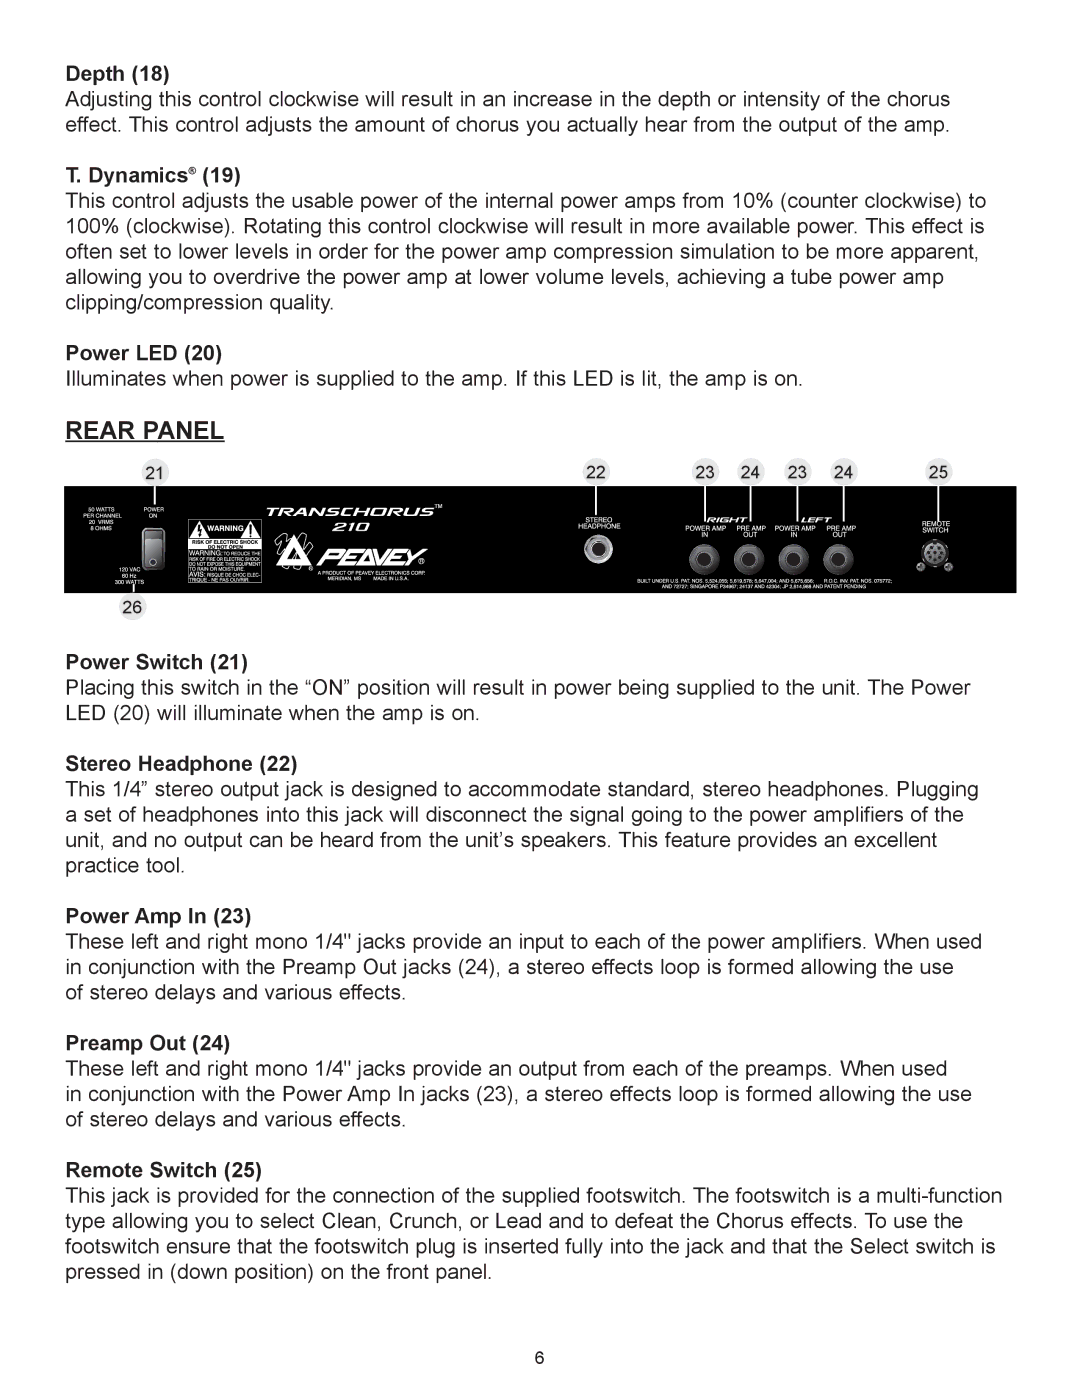
Power Switch (21)
Placing this switch in the ÒONÓ position will result in power being supplied to the unit. The Power LED (20) will illuminate when the amp is on.
Stereo Headphone (22)
This 1/4Ó stereo output jack is designed to accommodate standard, stereo headphones. Plugging a set of headphones into this jack will disconnect the signal going to the power amplifiers of the unit, and no output can be heard from the unitÕs speakers. This feature provides an excellent practice tool.
Power Amp In (23)
These left and right mono 1/4" jacks provide an input to each of the power amplifiers. When used in conjunction with the Preamp Out jacks (24), a stereo effects loop is formed allowing the use of stereo delays and various effects.
Preamp Out (24)
These left and right mono 1/4" jacks provide an output from each of the preamps. When used in conjunction with the Power Amp In jacks (23), a stereo effects loop is formed allowing the use of stereo delays and various effects.
Remote Switch (25)
This jack is provided for the connection of the supplied footswitch. The footswitch is a
6
