SUA746PU specifications
Peerless Industries SUA746PU is a versatile and robust mounting solution designed for flat-panel displays, catering to both residential and commercial settings. This mount stands out due to its blend of innovative technology, user-friendly features, and high-quality construction, making it a preferred choice for various applications.One of the key features of the SUA746PU is its full-motion capability, allowing users to tilt, swivel, and extend the screen for optimal viewing angles. This functionality enhances the user experience by minimizing glare and ensuring comfortable visibility from different positions in a room. Whether in a conference room, living room, or classroom, this mount adapts to the user's needs seamlessly.
The SUA746PU supports a wide range of display sizes, accommodating screens from 42 to 75 inches. This versatility makes it an ideal choice for environments with various screen types and sizes, ensuring compatibility and ease of installation. The mount is engineered to support a significant weight capacity, providing peace of mind that your investment is securely held.
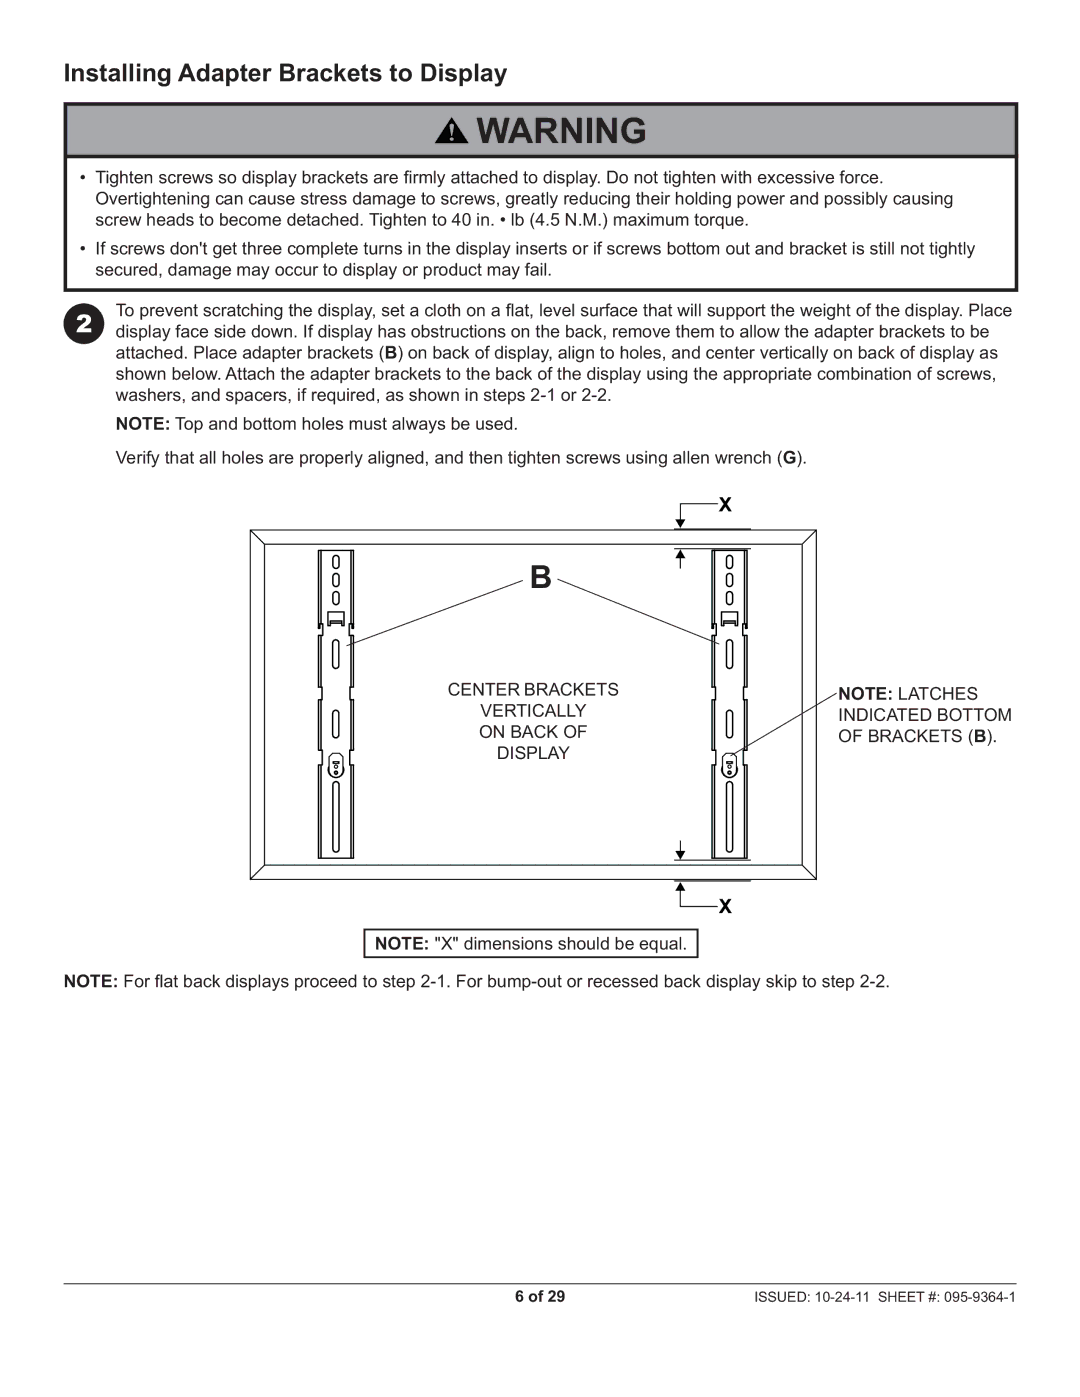
Installation is made simple and efficient, thanks to Peerless Industries’ thoughtful design. The mount includes a quick-release mechanism, which allows for straightforward attachment and detachment of the display. This feature is particularly beneficial for applications where screen maintenance or adjustments are frequent. Additionally, the SUA746PU comes with integrated cable management to help keep the installation neat and organized, reducing clutter and maintaining a professional appearance.
Durability is another hallmark of the SUA746PU. Constructed with high-quality materials, the mount is designed to withstand the rigors of daily use while maintaining its structural integrity. Peerless Industries places a strong emphasis on safety, ensuring that the mount meets rigorous industry standards.
In summary, the Peerless Industries SUA746PU is an advanced mounting solution that combines flexibility, durability, and ease of use. Its full-motion capabilities, wide compatibility with various screen sizes, and efficient installation process make it an excellent choice for both residential and commercial applications. Whether you're mounting a display for educational purposes or enhancing the entertainment experience at home, the SUA746PU delivers functionality and reliability.

