ADJUSTING THE FOOTBOARD 20• The footboard can be adjusted to
three different positions. To lower the footboard, pull the two small levers downward while lowering. To lift the footboard, pull it up until it clicks into place. This is the third, highest position (see figure) for the baby carriage version of Pliko
ADJUSTING THE BACKREST
21• The backrest can be reclined in four positions. To lower the backrest, raise the handle as you lower the backrest, blocking it in the desired position. To raise it, push the backrest upward.
SWIVELLING WHEELS
22• To make the front wheels swivel, push down as shown in the figure. To fix the wheels, pull up the lever.
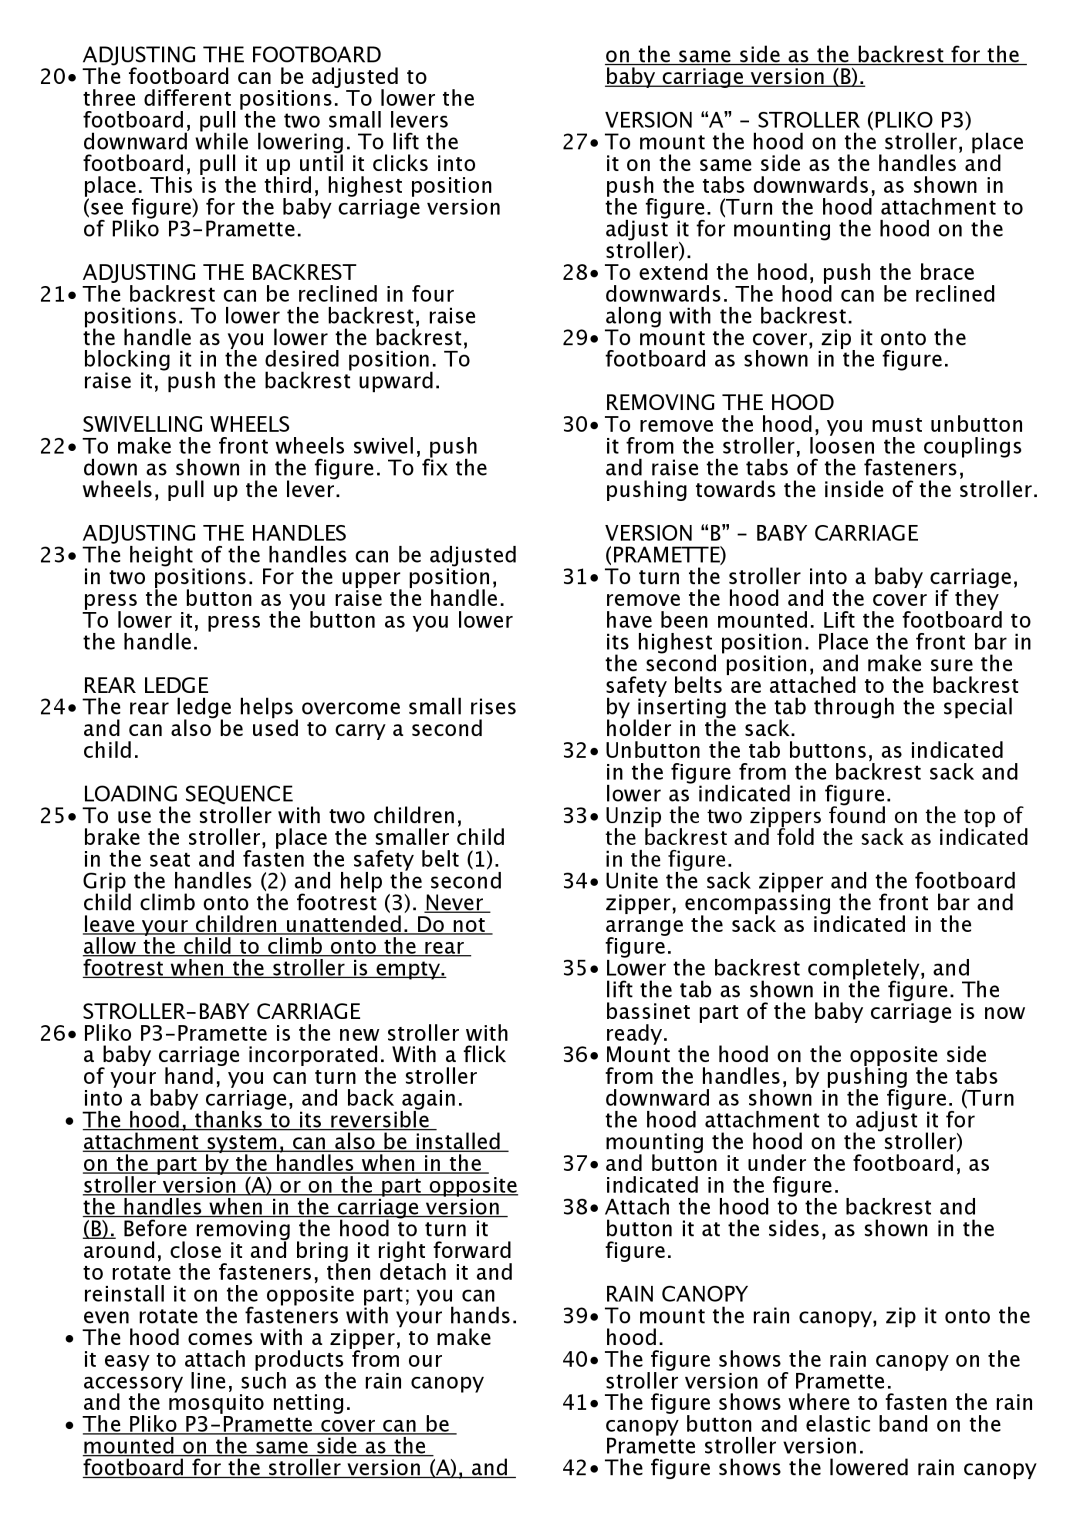
ADJUSTING THE HANDLES
23• The height of the handles can be adjusted in two positions. For the upper position, press the button as you raise the handle. To lower it, press the button as you lower the handle.
REAR LEDGE
24• The rear ledge helps overcome small rises and can also be used to carry a second child.
LOADING SEQUENCE
25• To use the stroller with two children, brake the stroller, place the smaller child in the seat and fasten the safety belt (1). Grip the handles (2) and help the second child climb onto the footrest (3). Never leave your children unattended. Do not allow the child to climb onto the rear footrest when the stroller is empty.
STROLLER-BABY CARRIAGE
26• Pliko
•The hood, thanks to its reversible attachment system, can also be installed on the part by the handles when in the stroller version (A) or on the part opposite the handles when in the carriage version
(B). Before removing the hood to turn it around, close it and bring it right forward to rotate the fasteners, then detach it and reinstall it on the opposite part; you can even rotate the fasteners with your hands.
•The hood comes with a zipper, to make it easy to attach products from our accessory line, such as the rain canopy and the mosquito netting.
•The Pliko
on the same side as the backrest for the baby carriage version (B).
VERSION “A” - STROLLER (PLIKO P3)
27• To mount the hood on the stroller, place it on the same side as the handles and push the tabs downwards, as shown in the figure. (Turn the hood attachment to adjust it for mounting the hood on the stroller).
28• To extend the hood, push the brace downwards. The hood can be reclined along with the backrest.
29• To mount the cover, zip it onto the footboard as shown in the figure.
REMOVING THE HOOD
30• To remove the hood, you must unbutton it from the stroller, loosen the couplings and raise the tabs of the fasteners, pushing towards the inside of the stroller.
VERSION “B” - BABY CARRIAGE (PRAMETTE)
31• To turn the stroller into a baby carriage, remove the hood and the cover if they have been mounted. Lift the footboard to its highest position. Place the front bar in the second position, and make sure the safety belts are attached to the backrest by inserting the tab through the special holder in the sack.
32• Unbutton the tab buttons, as indicated in the figure from the backrest sack and lower as indicated in figure.
33• Unzip the two zippers found on the top of the backrest and fold the sack as indicated in the figure.
34• Unite the sack zipper and the footboard zipper, encompassing the front bar and arrange the sack as indicated in the figure.
35• Lower the backrest completely, and lift the tab as shown in the figure. The bassinet part of the baby carriage is now ready.
36• Mount the hood on the opposite side from the handles, by pushing the tabs downward as shown in the figure. (Turn the hood attachment to adjust it for mounting the hood on the stroller)
37• and button it under the footboard, as indicated in the figure.
38• Attach the hood to the backrest and button it at the sides, as shown in the figure.
RAIN CANOPY
39• To mount the rain canopy, zip it onto the hood.