®
®
CM1750EXT/CM1750EXT-BK
Extension Tube
C219M-A (6/04)
Installation Instructions
The CM1750EXT/CM1750EXT-BK extension tube extends the length of the BS1750/CM1750/CM1750-BK/TB1750 universal camera mounts . The gray (CM1750EXT) or black (CM1750EXT-BK) 4-inch (10.16 cm) x 1-inch (2.54 cm) aluminum extension tube is used on the camera mounts to install cameras weighing a maximum 7 lbs (3.18 kg).
For more information about the BS1750/CM1750/CM1750-BK/TB1750 camera mounts, refer to the C218M-B manual.
INSTALLATION
NOTE: The CM1750EXT/CM1750EXT-BK extension tube and BS1750/CM1750/CM1750-BK/TB1750 camera mounts are not recommended for use with enclosures.
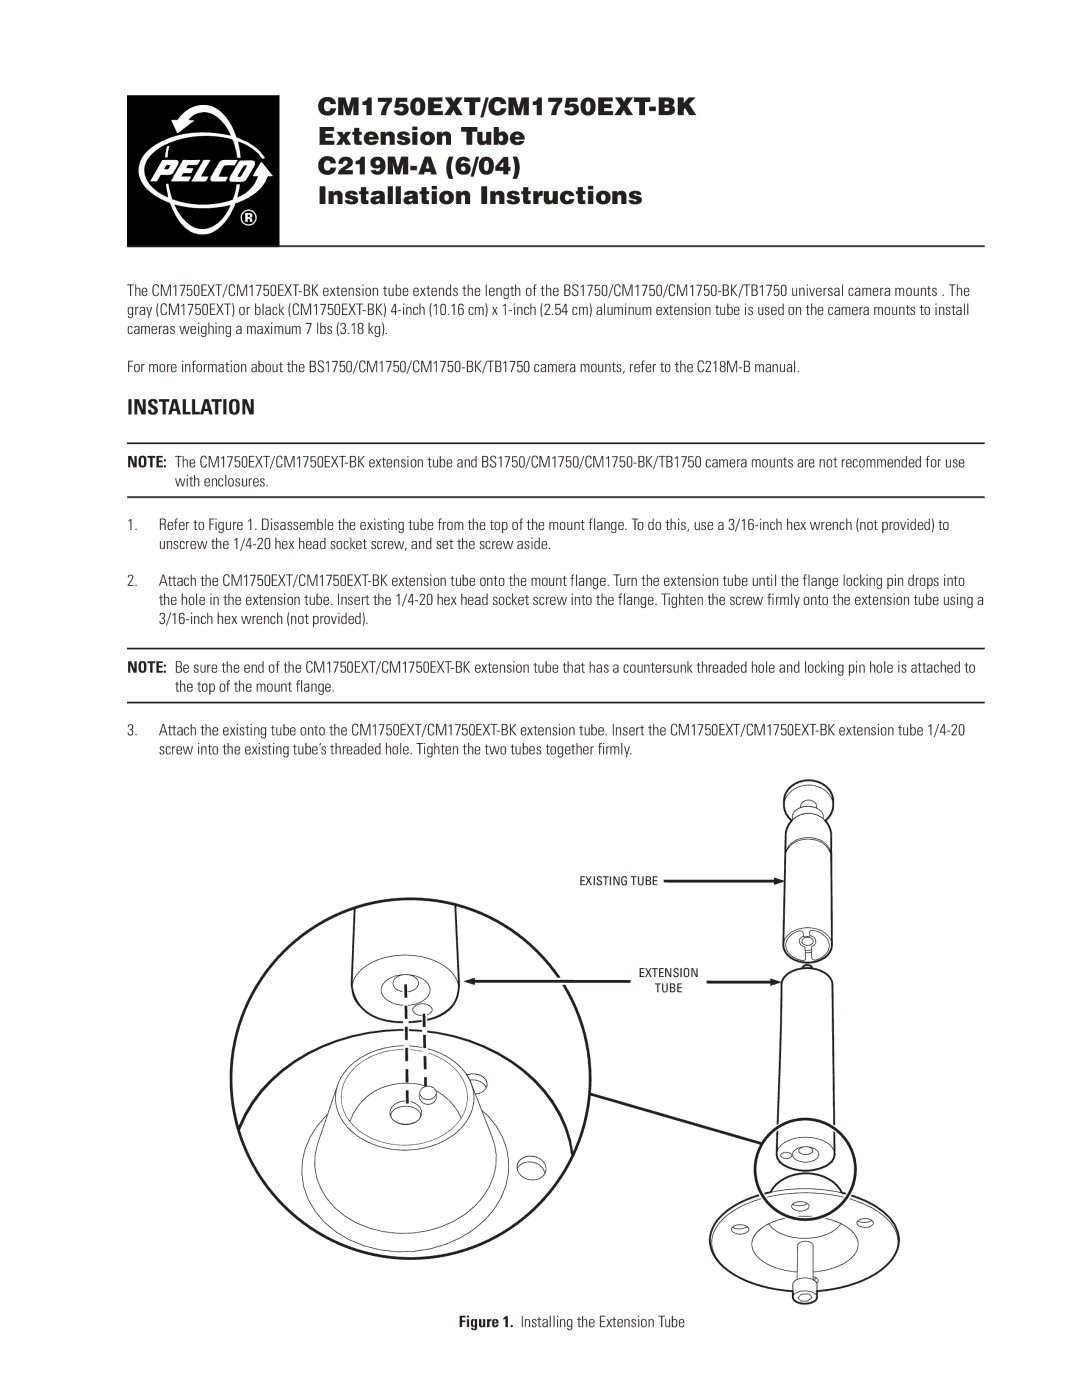
1.Refer to Figure 1. Disassemble the existing tube from the top of the mount flange. To do this, use a 3/16-inch hex wrench (not provided) to unscrew the 1/4-20 hex head socket screw, and set the screw aside.
2.Attach the CM1750EXT/CM1750EXT-BK extension tube onto the mount flange. Turn the extension tube until the flange locking pin drops into the hole in the extension tube. Insert the 1/4-20 hex head socket screw into the flange. Tighten the screw firmly onto the extension tube using a 3/16-inch hex wrench (not provided).
NOTE: Be sure the end of the CM1750EXT/CM1750EXT-BK extension tube that has a countersunk threaded hole and locking pin hole is attached to the top of the mount flange.
3.Attach the existing tube onto the CM1750EXT/CM1750EXT-BK extension tube. Insert the CM1750EXT/CM1750EXT-BK extension tube 1/4-20 screw into the existing tube’s threaded hole. Tighten the two tubes together firmly.
EXISTING TUBE 
EXTENSION
TUBE
Figure 1. Installing the Extension Tube