LENS INSTALLATION
The
LENS MOUNTING
1.Screw the lens onto the lens mount. Be careful to prevent dust from entering the space between the lens and the CCD element. If necessary, use clean, compressed air to remove any foreign matter.
2.Aim the camera and focus the lens to the object or area to be observed.
3.If a manual iris lens is used, adjust the iris for the best picture quality. The largest aperture gives the best light sensitivity, the smallest aperture the greatest depth of field.
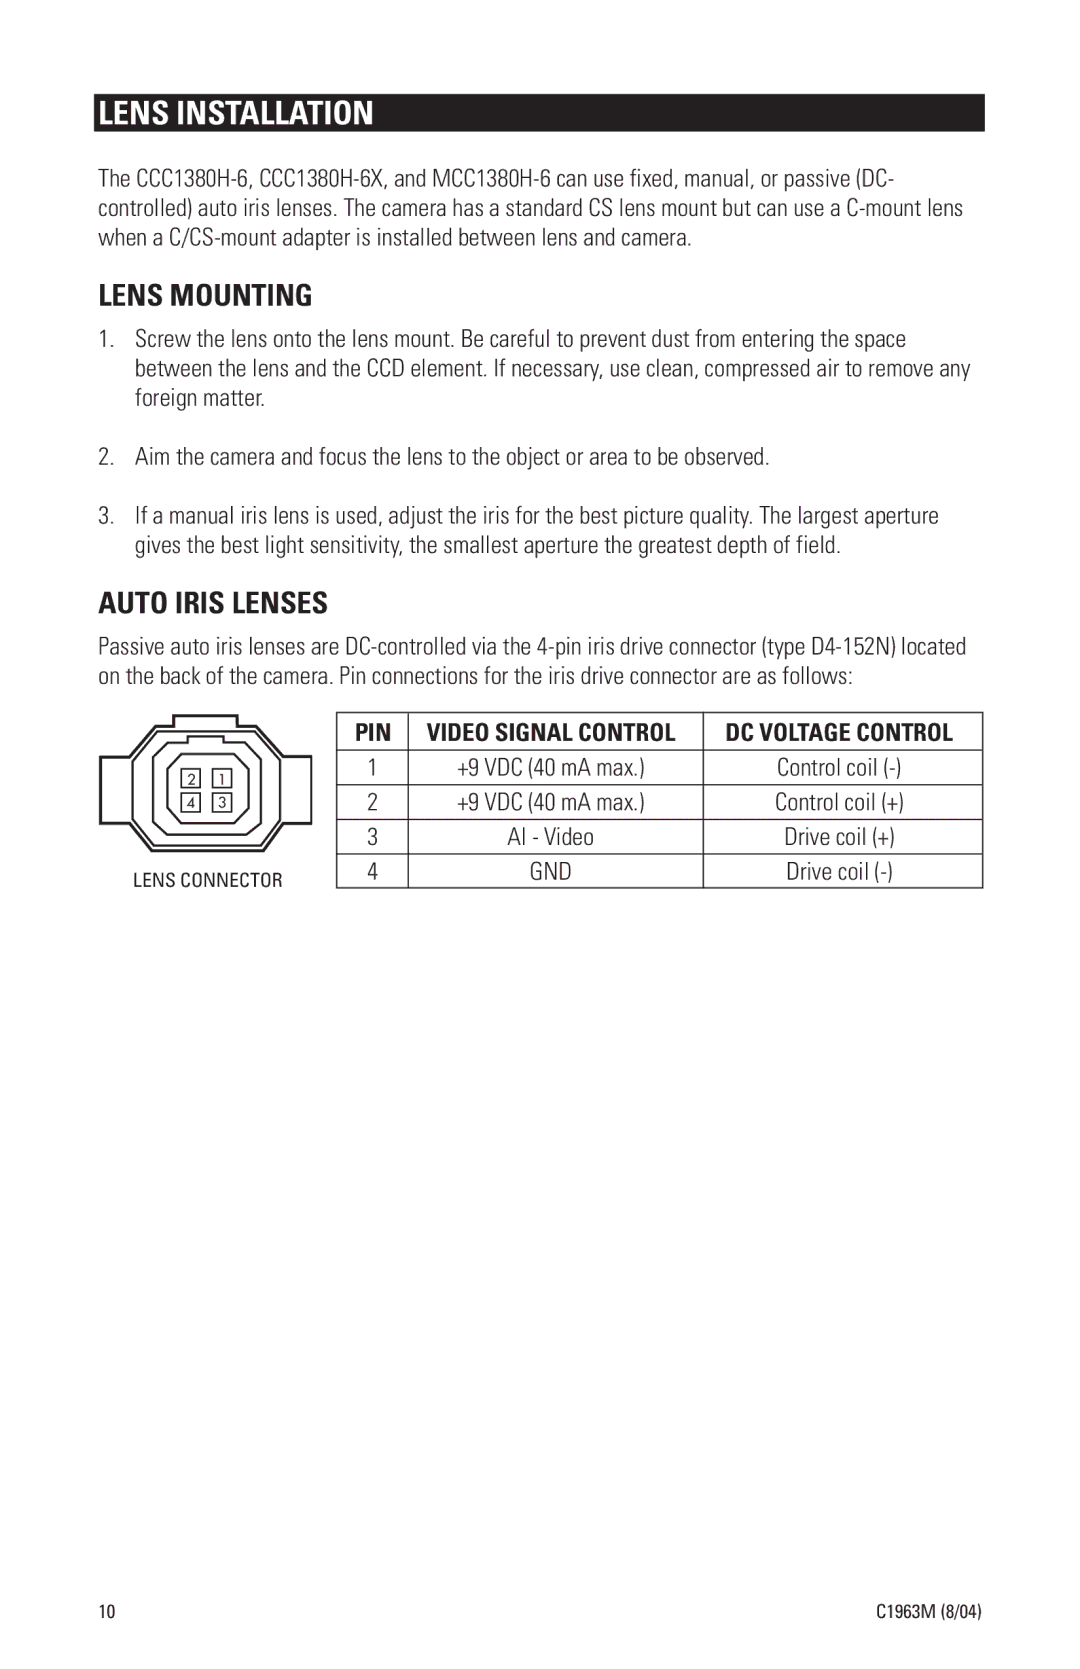
AUTO IRIS LENSES
Passive auto iris lenses are
|
|
|
|
| PIN | VIDEO SIGNAL CONTROL | DC VOLTAGE CONTROL |
|
|
|
|
| 1 | +9 VDC (40 mA max.) | Control coil |
| 2 |
| 1 |
| |||
|
|
|
|
| 2 | +9 VDC (40 mA max.) | Control coil (+) |
|
|
|
|
| |||
| 4 |
| 3 |
| |||
|
|
|
|
|
|
|
|
|
|
|
|
| 3 | AI - Video | Drive coil (+) |
LENS CONNECTOR | 4 | GND | Drive coil | ||||
10 | C1963M (8/04) |