Prepare the Receiver Collar
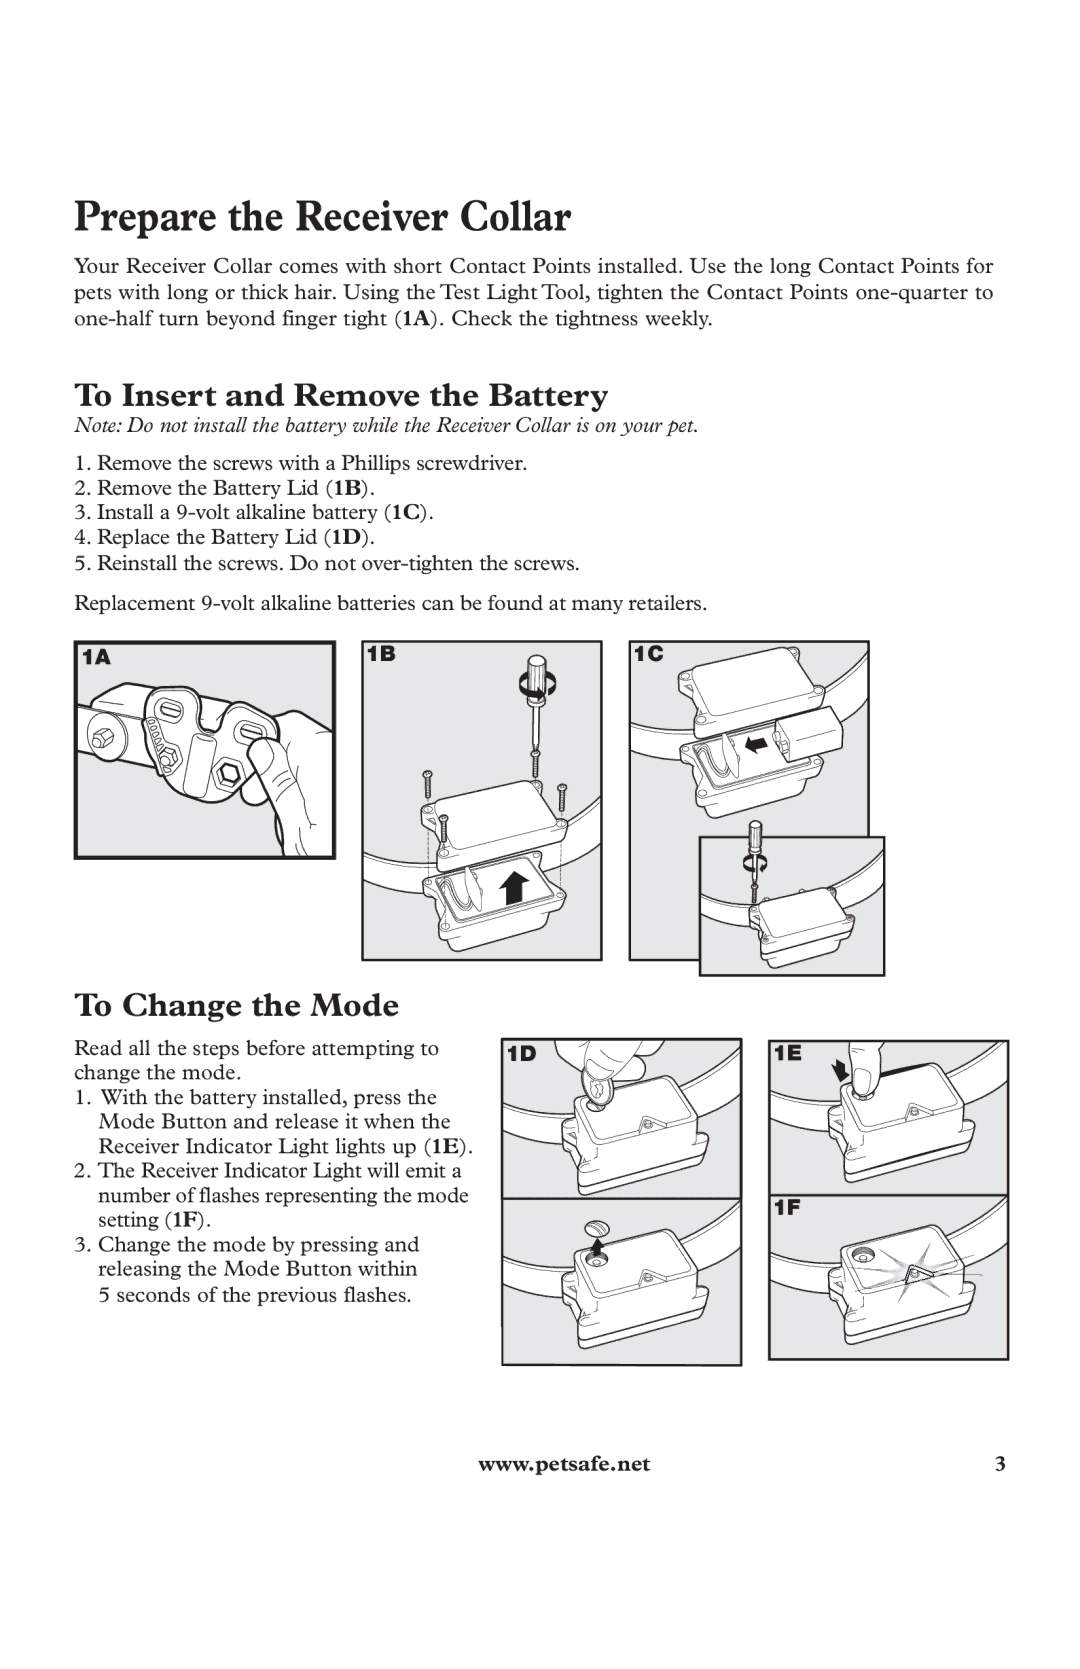
Your Receiver Collar comes with short Contact Points installed. Use the long Contact Points for pets with long or thick hair. Using the Test Light Tool, tighten the Contact Points
To Insert and Remove the Battery
Note: Do not install the battery while the Receiver Collar is on your pet.
1.Remove the screws with a Phillips screwdriver.
2.Remove the Battery Lid (1B).
3.Install a
4.Replace the Battery Lid (1D).
5.Reinstall the screws. Do not
Replacement
1A | 1B |
1C |
To Change the Mode
Read all the steps before attempting to | 1D | 1E |
change the mode.
1. With the battery installed, press the Mode Button and release it when the Receiver Indicator Light lights up (1E).
2. The Receiver Indicator Light will emit a number of flashes representing the mode
setting (1F).
1F
3. Change the mode by pressing and releasing the Mode Button within 5 seconds of the previous flashes.
www.petsafe.net | 3 |