CONNECTING THE AUDIO/VIDEO SOCKETS (PLAYBACK)
VIDEO |
|
|
| Y |
|
L | Pb | |
AUDIO |
| |
|
| |
R |
|
|
| Pr |
|
COMPONENT VIDEO INPUT | AV2 | |
Monitor | AV1 | |
out | in | in |
AV sockets on the rear of TV
OUT | OUT |
ANTENNAVIDEO
IN | IN |
OUT
R AUDIO L
IN
Back of VCR
VCR (equipped with Video and
Audio output sockets)
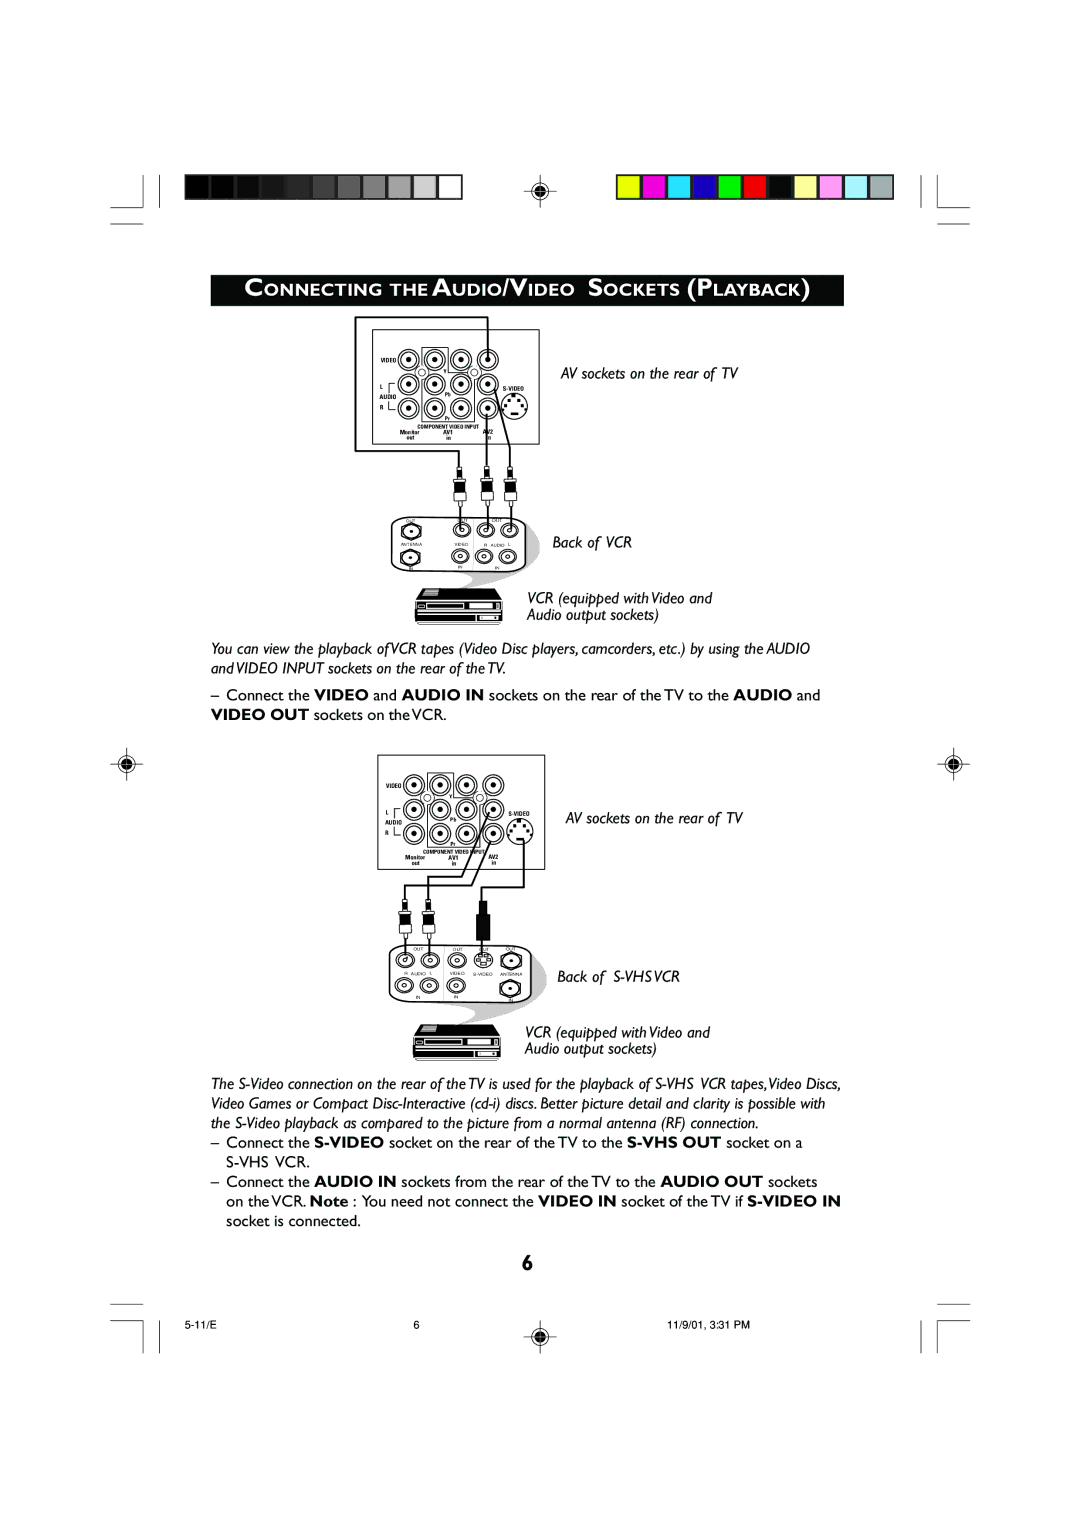
You can view the playback of VCR tapes (Video Disc players, camcorders, etc.) by using the AUDIO and VIDEO INPUT sockets on the rear of the TV.
–Connect the VIDEO and AUDIO IN sockets on the rear of the TV to the AUDIO and VIDEO OUT sockets on the VCR.
VIDEO |
|
|
| Y |
|
L | Pb | |
AUDIO |
| |
|
| |
R |
|
|
| Pr |
|
COMPONENT VIDEO INPUT | AV2 | |
Monitor | AV1 | |
out | in | in |
AV sockets on the rear of TV
OUT
R AUDIO L
OUT | OUT | OUT |
VIDEO
Back of
IN
IN
IN
VCR (equipped with Video and
Audio output sockets)
The
–Connect the
–Connect the AUDIO IN sockets from the rear of the TV to the AUDIO OUT sockets on the VCR. Note : You need not connect the VIDEO IN socket of the TV if
6
6 | 11/9/01, 3:31 PM |
