2. Setting up the monitor
2. Setting up the monitor
2.1 Installation
 Package contents
Register your product and get support at | 227E3 |
www.philips.com/welcome
Quick
Start
201 |
|
|
|
| A |
1 |
|
|
|
| 4 |
Ko |
|
|
|
| 31 |
nni |
|
|
|
| 81 |
klij |
|
|
|
| C1 |
ke |
|
|
|
| 22 |
Ph |
|
|
|
| G |
ilpi |
|
|
|
| 70 |
sE |
|
|
| 1T | Q |
elc |
|
|
|
| |
tro |
| 7 | E | Q |
|
nic |
|
|
|
| |
s,N |
|
|
|
|
|
.V. |
|
|
|
|
|
All |
|
|
|
|
|
righ |
|
|
|
|
|
tsr |
|
|
|
|
|
eser |
|
|
|
|
|
ved. |
|
|
|
|
|
Unaut |
| s.Mad |
|
|
|
horized | duplication is a vi |
|
|
| |
| olation of applicablelaw |
|
|
|
DVI (optional) | VGA (optional) |
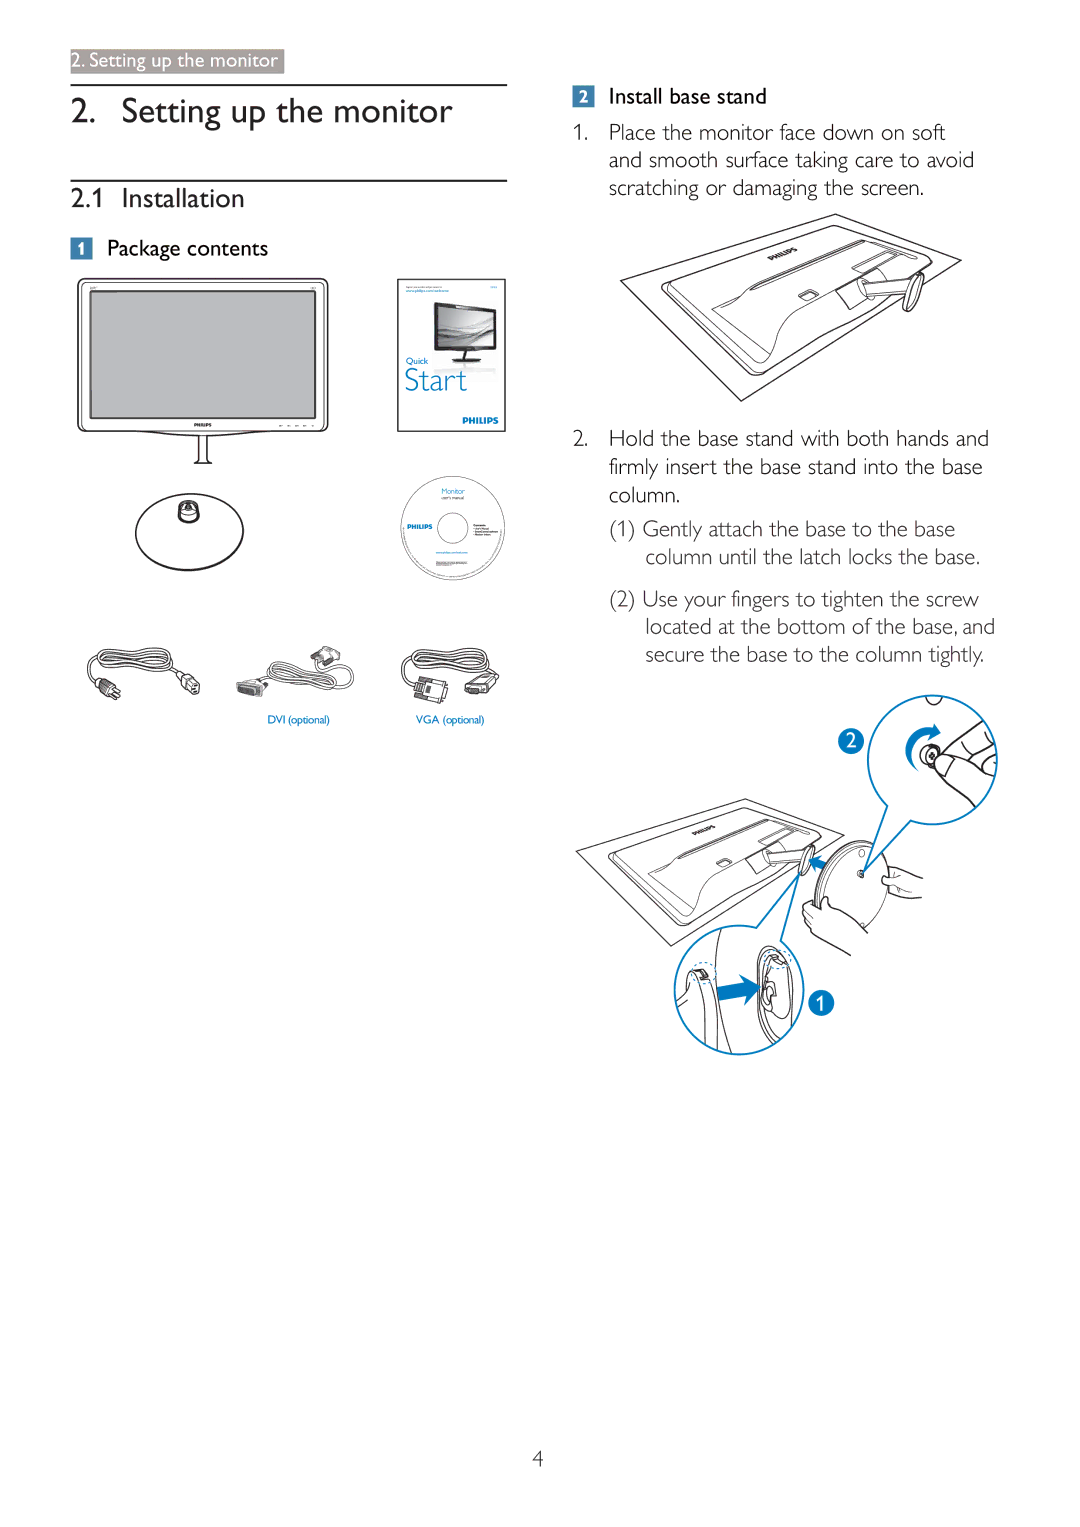
 Install base stand
1.Place the monitor face down on soft and smooth surface taking care to avoid scratching or damaging the screen.
2.Hold the base stand with both hands and firmly insert the base stand into the base column.
(1)Gently attach the base to the base column until the latch locks the base.
(2)Use your fingers to tighten the screw located at the bottom of the base, and secure the base to the column tightly.
2
1
4
