1. VOLTAGE
In North America, Central America, and South America, the most common voltage is between 110V and 130V AC. When traveling to other coun- tries, common voltage may range to 240V AC. Your new razor will automatically convert internally to work on 100V to 240V AC systems.
An adaptor plug may be neces- sary for cord usage in foreign countries. It is suggested that you take all adaptor plugs with you when traveling overseas to ensure compatibility with most foreign outlet configurations.
Norelco Travel Adaptor Plug Kit, model TP5, may be pur- chased at a store near you or at a Norelco Service Store.
2A. TO CHARGE
1.Be certain your razor is OFF.
■First time charging re- quires a full 8 hours. For first time or initial charge, Green Charge Indicator Light will light to indicate razor is (re)charging. For proper use, charge razor for the full 8 hours as directed. A fully charged razor will give approxi- mately 2 weeks of 3 minute shaves per day.
2.Use only the cord provided.
3.Connect cord to razor and plug into outlet.
■(Re)charge at tempera- tures between 40°F and 95°F. Charging at lower or higher temperatures ad- versely affects lifetime of batteries.
■(Re)charging longer than required period of time will not harm razor. However, continuously charging razor will reduce life of batteries.
2B. TO RECHARGE
■After initial 8 hour charge, recharging will take only 1 hour to (re)charge batter- ies to full capacity.
2C. FAST 5-MINUTE QUICK CHARGE
■When battery is totally depleted, recharging for 5 minutes gives enough energy for one
■If razor has not been used for at least a month, razor must be recharged for a full 8 hours (see Section 2A. TO CHARGE).
3.CORD/CORDLESS SHAVING
Start with a clean, dry face. You may choose to use a pre- shave lotion to set your beard up for a close, smooth, com- fortable shave, especially if you are using an electric razor for the first time.
CAUTION: It is recommended that you wash and dry your hands to remove any remain- ing lotion before handling your razor. Some lotions may cause damage to the exterior finish of your razor housing. In addition, clean razor heads more frequently to prevent
A. CORD
1.Be certain razor is in OFF position.
2.Connect cord provided to razor.
3.Remove Protective Razor Head Assembly Guard.
4.Plug into 100V to 240V AC outlet.
5.Slide ON/OFF switch ON. Begin shaving.
■Even when cord shaving, if battery is low, wait a few seconds for razor to go ON.
6.Shave against direction of beard growth using a quick, small, circular motion.
7.Keep skin taut using your fingers to stretch skin so blades can cut whiskers off.
8.Easy does it. Gently press razor to your skin so floating heads can follow the contours of your face.
9.Turn razor OFF and un- plug.
■It is not recommended that this razor be used exclusively as a corded razor. Continual use as a corded razor as well as continuously recharging razor will reduce life of batteries.
NOTE: Razor does not re- charge during shaving.
B. CORDLESS
1.Charge according to directions.
2.Slide ON/OFF switch ON. Begin shaving.
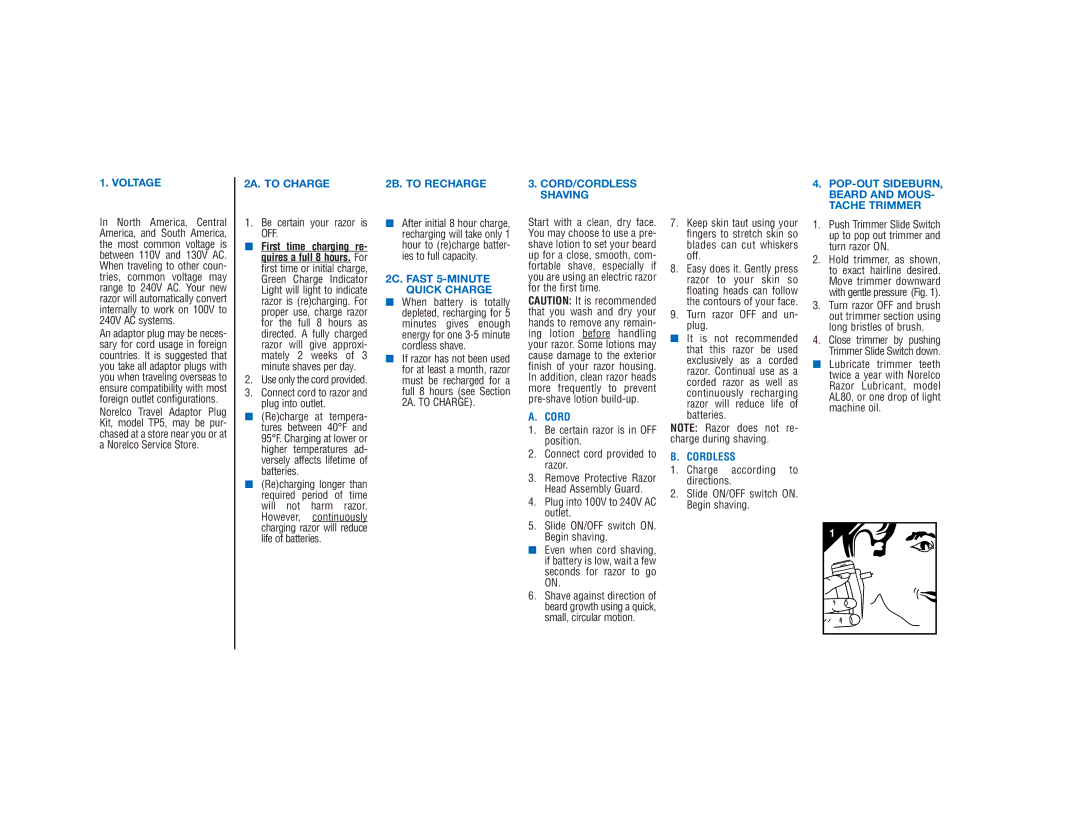
4.POP-OUT SIDEBURN, BEARD AND MOUS- TACHE TRIMMER
1.Push Trimmer Slide Switch up to pop out trimmer and turn razor ON.
2.Hold trimmer, as shown, to exact hairline desired. Move trimmer downward with gentle pressure (Fig. 1).
3.Turn razor OFF and brush out trimmer section using long bristles of brush.
4.Close trimmer by pushing Trimmer Slide Switch down.
■Lubricate trimmer teeth twice a year with Norelco Razor Lubricant, model AL80, or one drop of light machine oil.
1