1. CHARGE METER
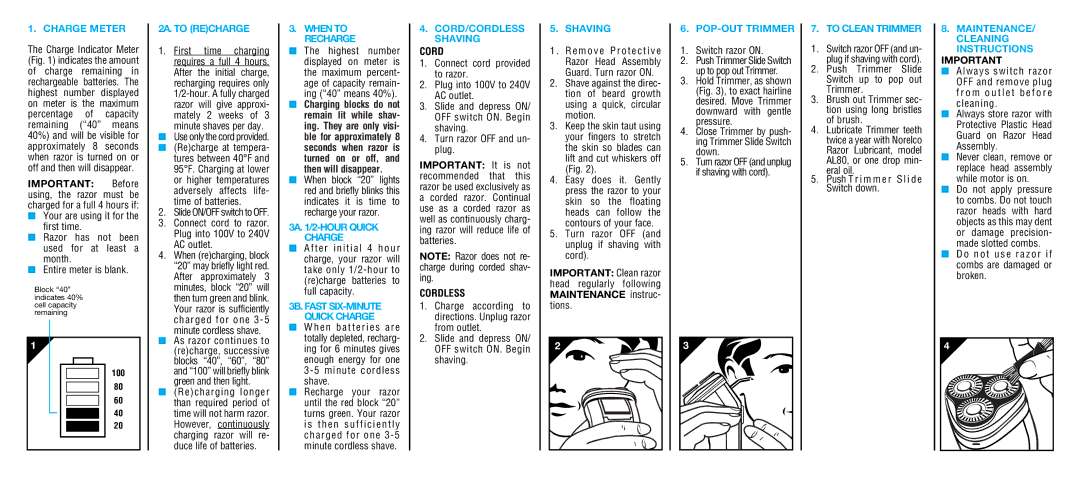
The Charge Indicator Meter (Fig. 1) indicates the amount of charge remaining in rechargeable batteries. The highest number displayed on meter is the maximum percentage of capacity remaining (“40” means 40%) and will be visible for approximately 8 seconds when razor is turned on or off and then will disappear.
IMPORTANT: Before using, the razor must be charged for a full 4 hours if:
■Your are using it for the first time.
■Razor has not been used for at least a month.
■Entire meter is blank.
Block “40” indicates 40% cell capacity remaining
1
100
80
60
40
20
2A. TO (RE)CHARGE
1.First time charging requires a full 4 hours. After the initial charge, recharging requires only
minute shaves per day.
■Use only the cord provided.
■(Re)charge at tempera-
tures between 40°F and 95°F. Charging at lower or higher temperatures adversely affects life- time of batteries.
2.Slide ON/OFF switch to OFF.
3.Connect cord to razor. Plug into 100V to 240V AC outlet.
4.When (re)charging, block “20” may briefly light red. After approximately 3 minutes, block “20” will then turn green and blink. Your razor is sufficiently charged for one 3 - 5
minute cordless shave.
■As razor continues to (re)charge, successive blocks “40”, “60”, “80” and “100” will briefly blink green and then light.
■(Re)charging longer than required period of time will not harm razor. However, continuously charging razor will re- duce life of batteries.
3.WHEN TO RECHARGE
■The highest number displayed on meter is the maximum percent- age of capacity remain- ing (“40” means 40%).
■Charging blocks do not remain lit while shav- ing. They are only visi- ble for approximately 8 seconds when razor is turned on or off, and then will disappear.
■When block “20” lights red and briefly blinks this indicates it is time to recharge your razor.
3A. 1/2-HOUR QUICK CHARGE
■After initial 4 hour charge, your razor will take only
3B. FAST SIX-MINUTE QUICK CHARGE
■When batteries are totally depleted, recharg- ing for 6 minutes gives enough energy for one
■Recharge your razor until the red block “20” turns green. Your razor is then sufficiently charged for one 3 - 5 minute cordless shave.
4.CORD/CORDLESS SHAVING
CORD
1.Connect cord provided to razor.
2.Plug into 100V to 240V AC outlet.
3.Slide and depress ON/ OFF switch ON. Begin shaving.
4.Turn razor OFF and un- plug.
IMPORTANT: It is not recommended that this razor be used exclusively as a corded razor. Continual use as a corded razor as well as continuously charg- ing razor will reduce life of batteries.
NOTE: Razor does not re- charge during corded shav- ing.
CORDLESS
1.Charge according to directions. Unplug razor from outlet.
2.Slide and depress ON/ OFF switch ON. Begin shaving.
5. SHAVING
1 . R e m o v e P r o t e c t i v e Razor Head Assembly Guard. Turn razor ON.
2.Shave against the direc- tion of beard growth using a quick, circular motion.
3.Keep the skin taut using your fingers to stretch the skin so blades can lift and cut whiskers off (Fig. 2).
4.Easy does it. Gently press the razor to your skin so the floating heads can follow the contours of your face.
5.Turn razor OFF (and unplug if shaving with cord).
IMPORTANT: Clean razor head regularly following MAINTENANCE instruc- tions.
2 |
6. POP-OUT TRIMMER
1.Switch razor ON.
2.Push Trimmer Slide Switch up to pop out Trimmer.
3.Hold Trimmer, as shown (Fig. 3), to exact hairline desired. Move Trimmer downward with gentle pressure.
4.Close Trimmer by push- ing Trimmer Slide Switch down.
5.Turn razor OFF (and unplug if shaving with cord).
3 |
7. TO CLEAN TRIMMER
1.Switch razor OFF (and un- plug if shaving with cord).
2.Push Trimmer Slide Switch up to pop out Trimmer.
3.Brush out Trimmer sec- tion using long bristles of brush.
4.Lubricate Trimmer teeth twice a year with Norelco Razor Lubricant, model AL80, or one drop min- eral oil.
5.Push T r i m m e r S l i d e Switch down.
8.MAINTENANCE/ CLEANING INSTRUCTIONS
IMPORTANT
■Always switch razor OFF and remove plug f r o m o u t l e t b e f o r e cleaning.
■Always store razor with Protective Plastic Head Guard on Razor Head Assembly.
■Never clean, remove or replace head assembly while motor is on.
■Do not apply pressure to combs. Do not touch razor heads with hard objects as this may dent or damage precision- made slotted combs.
■D o n o t u s e r a z o r i f combs are damaged or broken.
4 |