Connections
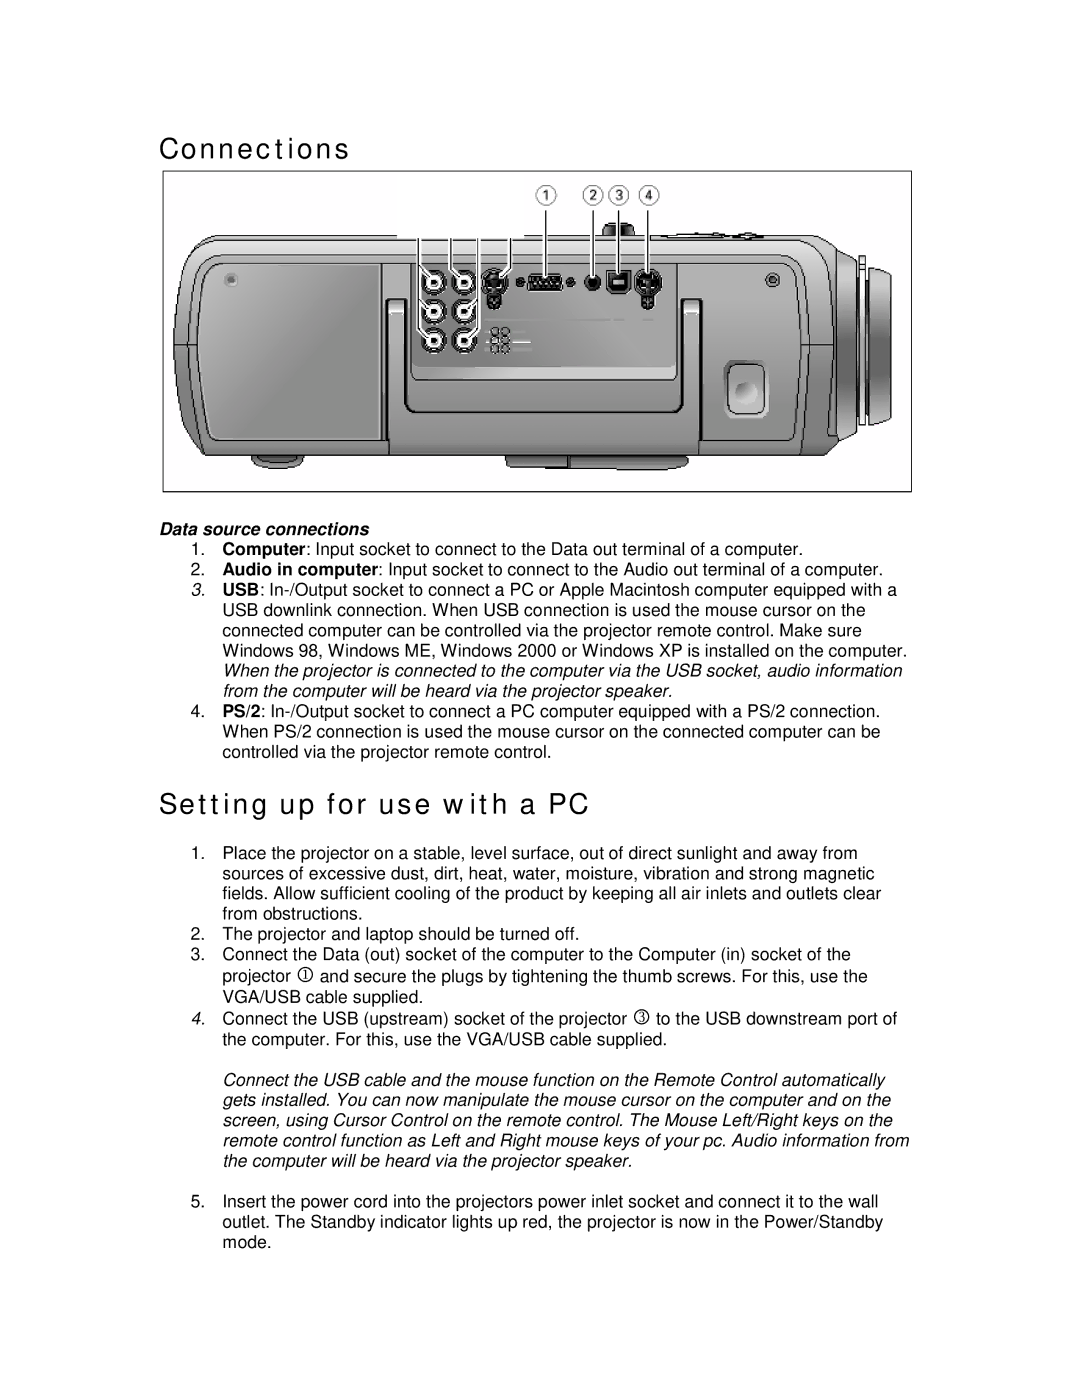
Data source connections
1.Computer: Input socket to connect to the Data out terminal of a computer.
2.Audio in computer: Input socket to connect to the Audio out terminal of a computer.
3.USB:
4.PS/2:
Setting up for use with a PC
1.Place the projector on a stable, level surface, out of direct sunlight and away from sources of excessive dust, dirt, heat, water, moisture, vibration and strong magnetic fields. Allow sufficient cooling of the product by keeping all air inlets and outlets clear from obstructions.
2.The projector and laptop should be turned off.
3.Connect the Data (out) socket of the computer to the Computer (in) socket of the projector 1 and secure the plugs by tightening the thumb screws. For this, use the VGA/USB cable supplied.
4.Connect the USB (upstream) socket of the projector 3 to the USB downstream port of the computer. For this, use the VGA/USB cable supplied.
Connect the USB cable and the mouse function on the Remote Control automatically gets installed. You can now manipulate the mouse cursor on the computer and on the screen, using Cursor Control on the remote control. The Mouse Left/Right keys on the remote control function as Left and Right mouse keys of your pc. Audio information from the computer will be heard via the projector speaker.
5.Insert the power cord into the projectors power inlet socket and connect it to the wall outlet. The Standby indicator lights up red, the projector is now in the Power/Standby mode.