4 start manual recording
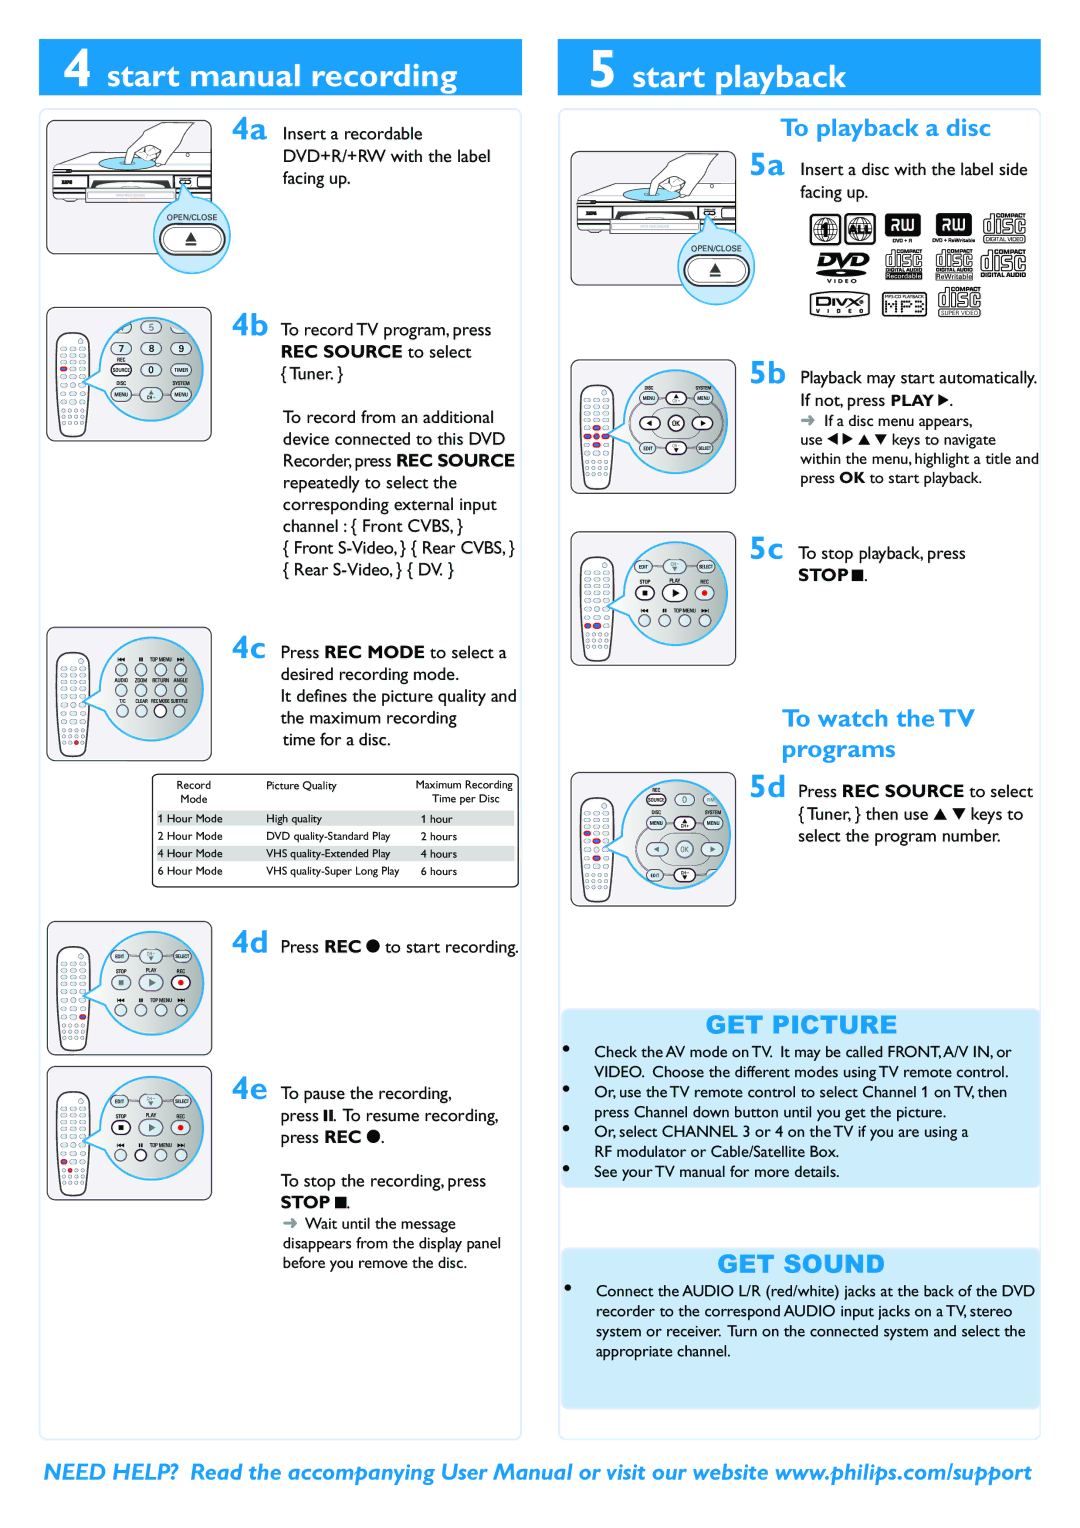
4a Insert a recordable DVD+R/+RW with the label facing up.
4b To record TV program, press REC SOURCE to select
{ Tuner. }
To record from an additional device connected to this DVD Recorder, press REC SOURCE repeatedly to select the corresponding external input channel : { Front CVBS, }
{ Front
4c Press REC MODE to select a
desired recording mode.
It defines the picture quality and the maximum recording
time for a disc.
Record | Picture Quality | Maximum Recording |
Mode |
| Time per Disc |
|
|
|
1 Hour Mode | High quality | 1 hour |
2 Hour Mode | DVD | 2 hours |
|
|
|
4 Hour Mode | VHS | 4 hours |
6 Hour Mode | VHS | 6 hours |
4d Press REC 0 to start recording.
4e To pause the recording, press ;. To resume recording, press REC 0.
To stop the recording, press
STOP 9.
➜ Wait until the message disappears from the display panel before you remove the disc.
5 start playback
To playback a disc
5a Insert a disc with the label side facing up.
1 ALL
SUPER VIDEO
5b Playback may start automatically.
If not, press PLAY 2. ➜ If a disc menu appears, use 1 2 3 4 keys to navigate
within the menu, highlight a title and press OK to start playback.
5c To stop playback, press
STOP 9.
To watch the TV programs
5d Press REC SOURCE to select { Tuner, } then use 3 4 keys to select the program number.
GET PICTURE
•Check the AV mode on TV. It may be called FRONT,A/V IN, or VIDEO. Choose the different modes using TV remote control.
•Or, use the TV remote control to select Channel 1 on TV, then press Channel down button until you get the picture.
•Or, select CHANNEL 3 or 4 on the TV if you are using a RF modulator or Cable/Satellite Box.
•See your TV manual for more details.
GET SOUND
•Connect the AUDIO L/R (red/white) jacks at the back of the DVD recorder to the correspond AUDIO input jacks on a TV, stereo system or receiver. Turn on the connected system and select the appropriate channel.
NEED HELP? Read the accompanying User Manual or visit our website www.philips.com/support
