
DVDR990 specifications
The Philips DVDR990 is a versatile and innovative DVD recorder that has garnered attention for its impressive set of features and user-friendly design. Launched as part of Philips' extensive lineup of home entertainment systems, the DVDR990 stands out with its ability to record, play, and manage audio and video content with remarkable ease and quality.One of the main features of the Philips DVDR990 is its dual recording capability, allowing users to record from various sources, including TV broadcasts, VHS tapes, and even camcorders. This flexibility enables users to capture their favorite shows or home videos effortlessly on DVD media, providing a convenient method to preserve cherished memories or must-see content.
The DVDR990 supports multiple recording formats, including DVD-R, DVD-RW, DVD+R, and DVD+RW. This wide range of media compatibility ensures that users can choose the format that best fits their needs. The ability to rewrite on DVD-RW and DVD+RW discs allows for easy editing and re-recording, catering to those who frequently capture content.
Additionally, the DVDR990 is equipped with a built-in digital tuner, allowing users to receive digital television signals without the need for an external tuner box. This feature simplifies the recording process and enhances overall convenience, especially as the transition to digital broadcasting has become more prevalent.
Picture and sound quality are significantly enhanced thanks to technologies such as Progressive Scan. This feature provides smoother video playback and improved picture clarity, particularly noticeable when playing back high-definition content. Built-in Dolby Digital support ensures a rich audio experience, making movie nights or home entertainment a pleasurable experience.
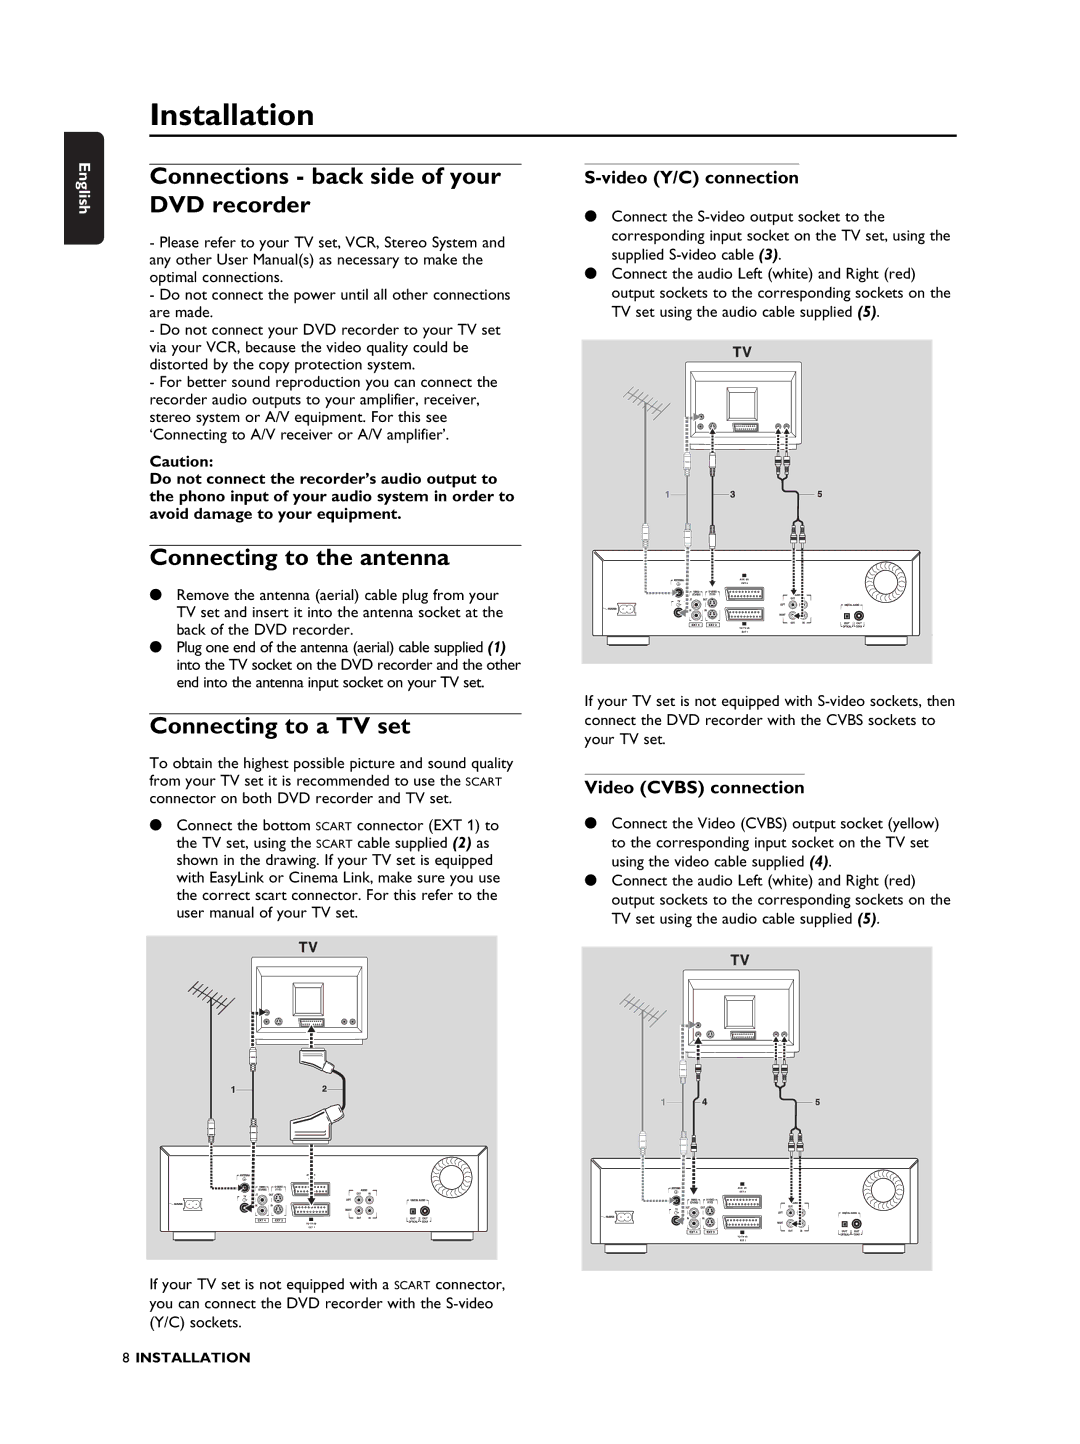
Moreover, the Philips DVDR990 includes a variety of connectivity options, such as composite, S-Video, and digital audio outputs. These connections enable users to easily hook up the device to different TVs or audio systems, maximizing the performance and compatibility of their home entertainment setup.
To further enhance user experience, the device incorporates an intuitive on-screen menu system. This user-friendly interface allows for straightforward navigation through various functions, including programmed recordings and playback options. The included remote control adds to the convenience, making it simple to operate from anywhere in the room.
In summary, the Philips DVDR990 is a robust DVD recorder that combines functionality, quality, and ease of use. Whether one is looking to archive home videos or record television programs, this device provides the tools necessary for a satisfying home entertainment experience, making it a noteworthy addition to any multimedia environment.