1Connect the component video cables (not supplied) to:
•the Y Pb Pr jacks on this product.
•the COMPONENT VIDEO input jacks on the TV.
![]() Tip
Tip
•The component video input jacks on the TV may be labeled as Y Pb/Cb Pr/Cr or YUV.
•This type of connection provides good picture quality.
Option 2: Connect to video (CVBS) jack
VIDEO IN
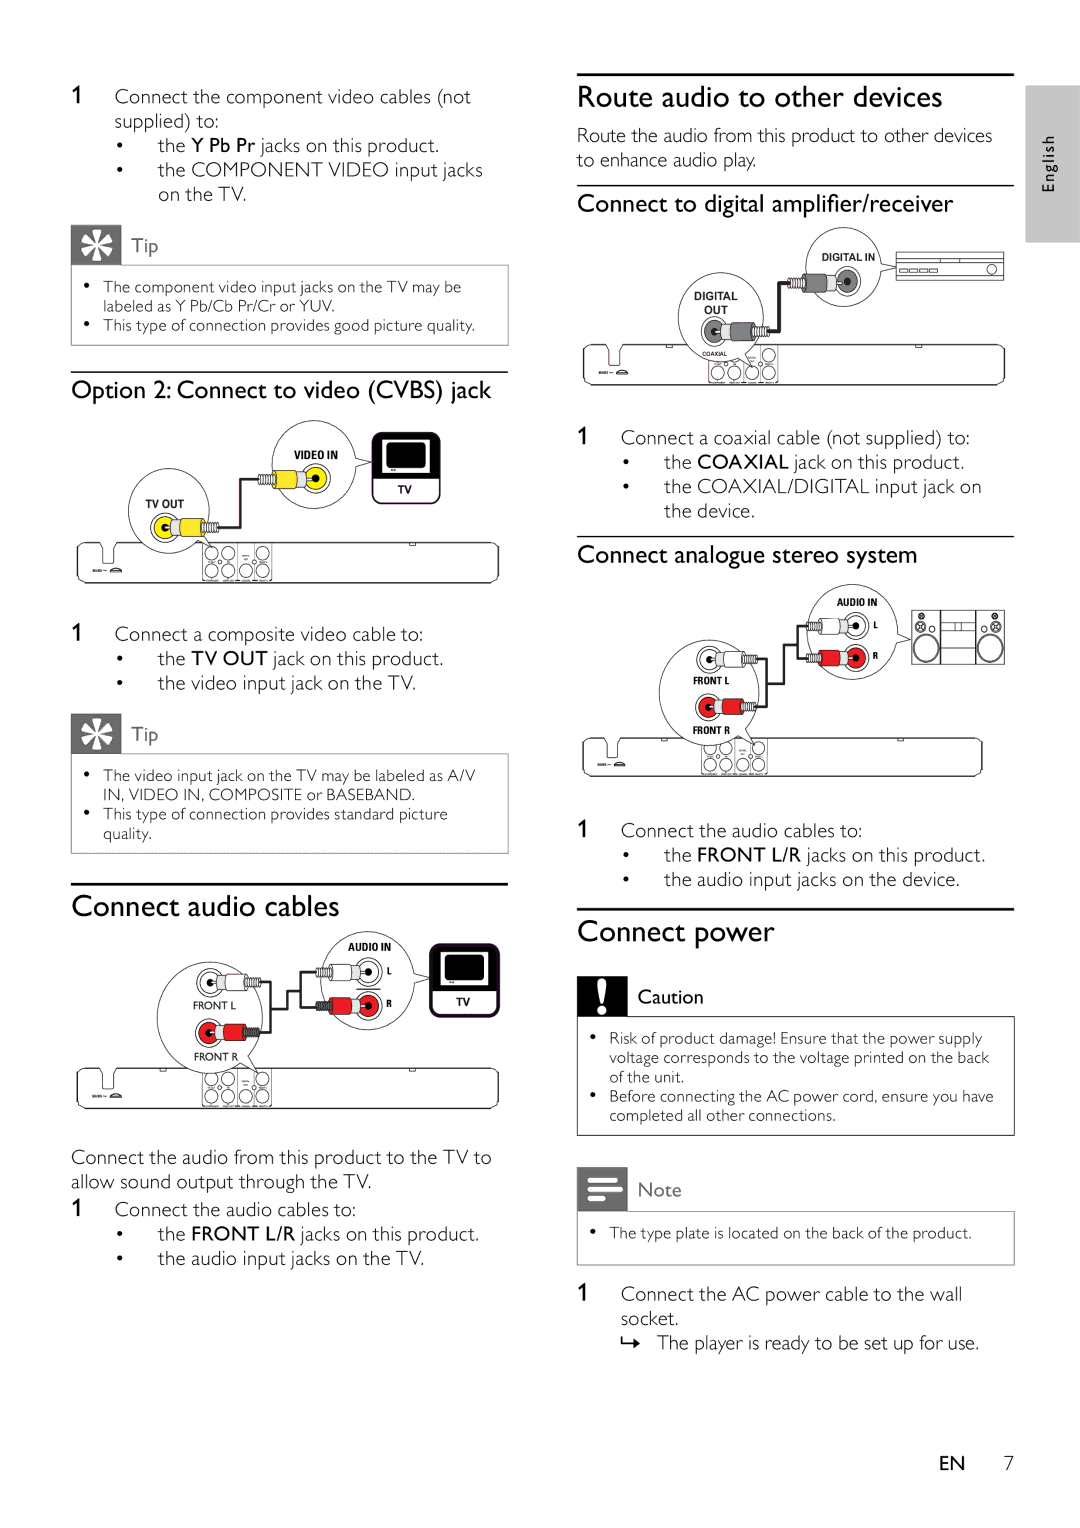
1Connect a composite video cable to:
•the TV OUT jack on this product.
•the video input jack on the TV.
![]() Tip
Tip
•The video input jack on the TV may be labeled as A/V IN, VIDEO IN, COMPOSITE or BASEBAND.
•This type of connection provides standard picture quality.
Connect audio cables
AUDIO IN
Connect the audio from this product to the TV to allow sound output through the TV.
1Connect the audio cables to:
•the FRONT L/R jacks on this product.
•the audio input jacks on the TV.
Route audio to other devices
Route the audio from this product to other devices to enhance audio play.
Connect to digital amplifi er/receiver
DIGITAL IN
DIGITAL
OUT
COAXIAL
1Connect a coaxial cable (not supplied) to:
•the COAXIAL jack on this product.
•the COAXIAL/DIGITAL input jack on the device.
Connect analogue stereo system
AUDIO IN
FRONT L
FRONT R
1Connect the audio cables to:
•the FRONT L/R jacks on this product.
•the audio input jacks on the device.
Connect power
![]() Caution
Caution
•Risk of product damage! Ensure that the power supply voltage corresponds to the voltage printed on the back of the unit.
•Before connecting the AC power cord, ensure you have completed all other connections.
![]() Note
Note
•The type plate is located on the back of the product.
1 Connect the AC power cable to the wall
socket.
» The player is ready to be set up for use.
English
EN 7
