20ENGLISH
Do not clean more than one cutter and comb at a time, since they are all matching sets. If you accidentally interchange the cutters and combs, it could take several weeks before optimal shaving performance is restored.
5Separate the cutter from the comb and clean with a small brush or rinse clean under hot water.
6Replace the cutter back onto the Shaving Unit making sure the blades are pointing upwards.
C 7 Place the razor head comb back onto the Shaving Unit.
Be sure to replace the comb back into the original razor head before cleaning the next set.
C8 Turn the razor head counterclockwise
until it locks into place.
9 Repeat the process for the other two sets
of cutters and combs.
C 10 Replace Shaving Unit back on razor and ![]() push down (you will hear a click).
push down (you will hear a click).
The Shaving Unit will only fit correctly in one position on razor. Make sure to align the 2 shaving lotion dispensing holes on the Shaving Unit with the 2 shaving lotion tubes on the razor.
ENGLISH 21
Replacing Cartridges
◗For optimal shaving results, it is recommended to replace the upgraded shaving conditioner cartridge once a year.
◗A new empty cartridge is supplied with each new Replacement Shaving Unit (Model HS85).
Shaving Conditioner Cartridge
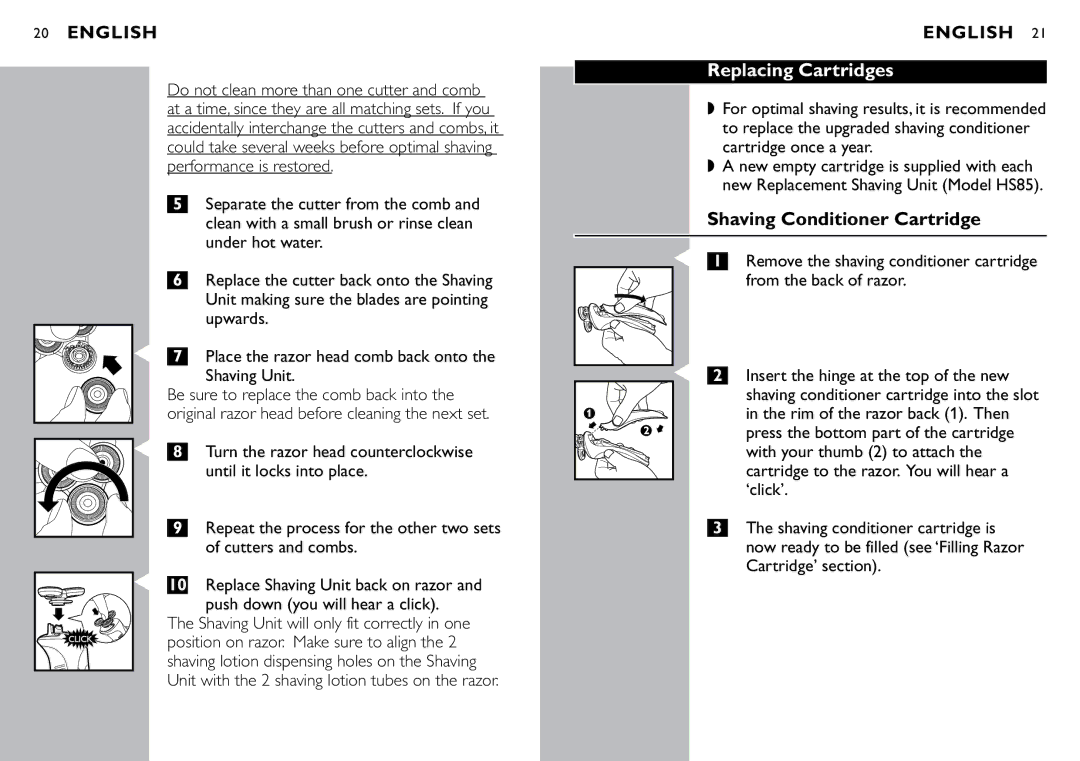
C1 Remove the shaving conditioner cartridge
| from the back of razor. |
C 2 | Insert the hinge at the top of the new |
| shaving conditioner cartridge into the slot |
| in the rim of the razor back (1). Then |
| press the bottom part of the cartridge |
| with your thumb (2) to attach the |
| cartridge to the razor. You will hear a |
| ‘click’. |
3The shaving conditioner cartridge is now ready to be filled (see ‘Filling Razor Cartridge’ section).