E n g l i s h
Basic Connections (continued)
Step 4: Connecting to a | Step 5: Connecting FM/MW |
Progressive Scan TV | antennas |
(optional)
fix the claw into the slot
➠ ![]()
FM
antenna
2
MW 1 antenna
Pr | Y |
Pb
IMPORTANT!
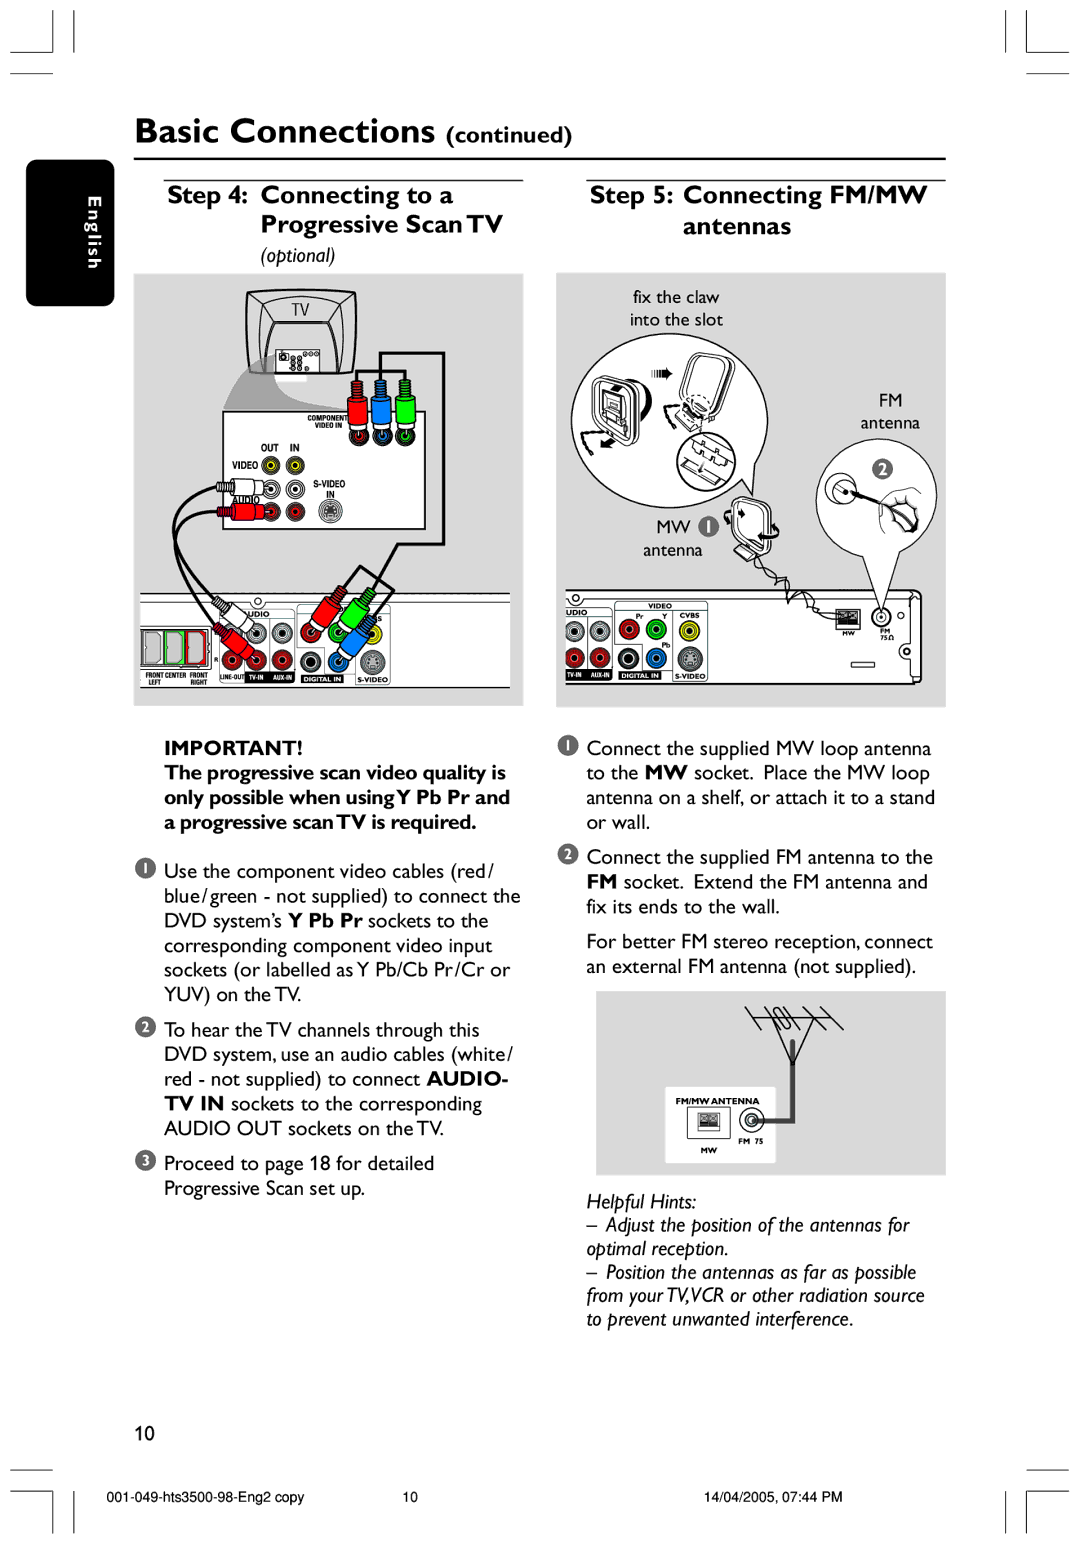
The progressive scan video quality is only possible when usingY Pb Pr and a progressive scan TV is required.
1Use the component video cables (red/ blue/green - not supplied) to connect the DVD system’s Y Pb Pr sockets to the corresponding component video input sockets (or labelled as Y Pb/Cb Pr/Cr or YUV) on the TV.
2To hear the TV channels through this DVD system, use an audio cables (white/ red - not supplied) to connect AUDIO- TV IN sockets to the corresponding AUDIO OUT sockets on the TV.
3Proceed to page 18 for detailed Progressive Scan set up.
10
1Connect the supplied MW loop antenna to the MW socket. Place the MW loop antenna on a shelf, or attach it to a stand or wall.
2Connect the supplied FM antenna to the FM socket. Extend the FM antenna and fix its ends to the wall.
For better FM stereo reception, connect an external FM antenna (not supplied).
Helpful Hints:
–Adjust the position of the antennas for optimal reception.
–Position the antennas as far as possible from your TV,VCR or other radiation source to prevent unwanted interference.
10 | 14/04/2005, 07:44 PM |
