
HTS8141 specifications
The Philips HTS8141 is a distinguished home theater system designed to amplify your audio-visual experience. This system stands out for its sleek design combined with advanced technology, making it an ideal choice for cinephiles and music lovers alike.At the core of the HTS8141 is its 5.1 channel surround sound capability, delivering immersive audio that envelops the listener. The system includes a powerful subwoofer that enhances the low-frequency sounds, providing depth to explosions in movies and richness to music playlists. Coupled with the satellite speakers, the HTS8141 creates a surround sound environment, allowing for a cinema-like experience in the comfort of your own home.
The HTS8141 features Philips’ proprietary Ambisound technology, known for its ability to create a wider sound stage. This technology strategically positions audio output, ensuring that sound expands beyond the physical speakers. This results in an expansive audio output that captures the nuances of sound, immersing viewers deeper into their favorite films or music tracks.
Another notable feature of the HTS8141 is its support for various media formats. Whether you prefer DVDs, CDs, or digital files, this system is equipped to handle it all. Supported formats include MP3 and WMA for music files, along with DivX for video playback, making it versatile and convenient for users to enjoy their media collections.
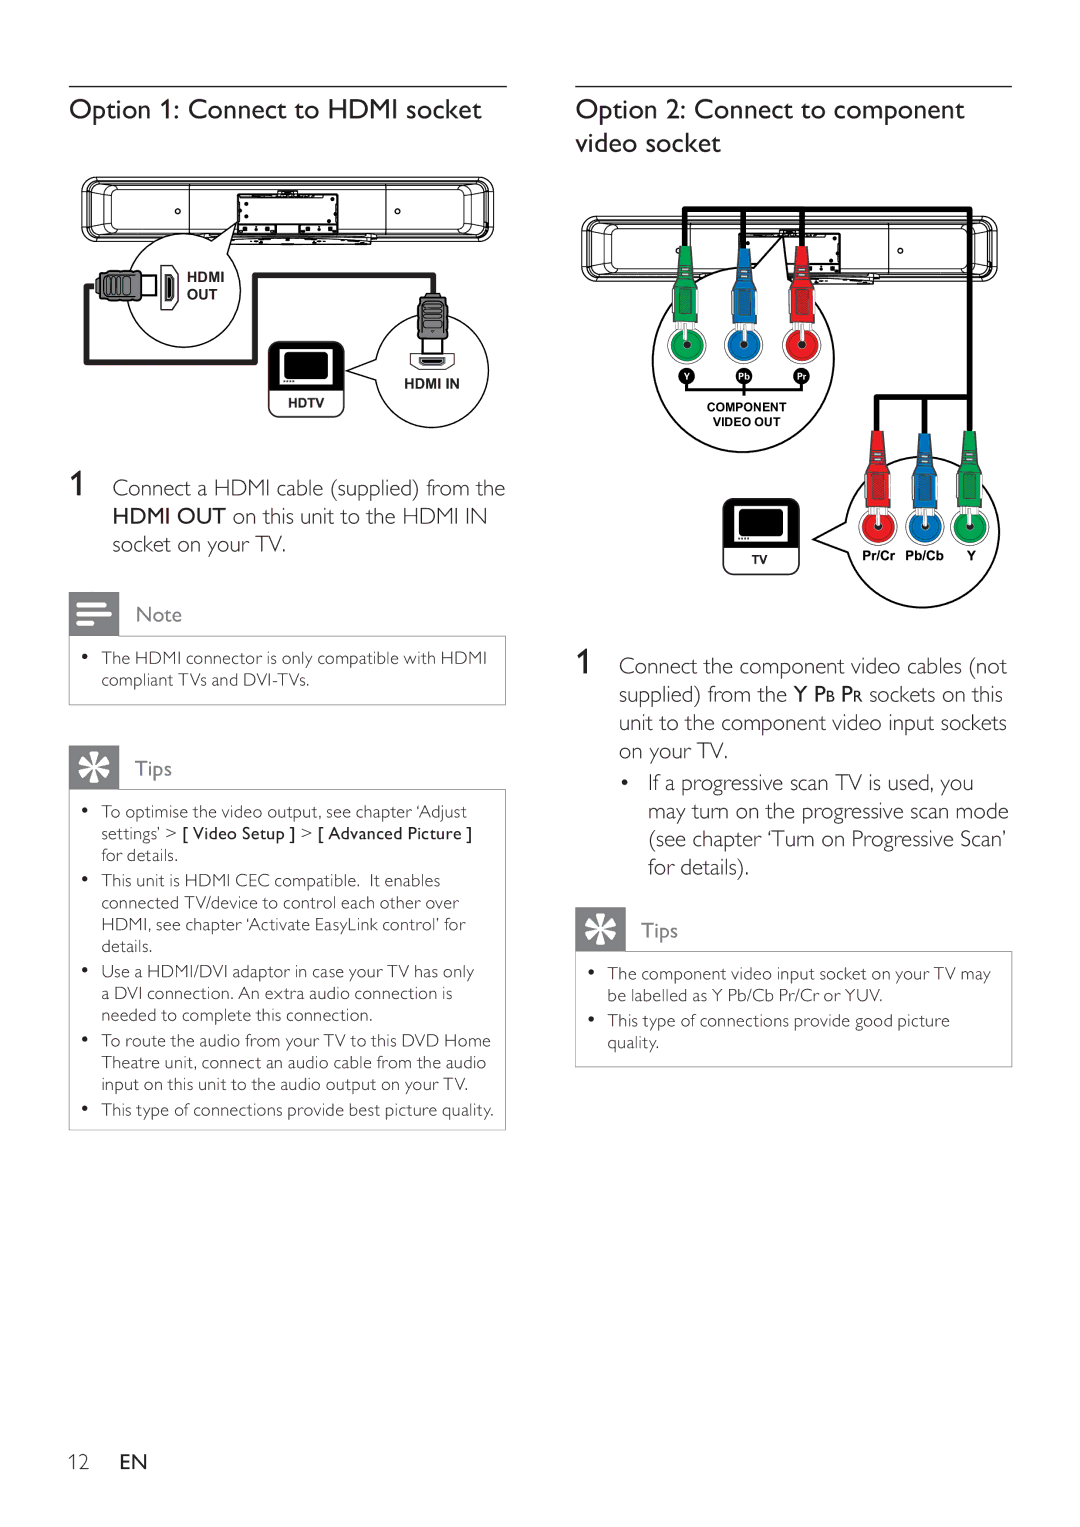
Connectivity is also a highlight of the HTS8141. The system includes multiple HDMI inputs and outputs, providing easy connections to high-definition devices such as Blu-ray players, gaming consoles, and TVs. The inclusion of USB ports allows for direct playback from USB storage devices, facilitating hassle-free access to your digital library.
Moreover, the system's user-friendly interface simplifies navigation between different input sources and settings. A remote control enhances the convenience, allowing users to adjust audio settings or switch modes from a distance.
Design-wise, the HTS8141 features an elegant finish that integrates well with modern home decor. Its minimalist approach ensures that it not only sounds good but also looks appealing within any entertainment setup.
In summary, the Philips HTS8141 is a remarkable home theater system that combines impressive audio technology, versatile media compatibility, and elegant design. With its powerful 5.1 surround sound, Ambisound technology, and user-centric features, it creates an unmatched home entertainment experience that caters to all your audio-visual needs.