Keystoned Image

6. Set Up

Horizontal angle (horizon)

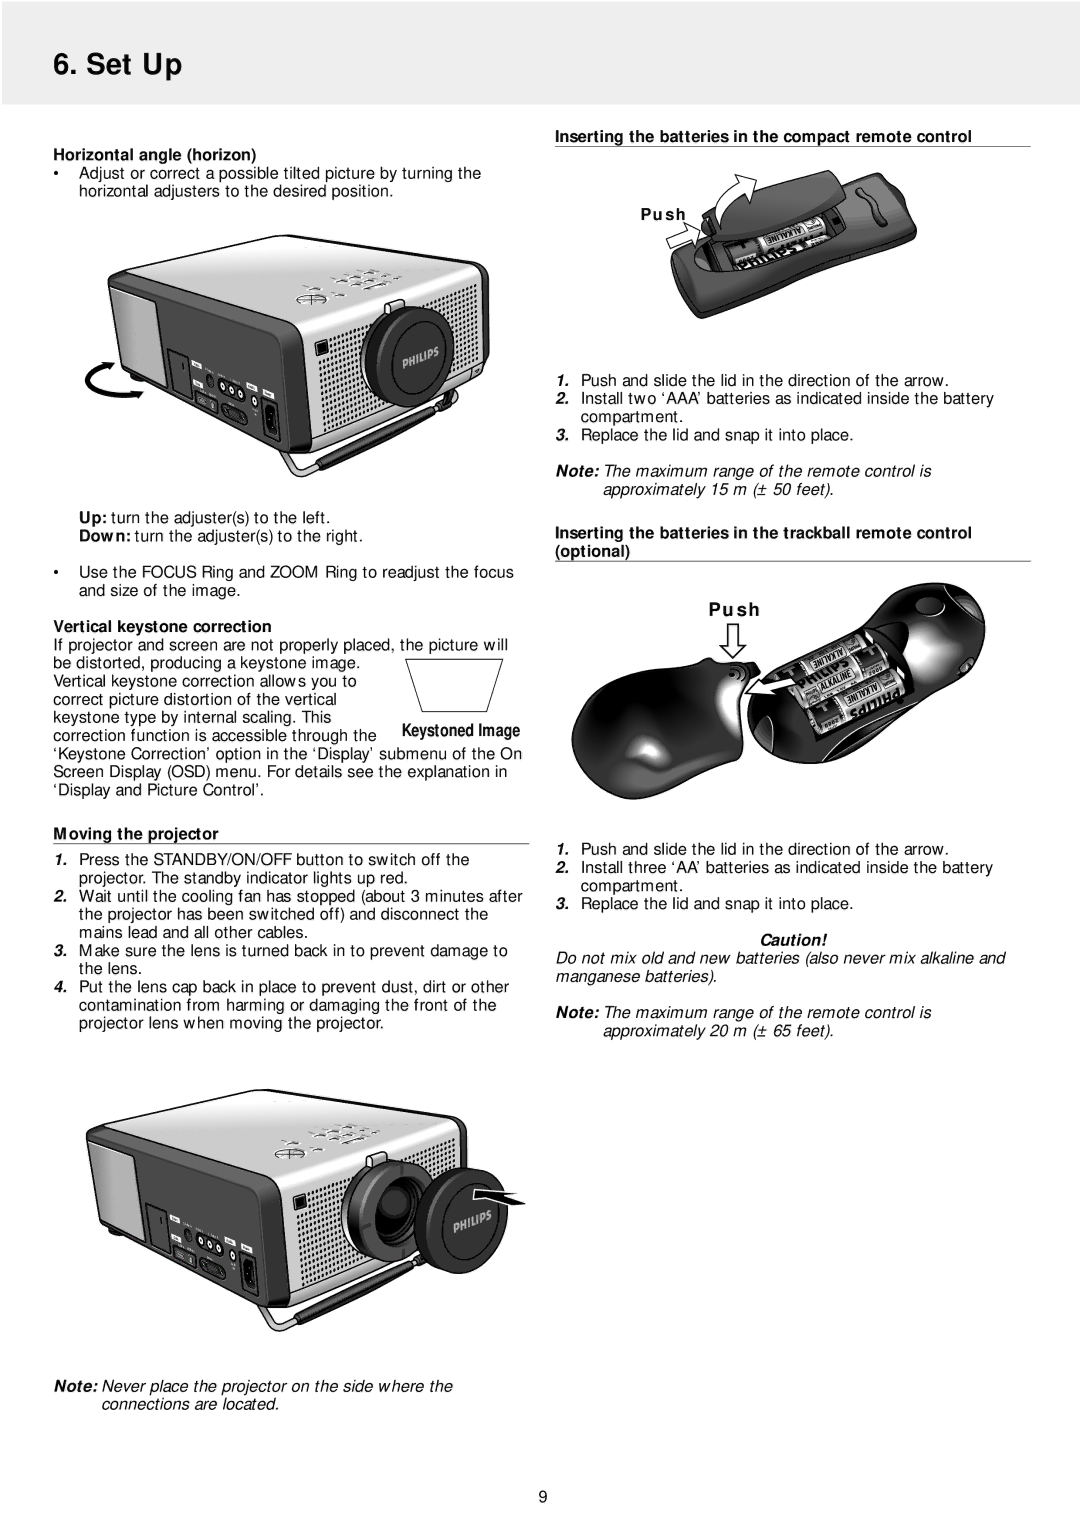
Adjust or correct a possible tilted picture by turning the horizontal adjusters to the desired position.

Video


S-


Videoin

Videoin


L


Data


Audio

R

USB


Audio

in

U


Power


SBout


Datain

Audio


out

Up: turn the adjuster(s) to the left.

Down: turn the adjuster(s) to the right.

Use the FOCUS Ring and ZOOM Ring to readjust the focus and size of the image.

Vertical keystone correction

If projector and screen are not properly placed, the picture will be distorted, producing a keystone image.

Vertical keystone correction allows you to correct picture distortion of the vertical keystone type by internal scaling. This correction function is accessible through the

‘Keystone Correction’ option in the ‘Display’ submenu of the On Screen Display (OSD) menu. For details see the explanation in ‘Display and Picture Control’.

Moving the projector

1.Press the STANDBY/ON/OFF button to switch off the projector. The standby indicator lights up red.

2.Wait until the cooling fan has stopped (about 3 minutes after the projector has been switched off) and disconnect the mains lead and all other cables.

3.Make sure the lens is turned back in to prevent damage to the lens.

4.Put the lens cap back in place to prevent dust, dirt or other contamination from harming or damaging the front of the

projector lens when moving the projector.

Inserting the batteries in the compact remote control

P u s h

1.Push and slide the lid in the direction of the arrow.

2.Install two ‘AAA’ batteries as indicated inside the battery compartment.

3.Replace the lid and snap it into place.

Note: The maximum range of the remote control is approximately 15 m (± 50 feet).

Inserting the batteries in the trackball remote control (optional)

P u s h

1.Push and slide the lid in the direction of the arrow.

2.Install three ‘AA’ batteries as indicated inside the battery compartment.

3.Replace the lid and snap it into place.

Caution!

Do not mix old and new batteries (also never mix alkaline and manganese batteries).

Note: The maximum range of the remote control is approximately 20 m (± 65 feet).

Video


S-


Videoin

Videoin


L


Data


Audio

R

USB

U


in


SBout


Datain


Audio

Power

Audio out

Note: Never place the projector on the side where the connections are located.

9

Page 9
Image 9
Philips LC4242, LC4246 manual Horizontal angle horizon, Vertical keystone correction, Moving the projector

LC4246, LC4242 specifications

The Philips LC4242 and LC4246 are cutting-edge products from Philips that showcase the company's commitment to innovation in the realm of technology and design. Designed primarily for the home entertainment sector, both models come with a plethora of features that enhance user experience and improve functionality.

The LC4242 is equipped with a vibrant 42-inch display that delivers stunning picture clarity thanks to its use of LCD technology. This model incorporates a dynamic contrast ratio that elevates the viewing experience by providing deeper blacks and brighter whites. The incorporation of wide viewing angles ensures that images remain intact and colors stay true, regardless of the viewer's position in the room. Additionally, its 1080p Full HD resolution guarantees that every detail is captured, providing an immersive viewing experience for movies, sports, and gaming.

On the other hand, the LC4246 offers a slightly larger screen at 46 inches, and builds upon the strengths of the LC4242. This model brings enhanced brightness levels, which is particularly beneficial in well-lit environments, ensuring that viewers do not miss out on visual details due to glare. Like the LC4242, the LC4246 also features advanced LCD technology, coupled with vibrant color reproduction to make images come alive.

Both models excel in connectivity, providing multiple HDMI and USB ports that allow for seamless integration with various devices including gaming consoles, streaming devices, and sound systems. This ensures that consumers can connect their gaming devices or media players with ease, expanding their entertainment options efficiently. They also feature built-in speakers that produce clear audio, enhancing the overall viewing experience.

Energy efficiency is another hallmark of both the LC4242 and LC4246. Designed with energy-saving features, these models minimize power consumption without sacrificing performance, making them eco-friendly choices.

In terms of design, both the LC4242 and LC4246 boast sleek, modern aesthetics that can complement a variety of home decors, with anti-glare screens that reduce reflections and improve visibility under various lighting conditions.

In summary, the Philips LC4242 and LC4246 are impressive models that combine modern technology with user-friendly features, making them ideal choices for anyone looking to elevate their home entertainment experience. With vibrant displays, excellent connectivity options, and energy efficiency, both televisions stand as testaments to Philips' dedication to quality and innovation in the industry.