LC4246, LC4242 specifications
The Philips LC4242 and LC4246 are cutting-edge products from Philips that showcase the company's commitment to innovation in the realm of technology and design. Designed primarily for the home entertainment sector, both models come with a plethora of features that enhance user experience and improve functionality.The LC4242 is equipped with a vibrant 42-inch display that delivers stunning picture clarity thanks to its use of LCD technology. This model incorporates a dynamic contrast ratio that elevates the viewing experience by providing deeper blacks and brighter whites. The incorporation of wide viewing angles ensures that images remain intact and colors stay true, regardless of the viewer's position in the room. Additionally, its 1080p Full HD resolution guarantees that every detail is captured, providing an immersive viewing experience for movies, sports, and gaming.
On the other hand, the LC4246 offers a slightly larger screen at 46 inches, and builds upon the strengths of the LC4242. This model brings enhanced brightness levels, which is particularly beneficial in well-lit environments, ensuring that viewers do not miss out on visual details due to glare. Like the LC4242, the LC4246 also features advanced LCD technology, coupled with vibrant color reproduction to make images come alive.
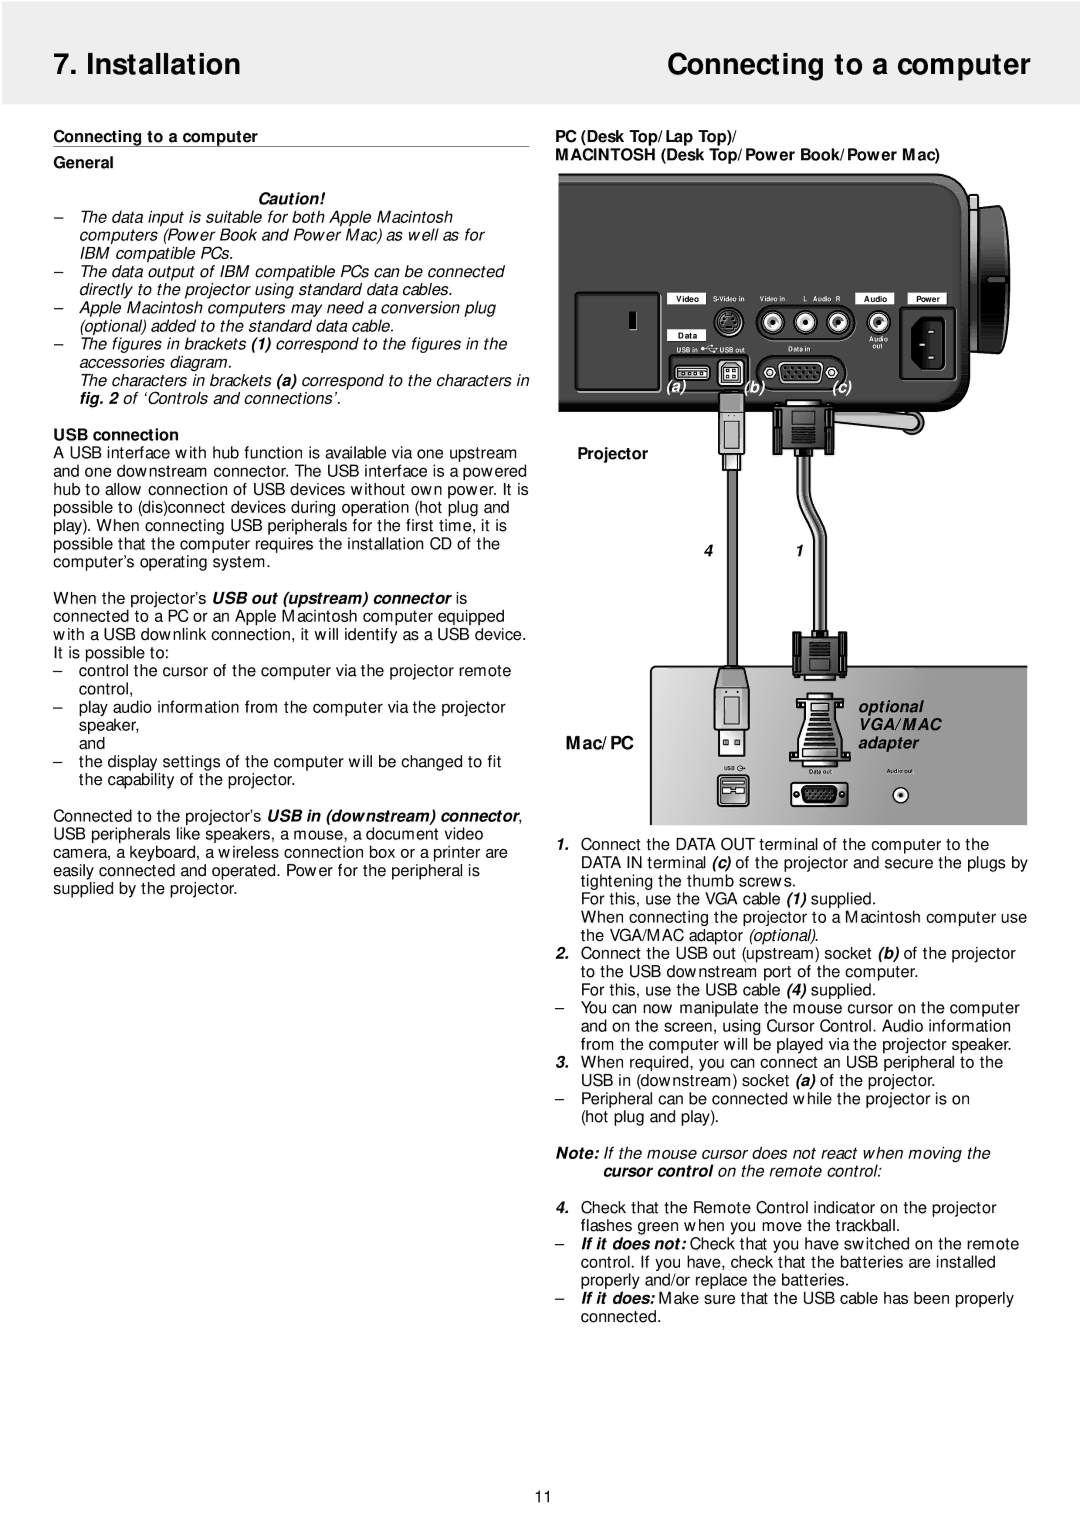
Both models excel in connectivity, providing multiple HDMI and USB ports that allow for seamless integration with various devices including gaming consoles, streaming devices, and sound systems. This ensures that consumers can connect their gaming devices or media players with ease, expanding their entertainment options efficiently. They also feature built-in speakers that produce clear audio, enhancing the overall viewing experience.
Energy efficiency is another hallmark of both the LC4242 and LC4246. Designed with energy-saving features, these models minimize power consumption without sacrificing performance, making them eco-friendly choices.
In terms of design, both the LC4242 and LC4246 boast sleek, modern aesthetics that can complement a variety of home decors, with anti-glare screens that reduce reflections and improve visibility under various lighting conditions.
In summary, the Philips LC4242 and LC4246 are impressive models that combine modern technology with user-friendly features, making them ideal choices for anyone looking to elevate their home entertainment experience. With vibrant displays, excellent connectivity options, and energy efficiency, both televisions stand as testaments to Philips' dedication to quality and innovation in the industry.

