Philips PRT-150 warranty Fit table pressure pad 3, by doing the following

Models: PRT-150

1 12
Download 12 pages 12.7 Kb
Page 9
Image 9

Assembly

Safety instructions


• Insert two coach bolt (M6X25) into the holes on the top of guide for


finger on the switch when carrying the machine or if you connect the


fence pressure pad (Fig. 6).


running machine to the socket, this may lead to accidents.


• Put the guide for fence pressure pad on the top of fence, and align


(d)

Remove the adjusting tools or the spanners before switching on the


two holes with the two holes on the fence, then insert two bolts


machine. A tool or a key which is located in a revolving part of the


(M6X25) into the holes, and secure in position with nuts (Fig. 7).


machine may lead to injuries.


• Slide the two front fence, in order to have enough space for fence


(e)

Concentrate at all times. Ensure a safe stand and keep your balance at all


pressure pad, then put fence pressure pad on the two bolts, and secure


times. In this case you will be able to control the machine better in


it in position with washer and locking knob (Fig. 8 and Fig. 9).


unexpected situations.


Fit table pressure pad (3, Fig. 1) by doing the following:


(f)

Wear suitable clothing. Do not wear any loose clothing or jewellery. Keep


• Loosen all the fittings on table pressure pad.


your hair, clothing and gloves clear of any moving parts.


• Loosen two screws on guide for table pressure pad (8, Fig. 1 - page


(g)

If dust extraction or collection devices can be mounted, make sure that


4), and align two hole on guide for table pressure into the two holes


they are connected properly and are used in the proper way. The use of


on the front side wall on the table, then insert two screws into the


these pieces of equipment reduce hazards caused by dust.


holes, secure it in position with nut (Fig. 10).


• Insert two coach bolts (M6X25) into the hole on guide for table pressure

4)

Careful handling and use of electric tools


pad, and put table pressure pad on the two bolts, and secure it in


(a)

Use the correct tool for the job at hand.


position with washer and locking knob (Fig. 11 and Fig. 12)


(b)

Do not use an electric tool, if the switch is defective. An electric tool,


Fit the switch box (5, Fig. 1) by doing the following:


which cannot be switched on or off, is dangerous and has to be repaired.


• Align two holes on switch box into the two holes on the front side


(c)

Remove the plug from the socket before setting down the machine,


wall of table.


changing accessories or putting the machine aside. This precautionary


• Fit in position with two Phillips head screws inserted from the front


measure prevents the unintentional start of the machine.


of table secured with two nuts (Fig. 13).


(d)

Keep unused electric tools out of reach of children. Do not permit


persons to use the machine who are not familiar with it or who have not


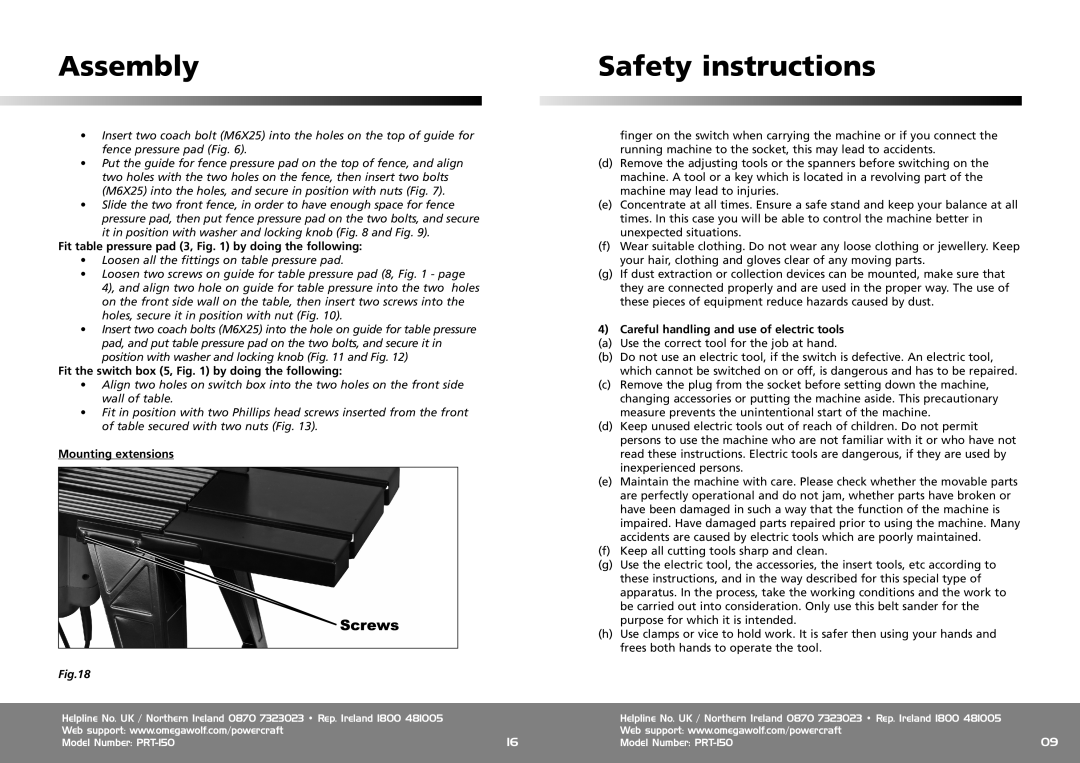
Mounting extensions


read these instructions. Electric tools are dangerous, if they are used by


inexperienced persons.


(e)

Maintain the machine with care. Please check whether the movable parts


are perfectly operational and do not jam, whether parts have broken or


have been damaged in such a way that the function of the machine is


impaired. Have damaged parts repaired prior to using the machine. Many


accidents are caused by electric tools which are poorly maintained.


(f)

Keep all cutting tools sharp and clean.


(g)

Use the electric tool, the accessories, the insert tools, etc according to


these instructions, and in the way described for this special type of


apparatus. In the process, take the working conditions and the work to


be carried out into consideration. Only use this belt sander for the


purpose for which it is intended.


(h)

Use clamps or vice to hold work. It is safer then using your hands and


frees both hands to operate the tool.


Fig.18


Helpline No. UK / Northern Ireland 0870 7323023 • Rep. Ireland 1800 481005


Helpline No. UK / Northern Ireland 0870 7323023 • Rep. Ireland 1800 481005


Web support: www.omegawolf.com/powercraft

16


Web support: www.omegawolf.com/powercraft

09


Model Number: PRT-150


Model Number: PRT-150


Page 9
Image 9
Philips PRT-150 warranty Fit table pressure pad 3, by doing the following

PRT-150 specifications

The Philips PRT-150 is a compact yet powerful professional-grade projector designed to meet the needs of both business presentations and casual entertainment. With its exceptional image quality and advanced features, the PRT-150 stands out as a versatile solution for various environments.

One of the prominent features of the PRT-150 is its high resolution, capable of delivering crystal-clear images. The projector supports Full HD resolution, ensuring that presentations, videos, and images are sharp and vibrant. This is particularly beneficial in business settings where professionalism is key, as it enhances the visual impact of presentations.

The PRT-150 employs cutting-edge DLP (Digital Light Processing) technology, which is known for its reliability and fantastic color accuracy. This technology allows for rich and deep colors, providing a true-to-life viewing experience. Additionally, the projector boasts a high contrast ratio, enabling it to produce deep blacks and bright whites, essential for showcasing detailed graphics and text.

Portability is another significant aspect of the PRT-150. Designed to be lightweight and easy to set up, it is an ideal companion for mobile professionals who frequently conduct meetings across different locations. Its compact size allows for easy transport, making it suitable for both indoor and outdoor presentations.

Connectivity options are plentiful with the PRT-150, featuring multiple ports such as HDMI, VGA, and USB. This versatility ensures compatibility with various devices, including laptops, tablets, and smartphones. Furthermore, the projector supports wireless connectivity, allowing users to connect without the hassle of tangled cables.

An additional feature is the built-in speaker system, which provides adequate sound quality for small to medium-sized rooms. However, for larger venues, additional audio equipment might be required to enhance the auditory experience further.

Regarding energy efficiency, the Philips PRT-150 has an extended lamp life. This means that users can enjoy long hours of usage without frequent lamp replacements, leading to lower maintenance costs.

In summary, the Philips PRT-150 is an excellent choice for users who require a multifunctional projector. With its high resolution, DLP technology, portability, and versatile connectivity options, it is equipped to handle a range of applications, from professional meetings to home entertainment. Its combination of features makes it a reliable and effective tool for anyone needing high-performance projection capabilities.