ENInstallation
Installing the WebCam software
The software supplied only works on PCs with the operating systems Microsoft® Windows® 98SE, ME, 2000 and XP.
Notes!
–Unplug all your USB devices (except USB keyboard and USB mouse) before you start.
–Do not plug in your WebCam yet. Run the Installation
–Have your Windows®
–The SPC650NC WebCam is 'XP Plug & Play'. This means if you are running Windows XP and you have installed Service Pack 2 and the latest Microsoft Windows XP updates you don't need to install the SPC650NC WebCam driver. Simply plug in the WebCam and you can start using your SPC650NC WebCam.
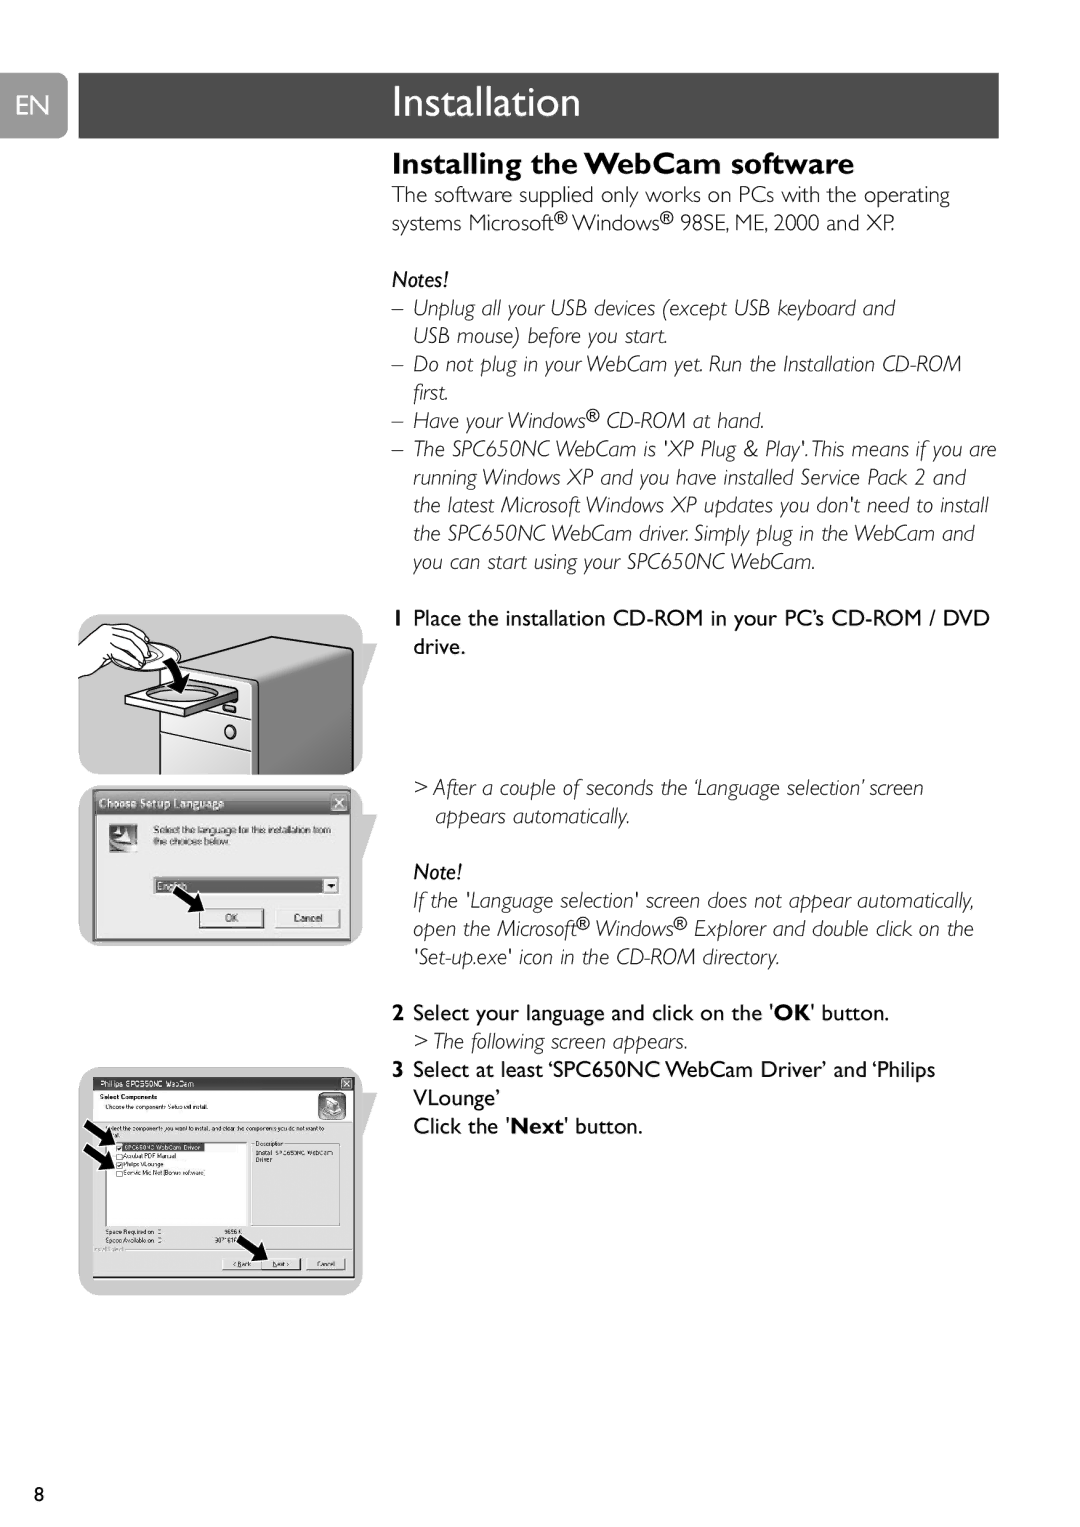
1Place the installation
drive.
> After a couple of seconds the ‘Language selection’ screen appears automatically.
Note!
If the 'Language selection' screen does not appear automatically, open the Microsoft® Windows® Explorer and double click on the
2Select your language and click on the 'OK' button. > The following screen appears.
3Select at least ‘SPC650NC WebCam Driver’ and ‘Philips VLounge’
Click the 'Next' button.
8