ADVANCED OPERATIONS
7Fader start play
Using the cross fader start function of the
tion, when the CROSS FADER slider is returned to its original position, the status returns to that in step 9 (player CD2 at its Cue point), so that you can repeat the same play as many times as you like.
ADVANCED OPERATIONS
Functions indicated with an asterisk (*) are disabled when the rear panel DIGITAL OUT mode switch is set to NORMAL.
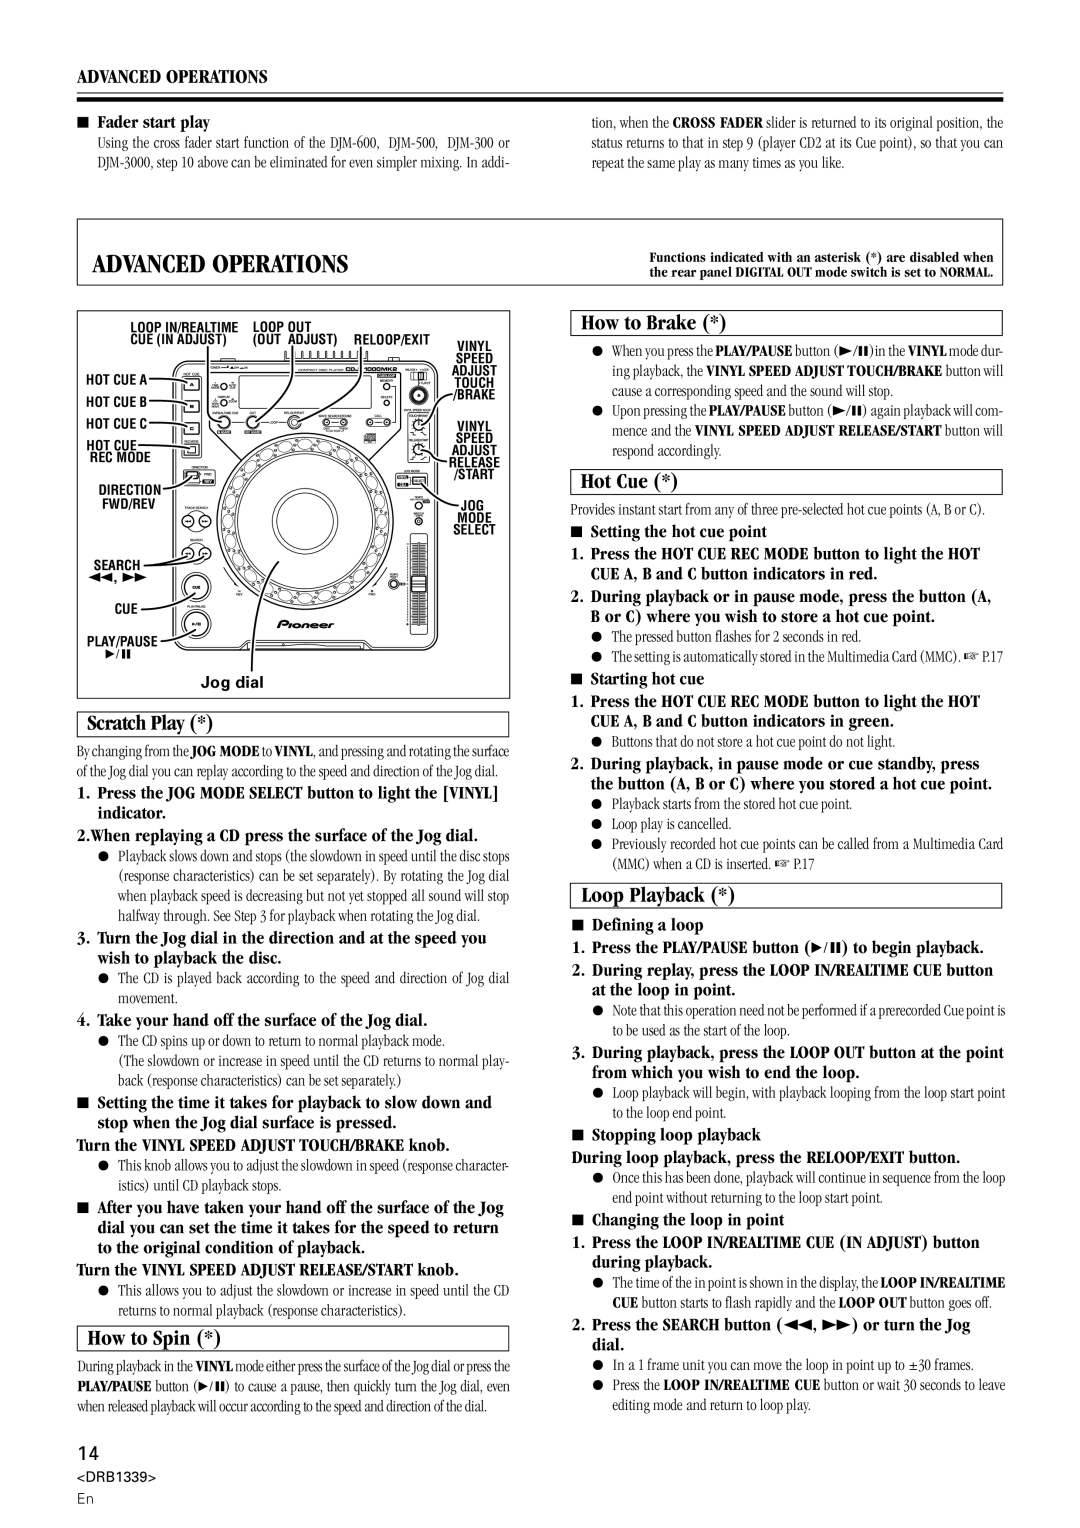
LOOP IN/REALTIME | LOOP OUT |
|
CUE (IN ADJUST) | (OUT ADJUST) RELOOP/EXIT | VINYL |
|
| SPEED |
HOT CUE A |
| ADJUST |
| TOUCH | |
HOT CUE B |
| /BRAKE |
|
| |
HOT CUE C |
| VINYL |
HOT CUE |
| SPEED |
| ADJUST | |
REC MODE |
| |
| RELEASE | |
DIRECTION |
| /START |
|
| |
FWD/REV |
| JOG |
|
| MODE |
|
| SELECT |
SEARCH
1, ¡
CUE
PLAY/PAUSE
6
Jog dial
Scratch Play (*)
By changing from the JOG MODE to VINYL, and pressing and rotating the surface of the Jog dial you can replay according to the speed and direction of the Jog dial.
1.Press the JOG MODE SELECT button to light the [VINYL] indicator.
2.When replaying a CD press the surface of the Jog dial.
¶Playback slows down and stops (the slowdown in speed until the disc stops (response characteristics) can be set separately). By rotating the Jog dial when playback speed is decreasing but not yet stopped all sound will stop halfway through. See Step 3 for playback when rotating the Jog dial.
3.Turn the Jog dial in the direction and at the speed you wish to playback the disc.
¶The CD is played back according to the speed and direction of Jog dial movement.
4.Take your hand off the surface of the Jog dial.
¶The CD spins up or down to return to normal playback mode.
(The slowdown or increase in speed until the CD returns to normal play- back (response characteristics) can be set separately.)
7Setting the time it takes for playback to slow down and stop when the Jog dial surface is pressed.
Turn the VINYL SPEED ADJUST TOUCH/BRAKE knob.
¶This knob allows you to adjust the slowdown in speed (response character- istics) until CD playback stops.
7After you have taken your hand off the surface of the Jog dial you can set the time it takes for the speed to return to the original condition of playback.
Turn the VINYL SPEED ADJUST RELEASE/START knob.
¶This allows you to adjust the slowdown or increase in speed until the CD returns to normal playback (response characteristics).
How to Spin (*)
During playback in the VINYL mode either press the surface of the Jog dial or press the PLAY/PAUSE button (6) to cause a pause, then quickly turn the Jog dial, even when released playback will occur according to the speed and direction of the dial.
How to Brake (*)
¶When you press the PLAY/PAUSE button (3/8)in the VINYL mode dur- ing playback, the VINYL SPEED ADJUST TOUCH/BRAKE button will cause a corresponding speed and the sound will stop.
¶Upon pressing the PLAY/PAUSE button (3/8) again playback will com- mence and the VINYL SPEED ADJUST RELEASE/START button will respond accordingly.
Hot Cue (*)
Provides instant start from any of three
7Setting the hot cue point
1.Press the HOT CUE REC MODE button to light the HOT CUE A, B and C button indicators in red.
2.During playback or in pause mode, press the button (A, B or C) where you wish to store a hot cue point.
¶The pressed button flashes for 2 seconds in red.
¶The setting is automatically stored in the Multimedia Card (MMC). ☞ P.17
7 Starting hot cue
1.Press the HOT CUE REC MODE button to light the HOT CUE A, B and C button indicators in green.
¶Buttons that do not store a hot cue point do not light.
2.During playback, in pause mode or cue standby, press the button (A, B or C) where you stored a hot cue point.
¶Playback starts from the stored hot cue point.
¶Loop play is cancelled.
¶Previously recorded hot cue points can be called from a Multimedia Card (MMC) when a CD is inserted. ☞ P.17
Loop Playback (*)
7Defining a loop
1.Press the PLAY/PAUSE button (6) to begin playback.
2.During replay, press the LOOP IN/REALTIME CUE button at the loop in point.
¶Note that this operation need not be performed if a prerecorded Cue point is to be used as the start of the loop.
3.During playback, press the LOOP OUT button at the point from which you wish to end the loop.
¶Loop playback will begin, with playback looping from the loop start point to the loop end point.
7Stopping loop playback
During loop playback, press the RELOOP/EXIT button.
¶Once this has been done, playback will continue in sequence from the loop end point without returning to the loop start point.
7Changing the loop in point
1.Press the LOOP IN/REALTIME CUE (IN ADJUST) button during playback.
¶The time of the in point is shown in the display, the LOOP IN/REALTIME CUE button starts to flash rapidly and the LOOP OUT button goes off.
2.Press the SEARCH button (1, ¡) or turn the Jog dial.
¶In a 1 frame unit you can move the loop in point up to ±30 frames.
¶Press the LOOP IN/REALTIME CUE button or wait 30 seconds to leave editing mode and return to loop play.
14
<DRB1339>
En