PD7130 specifications
The Planar PD7150 and PD7130 are cutting-edge display solutions designed for superior performance in various professional environments, including corporate settings, educational institutions, and public spaces. These models are part of Planar's commitment to delivering high-quality visual experiences, blending advanced technology with user-friendly features.Both the PD7150 and PD7130 display models are equipped with Full HD resolution, providing crystal-clear images that enhance the viewing experience. The 1920 x 1080 resolution ensures that even the finest details are captured, making these displays ideal for presentations, videos, and detailed graphics. The brightness levels of these displays are remarkable, with the PD7150 offering up to 700 nits, making it suitable for brightly lit environments where visibility is crucial.
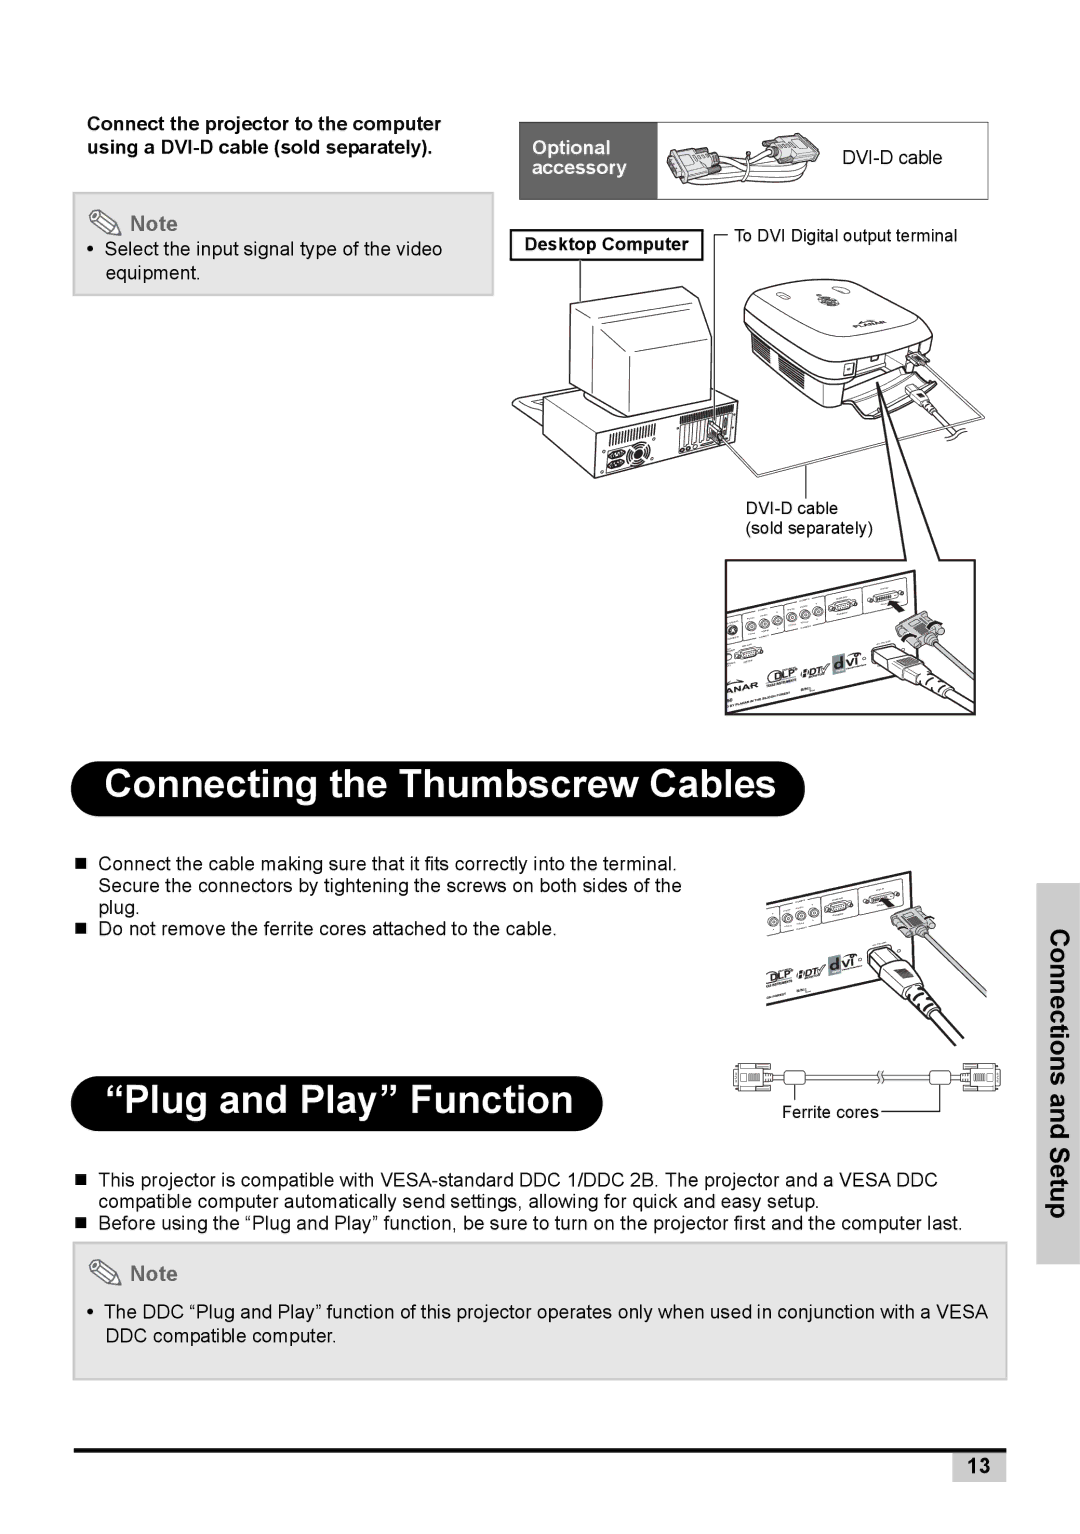
A significant aspect of the PD7150 and PD7130 is their versatility in connectivity options. Both models feature a range of input ports, including HDMI, DisplayPort, and VGA, enabling seamless integration with various devices. This adaptability ensures that users can connect laptops, computers, media players, and other peripherals without hassle, streamlining the setup process for meetings and presentations.
In terms of design, the PD7150 and PD7130 boast slim bezels, allowing for a more immersive viewing experience. The sleek design is not only aesthetically pleasing but also practical, as it facilitates multi-display setups for expanded visual engagement. This is especially useful in environments where multiple screens are used for presentations or information displays.
Another important feature of these displays is their energy efficiency. Both models are designed with energy-saving technologies that help reduce power consumption without compromising performance. This focus on sustainability not only benefits the environment but also results in cost savings over time.
The PD7150 and PD7130 also combine advanced technologies to enhance image quality. Features such as dynamic contrast and wide viewing angles ensure that colors remain vibrant and details sharp, regardless of the viewer's position relative to the screen. Furthermore, the use of advanced LED backlighting ensures that these models deliver consistent brightness and color accuracy.
With robust build quality and reliability, the Planar PD7150 and PD7130 are engineered for longevity. These displays are designed to endure the rigors of daily use in demanding environments, making them a dependable choice for professionals seeking high-performance display solutions.
In summary, the Planar PD7150 and PD7130 incorporate state-of-the-art technology, versatile connectivity, and energy-efficient design, making them ideal for a wide array of professional applications. Their combination of quality, performance, and durability positions them as top choices in the market for high-definition displays.