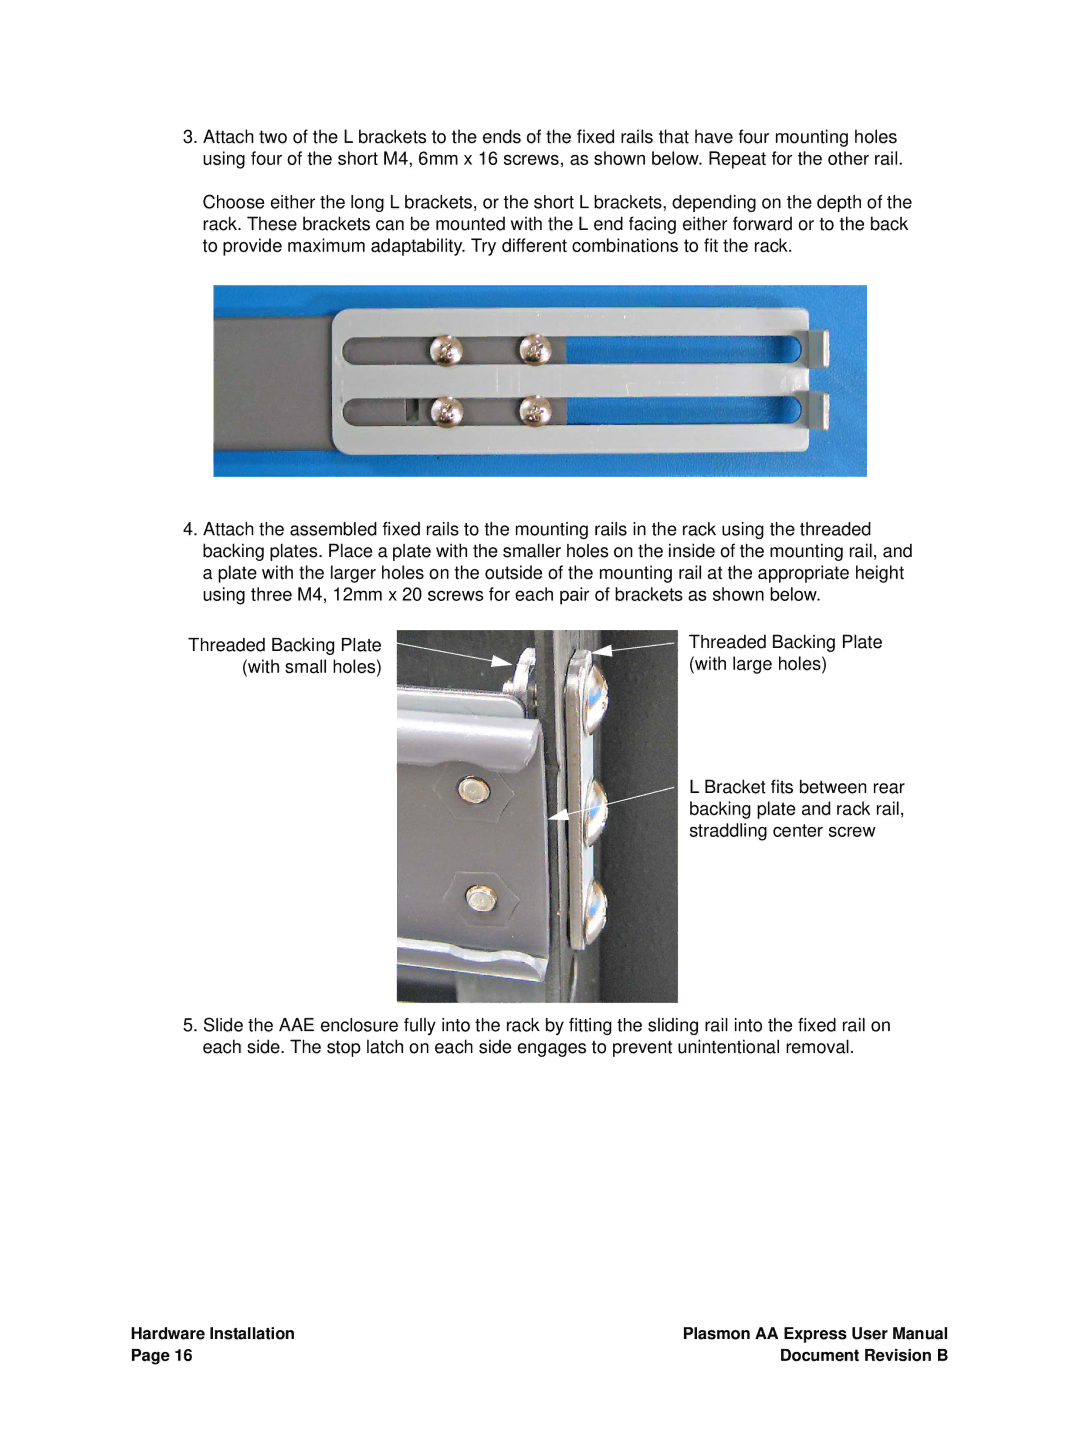
3.Attach two of the L brackets to the ends of the fixed rails that have four mounting holes using four of the short M4, 6mm x 16 screws, as shown below. Repeat for the other rail.
Choose either the long L brackets, or the short L brackets, depending on the depth of the rack. These brackets can be mounted with the L end facing either forward or to the back to provide maximum adaptability. Try different combinations to fit the rack.
4.Attach the assembled fixed rails to the mounting rails in the rack using the threaded backing plates. Place a plate with the smaller holes on the inside of the mounting rail, and a plate with the larger holes on the outside of the mounting rail at the appropriate height using three M4, 12mm x 20 screws for each pair of brackets as shown below.
Threaded Backing Plate (with small holes)
Threaded Backing Plate (with large holes)
L Bracket fits between rear backing plate and rack rail, straddling center screw
5.Slide the AAE enclosure fully into the rack by fitting the sliding rail into the fixed rail on each side. The stop latch on each side engages to prevent unintentional removal.
Hardware Installation | Plasmon AA Express User Manual |
Page 16 | Document Revision B |
