
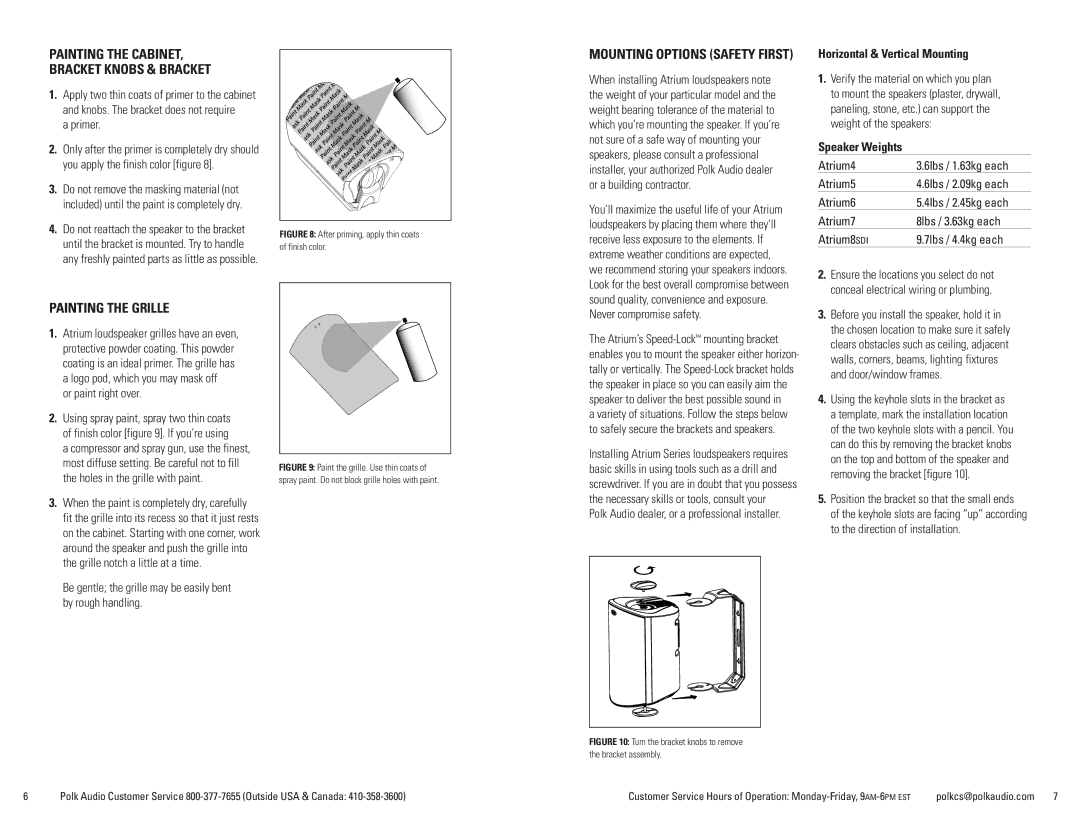
ATRIUM 4, 7, 8SDI, ATRIUM6, ATRIUM5 specifications
Polk Audio has long been recognized for producing high-quality speakers, and their ATRIUM series exemplifies this commitment to excellence in outdoor audio performance. The ATRIUM 4, 5, 6, 7, and 8SDI models showcase a blend of innovative technologies and superior craftsmanship, ensuring that every outdoor listening experience is exceptional.The ATRIUM 4 is designed for great sound in smaller spaces. It features a 4.5-inch dynamic balance driver, which provides a smooth and balanced sound reproduction. Built to withstand the elements, the ATRIUM 4 utilizes an all-weather enclosure and stainless steel hardware, making it ideal for patios, backyards, or pool areas. Its sleek design allows for versatile mounting options, ensuring seamless integration into any outdoor environment.
The ATRIUM 5 upgrades the performance with a larger 5.25-inch driver, enhancing low-frequency reproduction while still maintaining clarity in the mids and highs. With its advanced Dynamic Balance technology, this model minimizes distortion across the frequency range. The ATRIUM 5's rugged construction allows it to fight against rain, snow, and extreme temperatures, providing reliable performance year-round.
Moving up the lineup, the ATRIUM 6 and 7 models feature a more powerful 6.5-inch driver, offering deeper bass response and a wider soundstage. The ATRIUM 6 is equipped with a 1-inch tweeter, producing crisp high frequencies, while the ATRIUM 7 boasts a dual tweeter design that fills larger spaces with immersive sound. Both models maintain Polk's commitment to durability, featuring UV-resistant materials and a sealed enclosure that protects the speakers from moisture damage.
Finally, the ATRIUM 8SDI is the flagship model of the series, offering exceptional audio fidelity with additional features. It incorporates cutting-edge technologies such as a 8-inch subwoofer and built-in amplification for deeper bass and higher output levels, making it suitable for larger outdoor gatherings. The dual-tweeter configuration ensures an expansive soundstage and impressive clarity, whether you’re listening to music or watching movies al fresco.
In conclusion, each model in the Polk Audio ATRIUM series is engineered with a focus on sound quality, durability, and aesthetic appeal. With weather-resistant designs and innovative technologies, these speakers are perfect for anyone looking to elevate their outdoor audio experience, making them a popular choice among audiophiles and casual listeners alike.