3.Your tool will operate in either the forward direction (clockwise rotation) for drilling holes, or the reverse direction
NOTE: Never attempt to change the direction of rotation while the switch is “ON”. To do so may damage interlock feature built into switch. Be sure that the switch is “OFF” and the motor has completely stopped before changing the direction of rotation.
4.VARIABLE SPEED – As the trigger switch is squeezed, the drill speed increases.
HOW TO HOLD THE DRILL
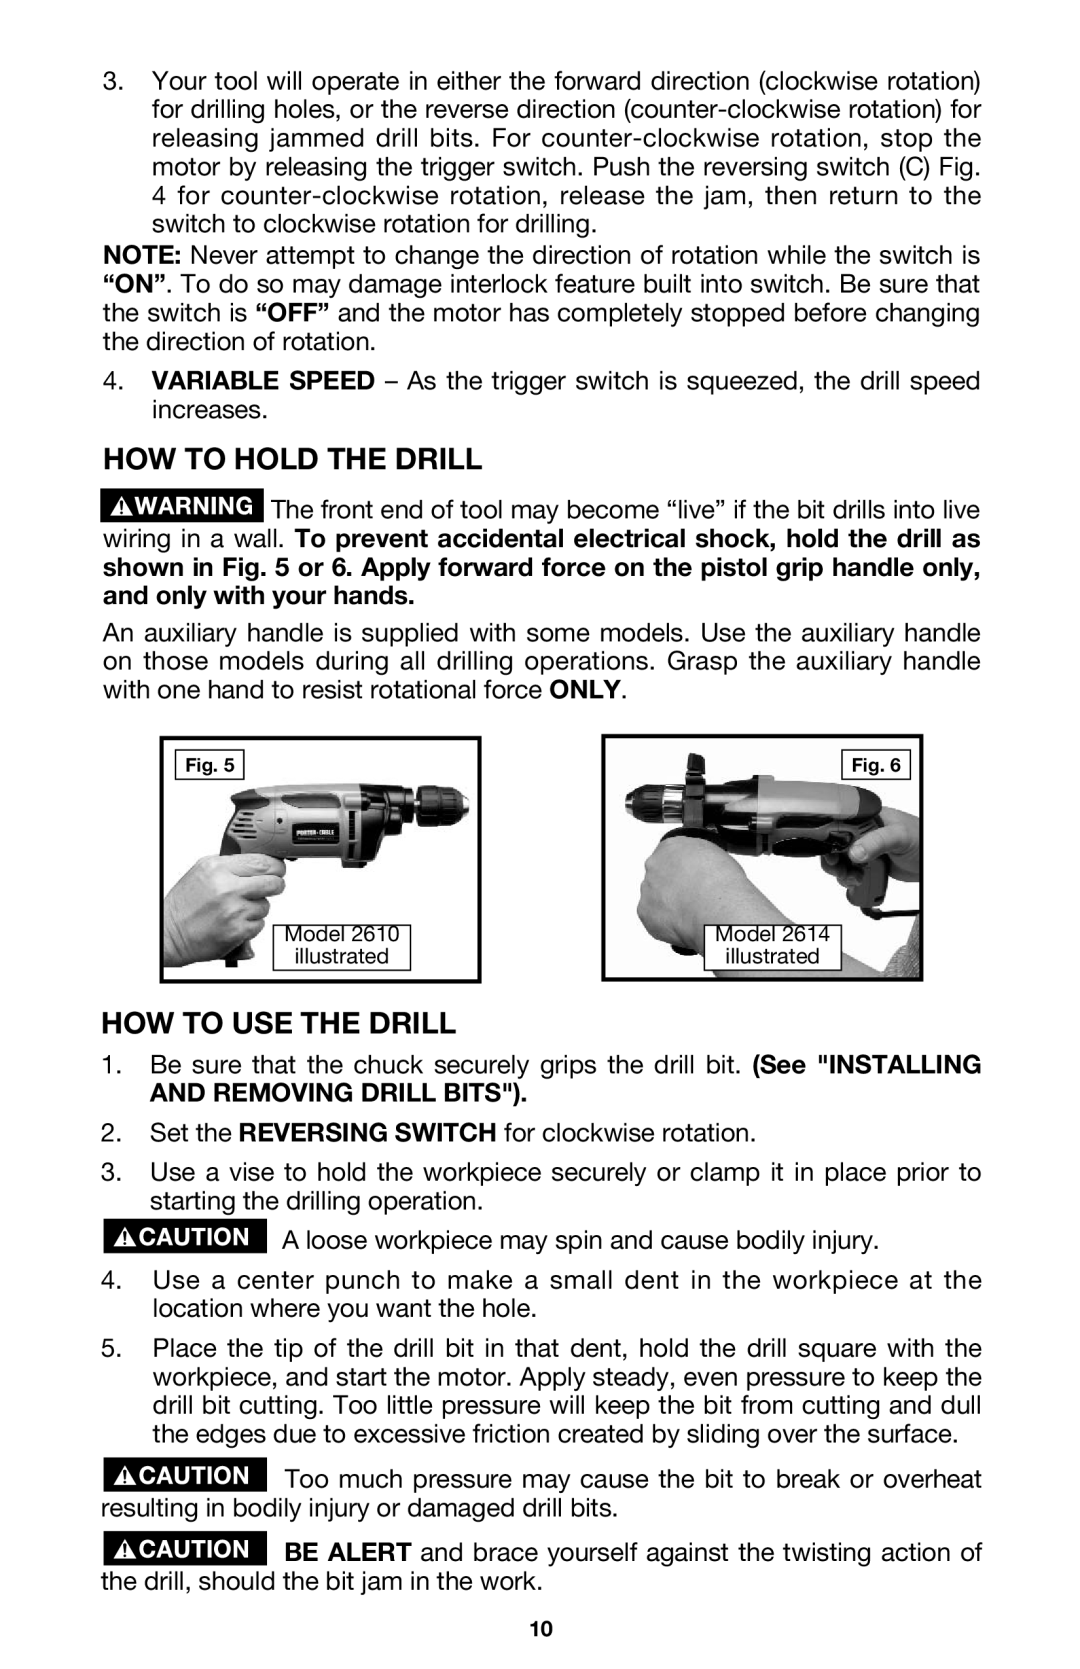
![]() The front end of tool may become “live” if the bit drills into live wiring in a wall. To prevent accidental electrical shock, hold the drill as shown in Fig. 5 or 6. Apply forward force on the pistol grip handle only, and only with your hands.
The front end of tool may become “live” if the bit drills into live wiring in a wall. To prevent accidental electrical shock, hold the drill as shown in Fig. 5 or 6. Apply forward force on the pistol grip handle only, and only with your hands.
An auxiliary handle is supplied with some models. Use the auxiliary handle on those models during all drilling operations. Grasp the auxiliary handle with one hand to resist rotational force ONLY.
Fig. 5
Model 2610
illustrated
Fig. 6
Model 2614
illustrated
HOW TO USE THE DRILL
1.Be sure that the chuck securely grips the drill bit. (See "INSTALLING
AND REMOVING DRILL BITS").
2.Set the REVERSING SWITCH for clockwise rotation.
3.Use a vise to hold the workpiece securely or clamp it in place prior to starting the drilling operation.
A loose workpiece may spin and cause bodily injury.
4.Use a center punch to make a small dent in the workpiece at the location where you want the hole.
5.Place the tip of the drill bit in that dent, hold the drill square with the workpiece, and start the motor. Apply steady, even pressure to keep the drill bit cutting. Too little pressure will keep the bit from cutting and dull the edges due to excessive friction created by sliding over the surface.
![]() Too much pressure may cause the bit to break or overheat resulting in bodily injury or damaged drill bits.
Too much pressure may cause the bit to break or overheat resulting in bodily injury or damaged drill bits.
![]() BE ALERT and brace yourself against the twisting action of the drill, should the bit jam in the work.
BE ALERT and brace yourself against the twisting action of the drill, should the bit jam in the work.
10
