CARTON CONTENTS
Carton contents include the drill, an auxiliary handle for models 2614 and 2615 only, an instruction manual, and a parts list.
FUNCTIONAL DESCRIPTION
FOREWORD
MODEL # OF DRILL | TYPE OF BIT | MAX. DIA. HOLE | MATERIAL |
2610 | Twist Drill | 3/8" | Steel |
|
|
|
|
| Spade Bit | 3/4" | Wood |
2611 |
|
|
|
3/8" | Wood | ||
|
|
|
|
| Twist Drill | 1/2" | Steel |
2614, 2615 |
|
|
|
Spade Bit | Wood | ||
|
|
|
|
| Wood | ||
|
|
|
|
ASSEMBLY
NOTE: This tool is shipped completely assembled. No assembly time or tools are required.
INSTALLING AND REMOVING DRILL BITS-
![]() Disconnect tool from power source.
Disconnect tool from power source.
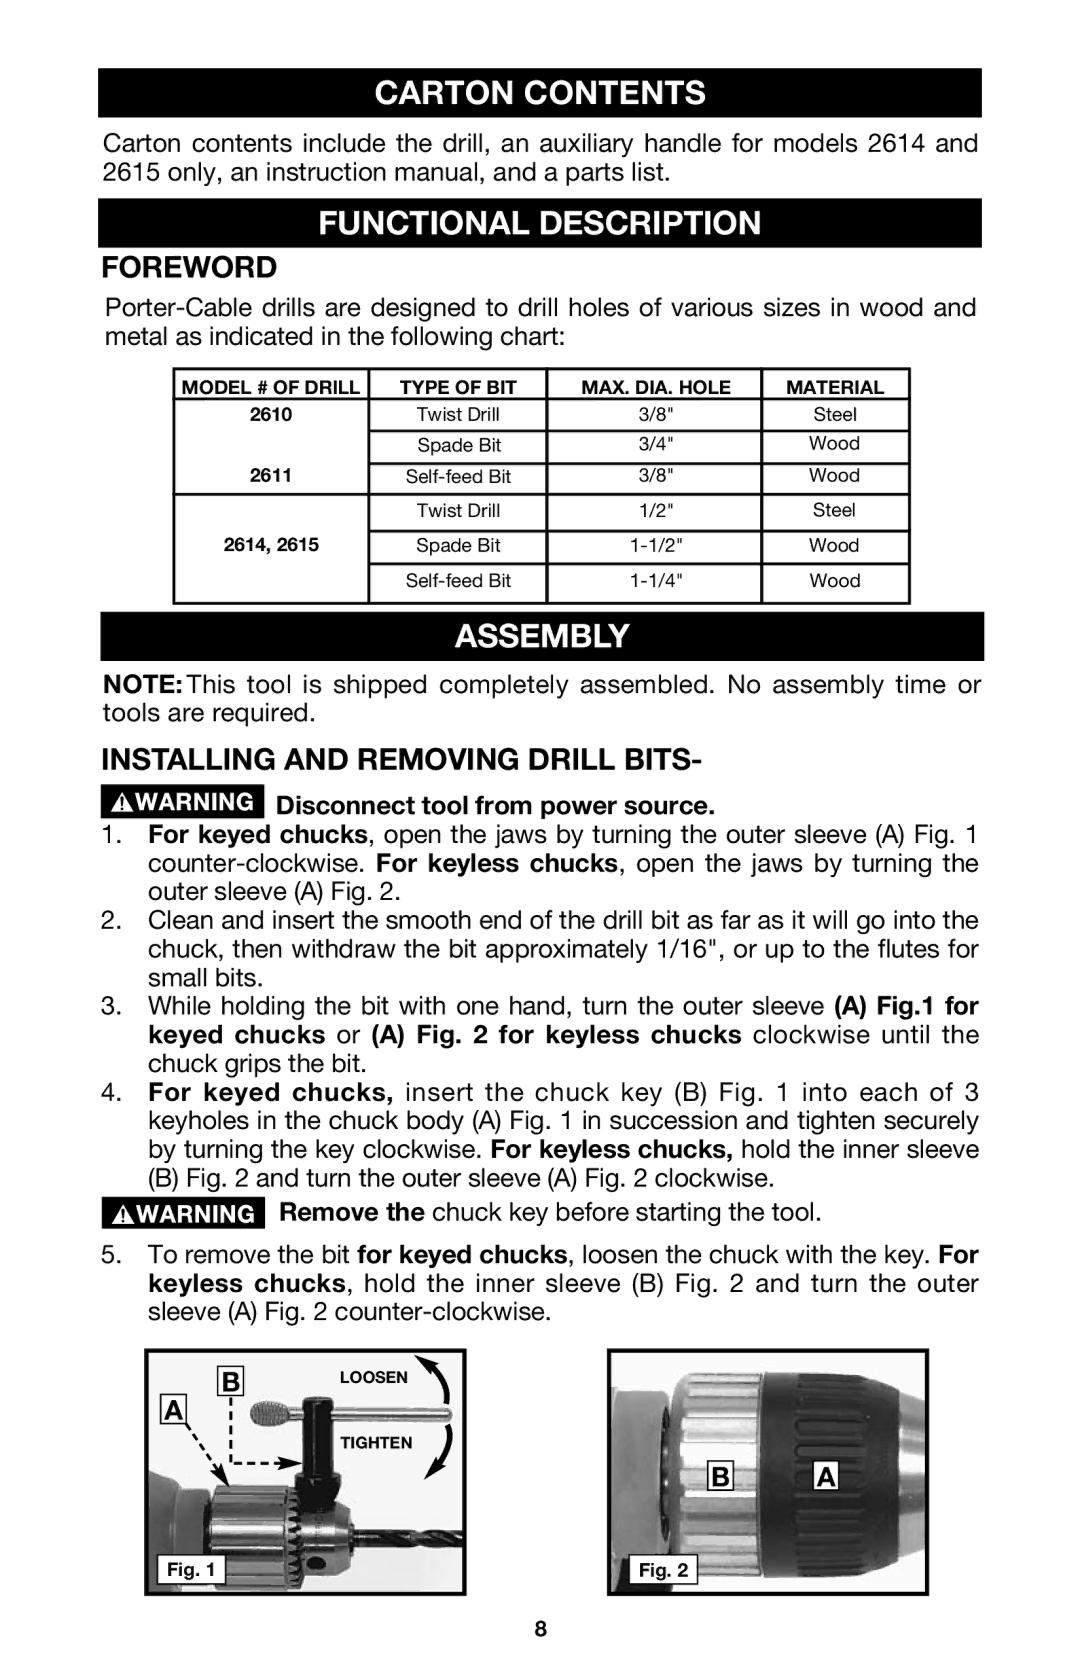
1.For keyed chucks, open the jaws by turning the outer sleeve (A) Fig. 1
2.Clean and insert the smooth end of the drill bit as far as it will go into the chuck, then withdraw the bit approximately 1/16", or up to the flutes for small bits.
3.While holding the bit with one hand, turn the outer sleeve (A) Fig.1 for keyed chucks or (A) Fig. 2 for keyless chucks clockwise until the chuck grips the bit.
4.For keyed chucks, insert the chuck key (B) Fig. 1 into each of 3 keyholes in the chuck body (A) Fig. 1 in succession and tighten securely by turning the key clockwise. For keyless chucks, hold the inner sleeve
(B) Fig. 2 and turn the outer sleeve (A) Fig. 2 clockwise.
Remove the chuck key before starting the tool.
5.To remove the bit for keyed chucks, loosen the chuck with the key. For keyless chucks, hold the inner sleeve (B) Fig. 2 and turn the outer sleeve (A) Fig. 2 counter-clockwise.
B A![]()
![]()
LOOSEN![]()
TIGHTEN
B
A
Fig. 1
Fig. 2
8