
7537, 7536 specifications
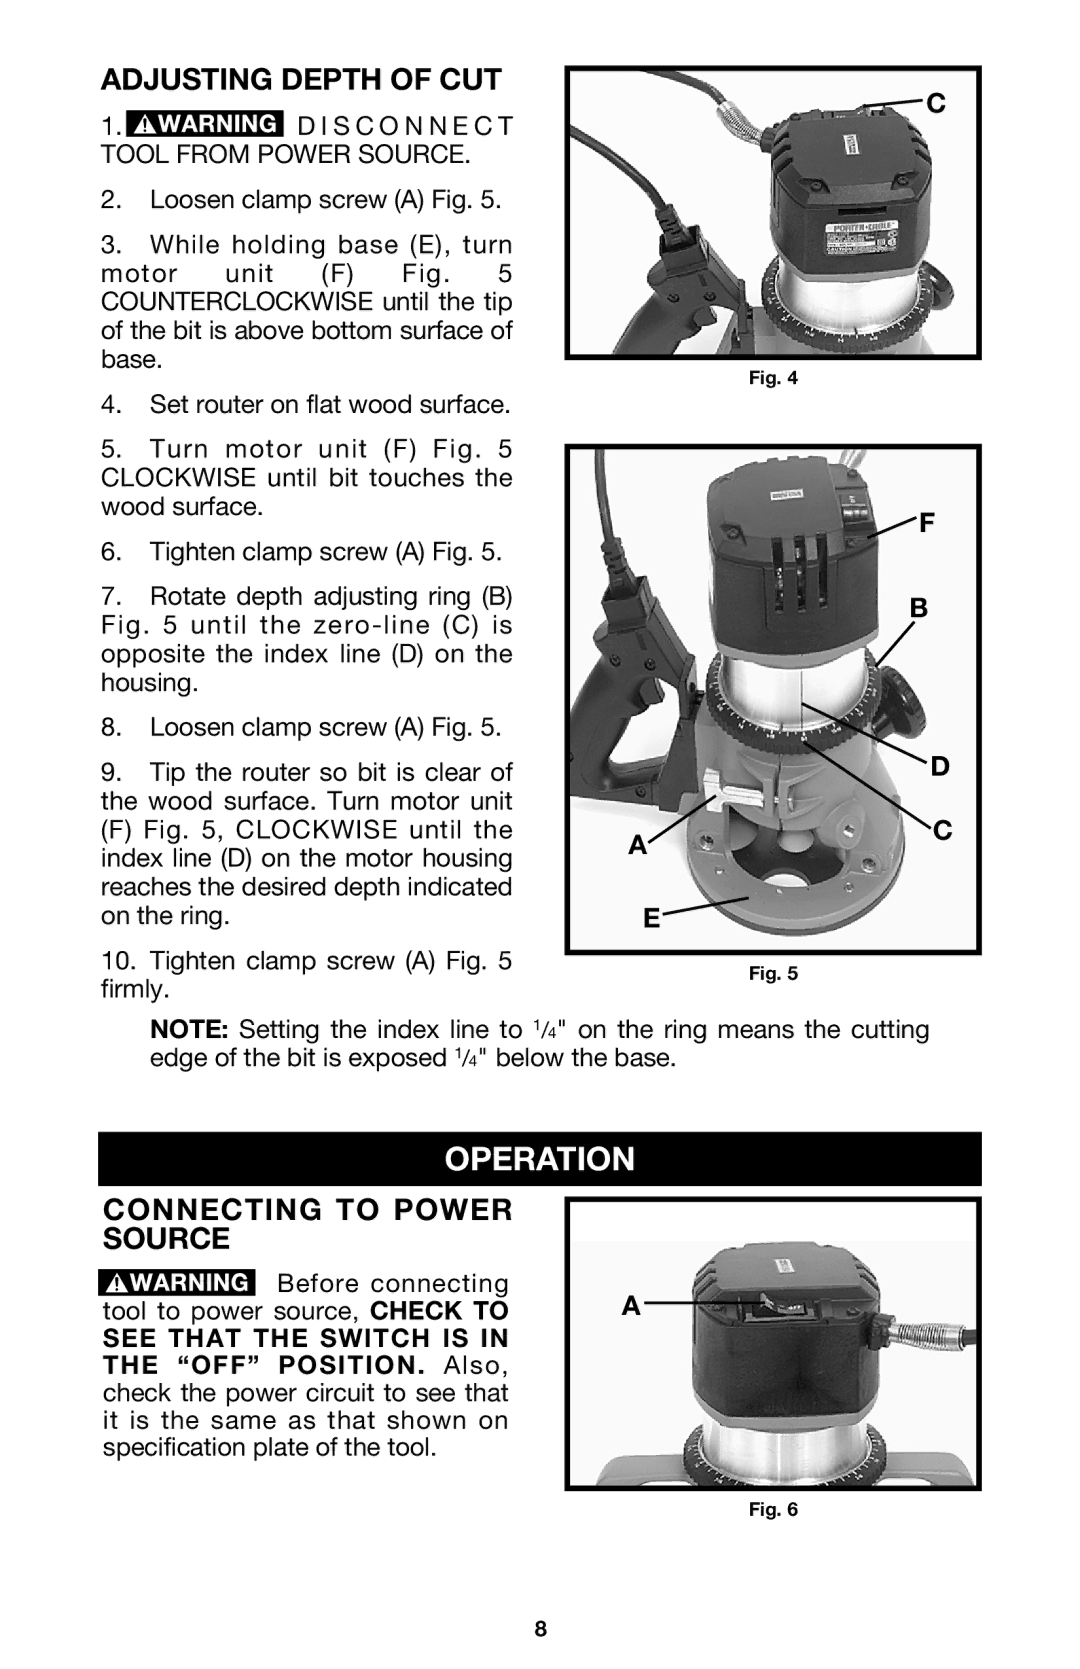
The Porter-Cable 7536 and 7537 are two well-regarded models in the realm of woodworking and construction tools, particularly known for their versatility and reliability in a professional environment. Both models serve a distinct purpose in the tooling landscape, with the Porter-Cable 7536 functioning primarily as a heavy-duty 6-inch laminate trimmer and the 7537 primarily as a more powerful model that caters to a wider range of woodworking tasks.One of the standout features of the Porter-Cable 7536 is its robust motor. With a 7.0 Amp motor, it delivers ample power for efficiently trimming laminate edges and performing other trim work. This tool provides a variable speed control, enabling users to adjust the RPM according to the specific material or task at hand, ultimately allowing for precision work without damaging the material. The unit is designed with a low profile and lightweight setup, which ensures enhanced maneuverability, making it easier to work in tight spaces.
The 7536 also boasts a durable base plate that enhances stability during operation, a crucial aspect when tackling delicate trimming tasks. Additionally, its clear sub-base provides visibility, allowing the operator to see the cutting line easily for accuracy. Furthermore, the model is compatible with a range of standard laminate bits, enabling craftsmen to execute a variety of applications seamlessly.
On the other hand, the Porter-Cable 7537 is equipped with even more power, featuring an 8.5 Amp motor that caters to a broader spectrum of woodworking needs. This model also includes precision depth adjustments for flawless cuts up to 1-3/4 inches deep in a single pass. The 7537 stands out for its easily adjustable depth control, which locks securely to provide repeatable accuracy, ideal for professional woodworkers who require consistency in their tasks.
Both models incorporate innovative technologies, such as the soft-start feature, which minimizes the initial torque when starting, ensuring the user has a controlled start. Reliability and ease of use are evident in their ergonomic design, reducing user fatigue during prolonged periods of work.
In summary, the Porter-Cable 7536 and 7537 are exemplary tools known for their robust performance, precise adjustments, and innovative features. Whether you're a professional contractor or a DIY enthusiast, these models promise to deliver exceptional results for a wide range of woodworking applications. They stand as a testament to Porter-Cable's commitment to producing high-quality tools that meet the demands of users across various skill levels.