ADJUSTING PLUNGE LOCKING LEVER
You can adjust the plunge locking mechanism to compensate for wear or to reposition lever (in locked position). To adjust:
DISCONNECT TOOL FROM POWER SOURCE.
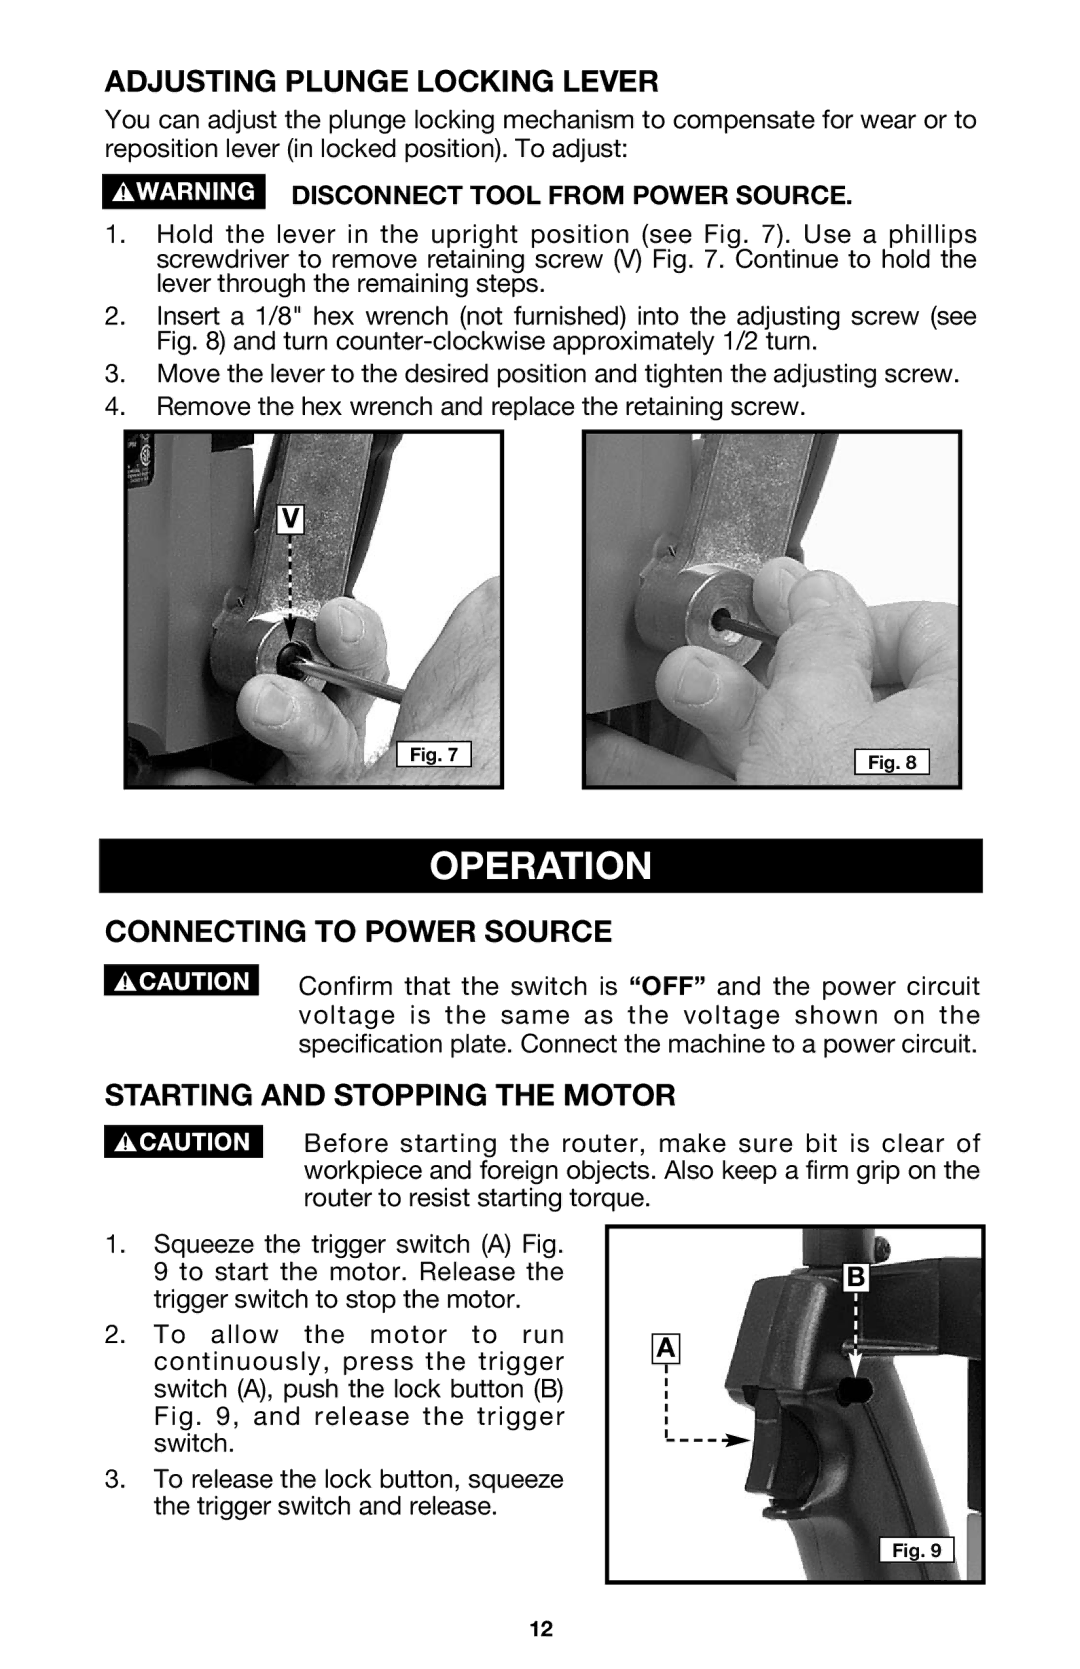
1.Hold the lever in the upright position (see Fig. 7). Use a phillips screwdriver to remove retaining screw (V) Fig. 7. Continue to hold the lever through the remaining steps.
2.Insert a 1/8" hex wrench (not furnished) into the adjusting screw (see Fig. 8) and turn
3.Move the lever to the desired position and tighten the adjusting screw.
4.Remove the hex wrench and replace the retaining screw.
V
Fig. 7 | Fig. 8 |
|
OPERATION
CONNECTING TO POWER SOURCE
Confirm that the switch is “OFF” and the power circuit voltage is the same as the voltage shown on the specification plate. Connect the machine to a power circuit.
STARTING AND STOPPING THE MOTOR
Before starting the router, make sure bit is clear of workpiece and foreign objects. Also keep a firm grip on the router to resist starting torque.
1.Squeeze the trigger switch (A) Fig. 9 to start the motor. Release the trigger switch to stop the motor.
2.To allow the motor to run continuously, press the trigger switch (A), push the lock button (B) Fig. 9, and release the trigger switch.
3.To release the lock button, squeeze the trigger switch and release.
A
B
Fig. 9
12
