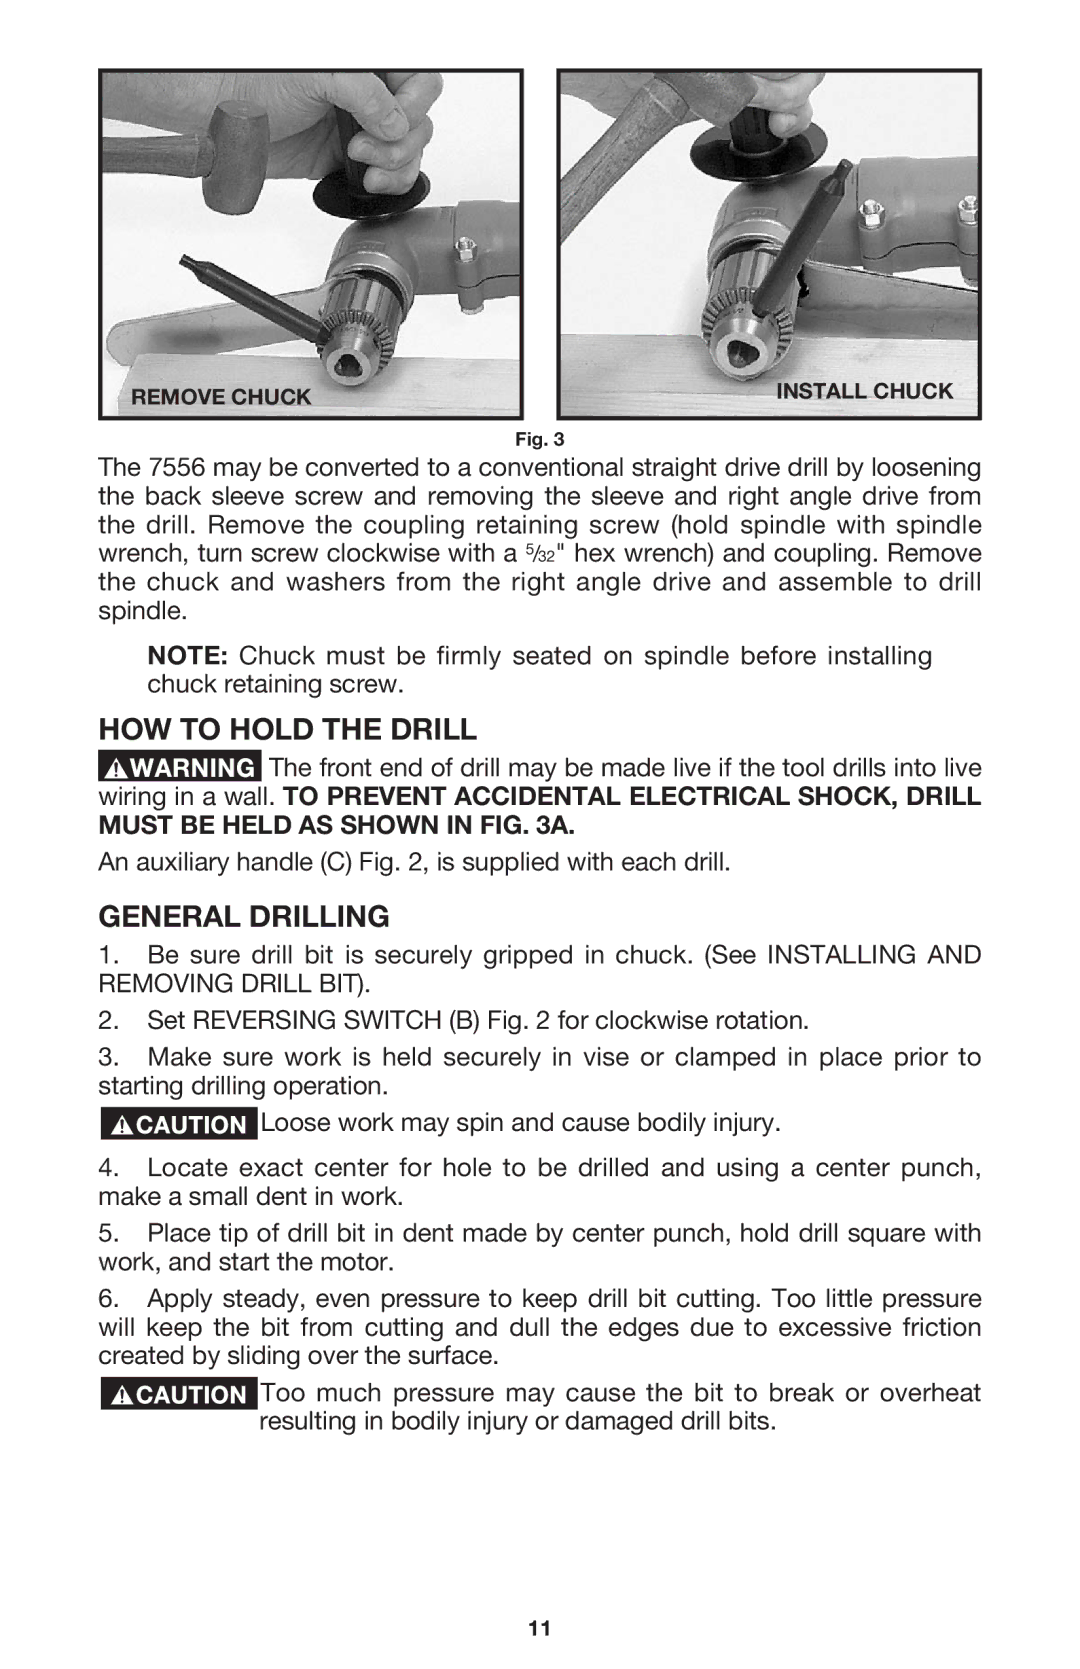
REMOVE CHUCK
INSTALL CHUCK
Fig. 3
The 7556 may be converted to a conventional straight drive drill by loosening the back sleeve screw and removing the sleeve and right angle drive from the drill. Remove the coupling retaining screw (hold spindle with spindle wrench, turn screw clockwise with a 5/32" hex wrench) and coupling. Remove the chuck and washers from the right angle drive and assemble to drill spindle.
NOTE: Chuck must be firmly seated on spindle before installing chuck retaining screw.
HOW TO HOLD THE DRILL
![]() The front end of drill may be made live if the tool drills into live wiring in a wall. TO PREVENT ACCIDENTAL ELECTRICAL SHOCK, DRILL
The front end of drill may be made live if the tool drills into live wiring in a wall. TO PREVENT ACCIDENTAL ELECTRICAL SHOCK, DRILL
MUST BE HELD AS SHOWN IN FIG. 3A.
An auxiliary handle (C) Fig. 2, is supplied with each drill.
GENERAL DRILLING
1.Be sure drill bit is securely gripped in chuck. (See INSTALLING AND REMOVING DRILL BIT).
2.Set REVERSING SWITCH (B) Fig. 2 for clockwise rotation.
3.Make sure work is held securely in vise or clamped in place prior to starting drilling operation.
![]() Loose work may spin and cause bodily injury.
Loose work may spin and cause bodily injury.
4.Locate exact center for hole to be drilled and using a center punch, make a small dent in work.
5.Place tip of drill bit in dent made by center punch, hold drill square with work, and start the motor.
6.Apply steady, even pressure to keep drill bit cutting. Too little pressure will keep the bit from cutting and dull the edges due to excessive friction created by sliding over the surface.
![]() Too much pressure may cause the bit to break or overheat resulting in bodily injury or damaged drill bits.
Too much pressure may cause the bit to break or overheat resulting in bodily injury or damaged drill bits.
11