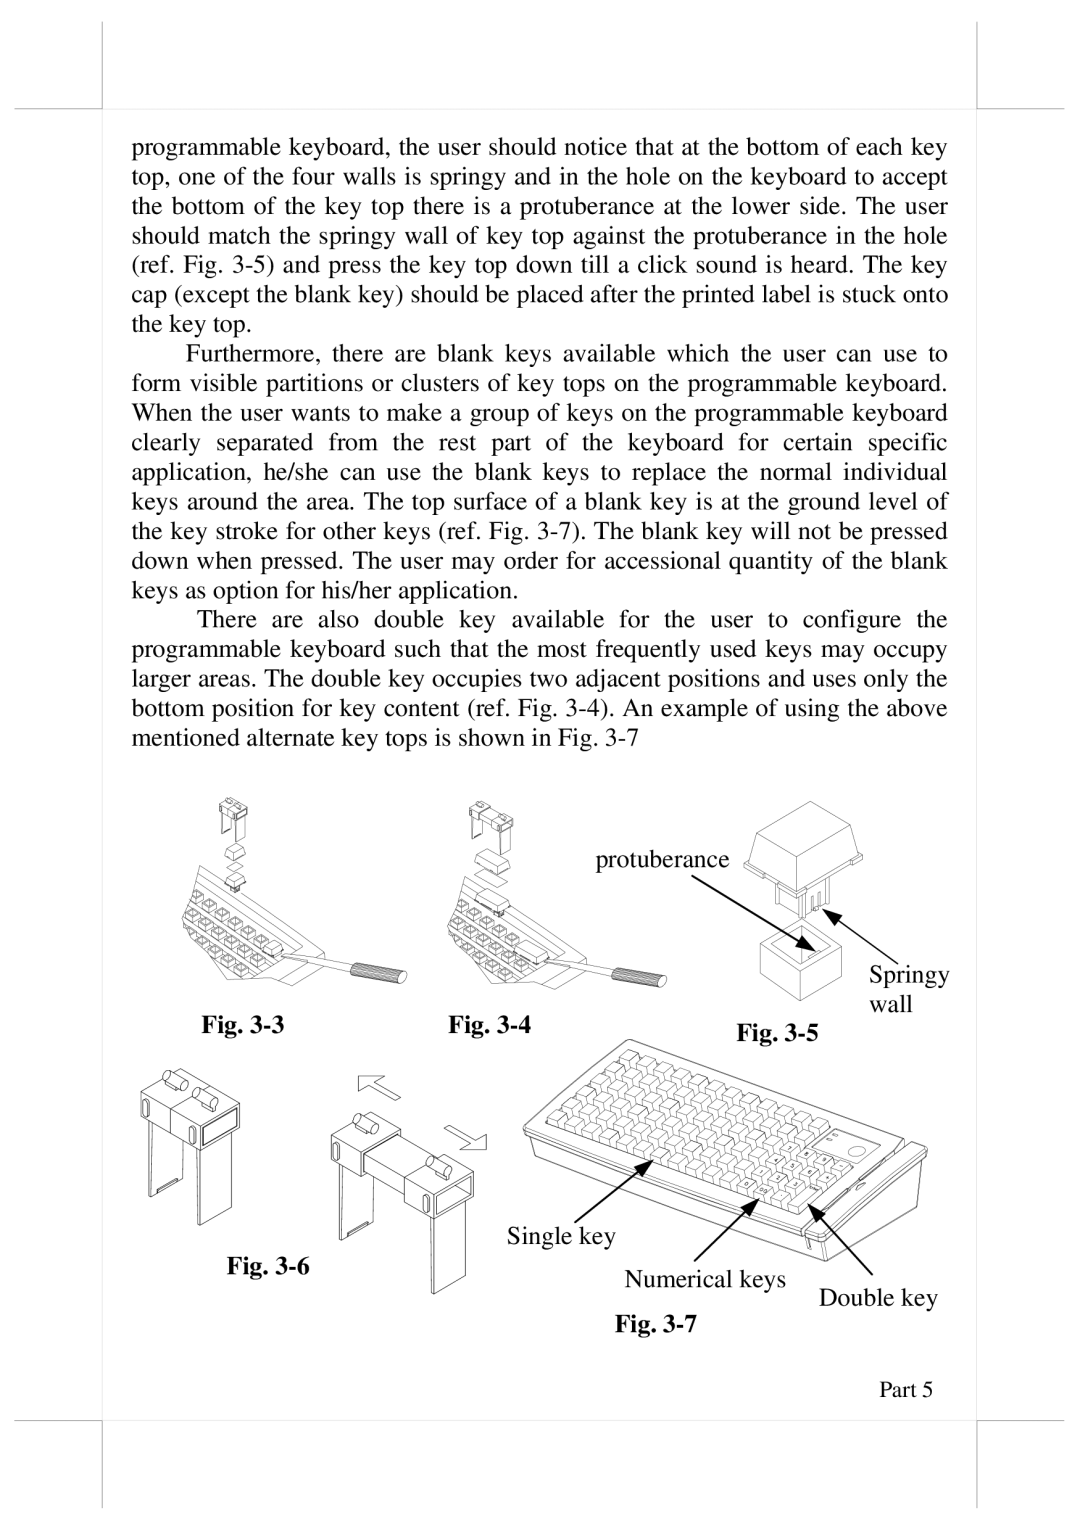
programmable keyboard, the user should notice that at the bottom of each key top, one of the four walls is springy and in the hole on the keyboard to accept the bottom of the key top there is a protuberance at the lower side. The user should match the springy wall of key top against the protuberance in the hole (ref. Fig.
Furthermore, there are blank keys available which the user can use to form visible partitions or clusters of key tops on the programmable keyboard. When the user wants to make a group of keys on the programmable keyboard clearly separated from the rest part of the keyboard for certain specific application, he/she can use the blank keys to replace the normal individual keys around the area. The top surface of a blank key is at the ground level of the key stroke for other keys (ref. Fig.
There are also double key available for the user to configure the programmable keyboard such that the most frequently used keys may occupy larger areas. The double key occupies two adjacent positions and uses only the bottom position for key content (ref. Fig.
protuberance
Fig. | Fig. | Fig. |
Springy wall
Fig.
Single key
Numerical keys
Fig.
Double key