
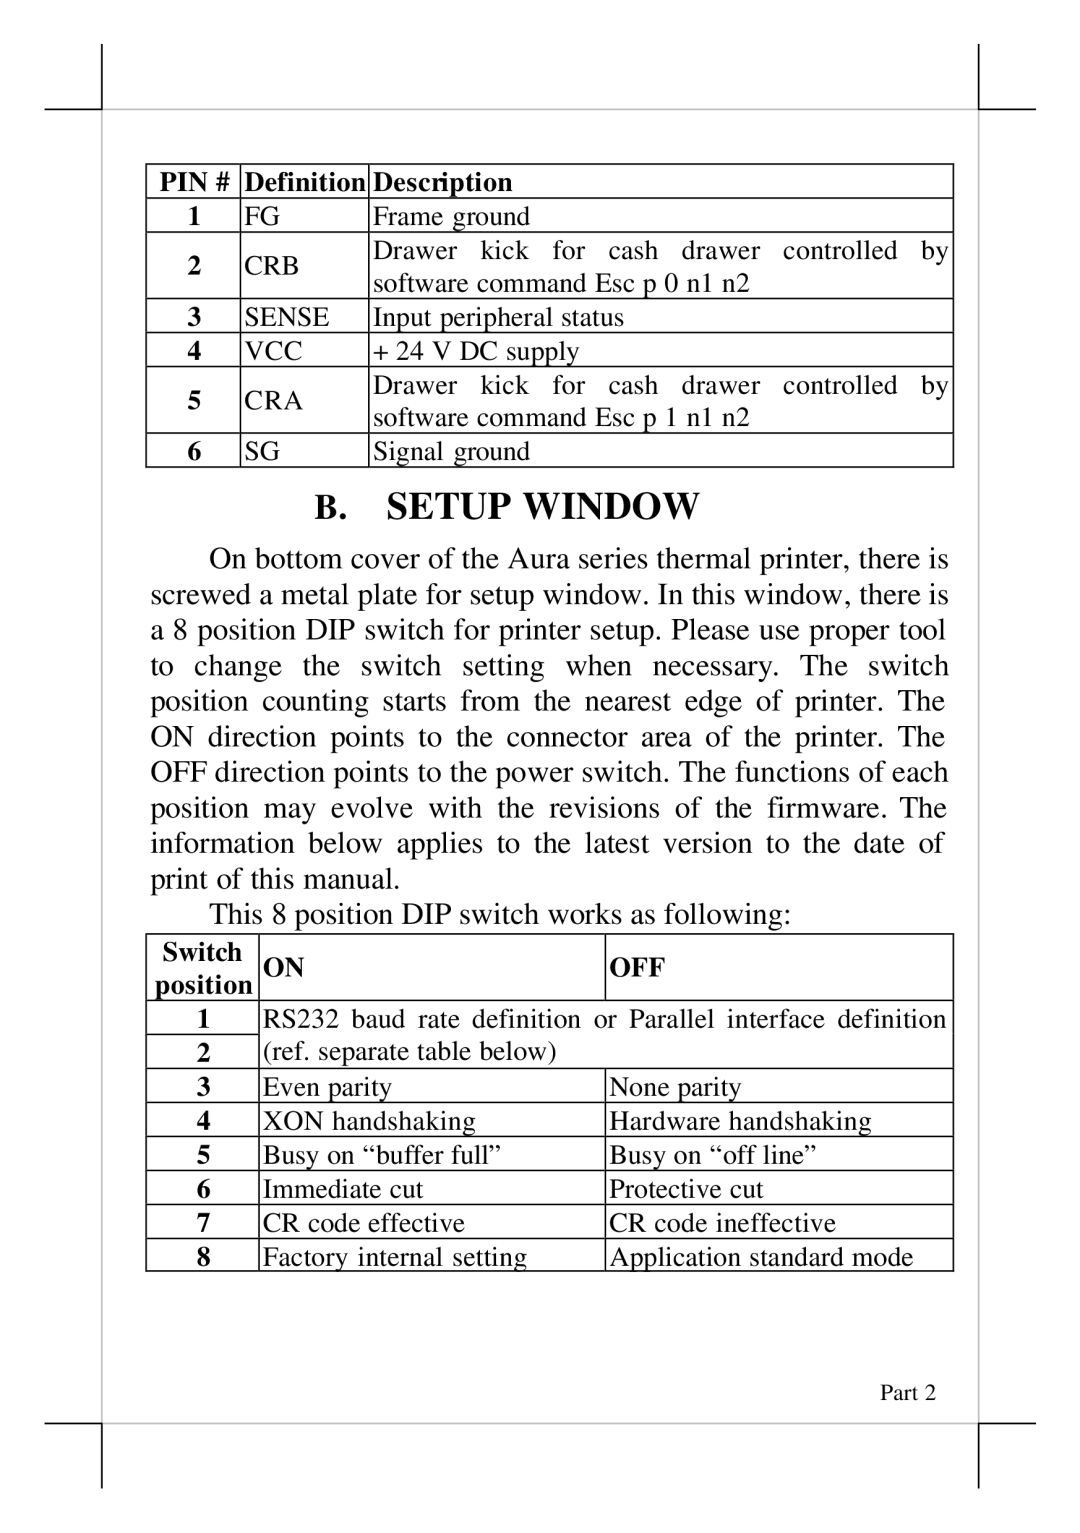
pp-7000-III, aura series thermal printer, pp-7000U-III specifications
The POSIFLEX Business Machines PP-7000U-III, part of the Aura Series, represents a significant advancement in thermal printing technology. Designed specifically for high-demand environments such as retail, hospitality, and various business sectors, this printer combines reliability with superior performance, making it an ideal choice for those who need fast and efficient printing solutions.One of the standout features of the PP-7000U-III is its high-speed printing capability. With a printing speed of up to 250mm per second, it ensures that transactions are processed quickly, reducing wait times for customers. This speed is complemented by a high-resolution print output of 203 DPI, allowing for crisp and clear text and graphics, which is essential for producing quality receipts, tickets, and labels.
The printer employs advanced thermal printing technology, eliminating the need for ink or ribbons, which not only reduces maintenance costs but also enhances overall efficiency. This technology allows for quieter operation, making it suitable for environments where noise reduction is essential.
In terms of connectivity, the PP-7000U-III offers multiple options, including USB, Ethernet, and Bluetooth interfaces. This versatility allows businesses to integrate the printer seamlessly into their existing systems, ensuring compatibility with various point-of-sale software and hardware setups. The inclusion of an easy-to-use, user-friendly interface also makes it simpler for staff to operate and maintain the printer.
The Aura Series printers are known for their robust build quality and durability. The PP-7000U-III is designed to withstand frequent use in demanding environments, featuring a compact design that saves space while maintaining a professional appearance. Its durable casing protects against dust and accidental spills, which can be common in busy settings.
The printer also incorporates advanced features such as an auto-cutter and a paper-saving function, which optimize the printing process and reduce waste. The sensors for paper end and paper near-end alerts help ensure that the printer runs smoothly without interruptions, allowing for continuous operation during peak hours.
In summary, the POSIFLEX Business Machines PP-7000U-III in the Aura Series is a versatile, high-performance thermal printer designed for modern business needs. Its combination of speed, quality, and reliable operation, along with user-friendly features, makes it an excellent choice for retailers and service providers looking to enhance their printing capabilities. The PP-7000U-III is a testament to POSIFLEX's commitment to innovation and quality in the business technology sector.