OPERATION
•Make sure spark plug wire is properly connected.
•Move shift lever indicator to “N” (neutral) position.
•Place throttle control in “FAST” position.
•Turn fuel
•Move choke control to choke position.
•Grasp recoil starter handle with one hand and grasp tiller handle with other hand. Pull rope out slowly until engine reaches start of compression cycle (rope will pull slightly harder at this point).
•Pull recoil starter handle quickly. Do not let starter handle snap back against starter.
•If engine fires but does not start, move choke control to half choke position. Pull recoil starter handle until engine starts.
•When engine starts, slowly move choke control to "RUN" position as engine warms up.
NOTE: A warm engine requires less choking to start.
•Move throttle control to desired running position.
•Allow engine to warm up for a few minutes before engaging tines.
NOTE: If at a high altitude (3000 feet) or in cold temperatures (below 32°F), the carburetor fuel mixture may need to be adjusted for best engine performance. See "TO ADJUST CARBURETOR" in the Service and Adjustments section of this manual.
NOTE: If engine does not start, see troubleshooting points.
CHOKE CONTROL
RUN | CHOKE |
RECOIL STARTER | ngin |
|
| e |
|
HANDLE | e_ | |
| art_ | |
|
| 71 |
FIG. 13
TILLING HINTS
CAUTION: Until you are accustomed to handling your tiller, start actual field use with throttle in slow position
•Tilling is digging into, turning over, and breaking up packed soil before planting. Loose, unpacked soil helps root growth. Best tilling depth is 4" to 6"
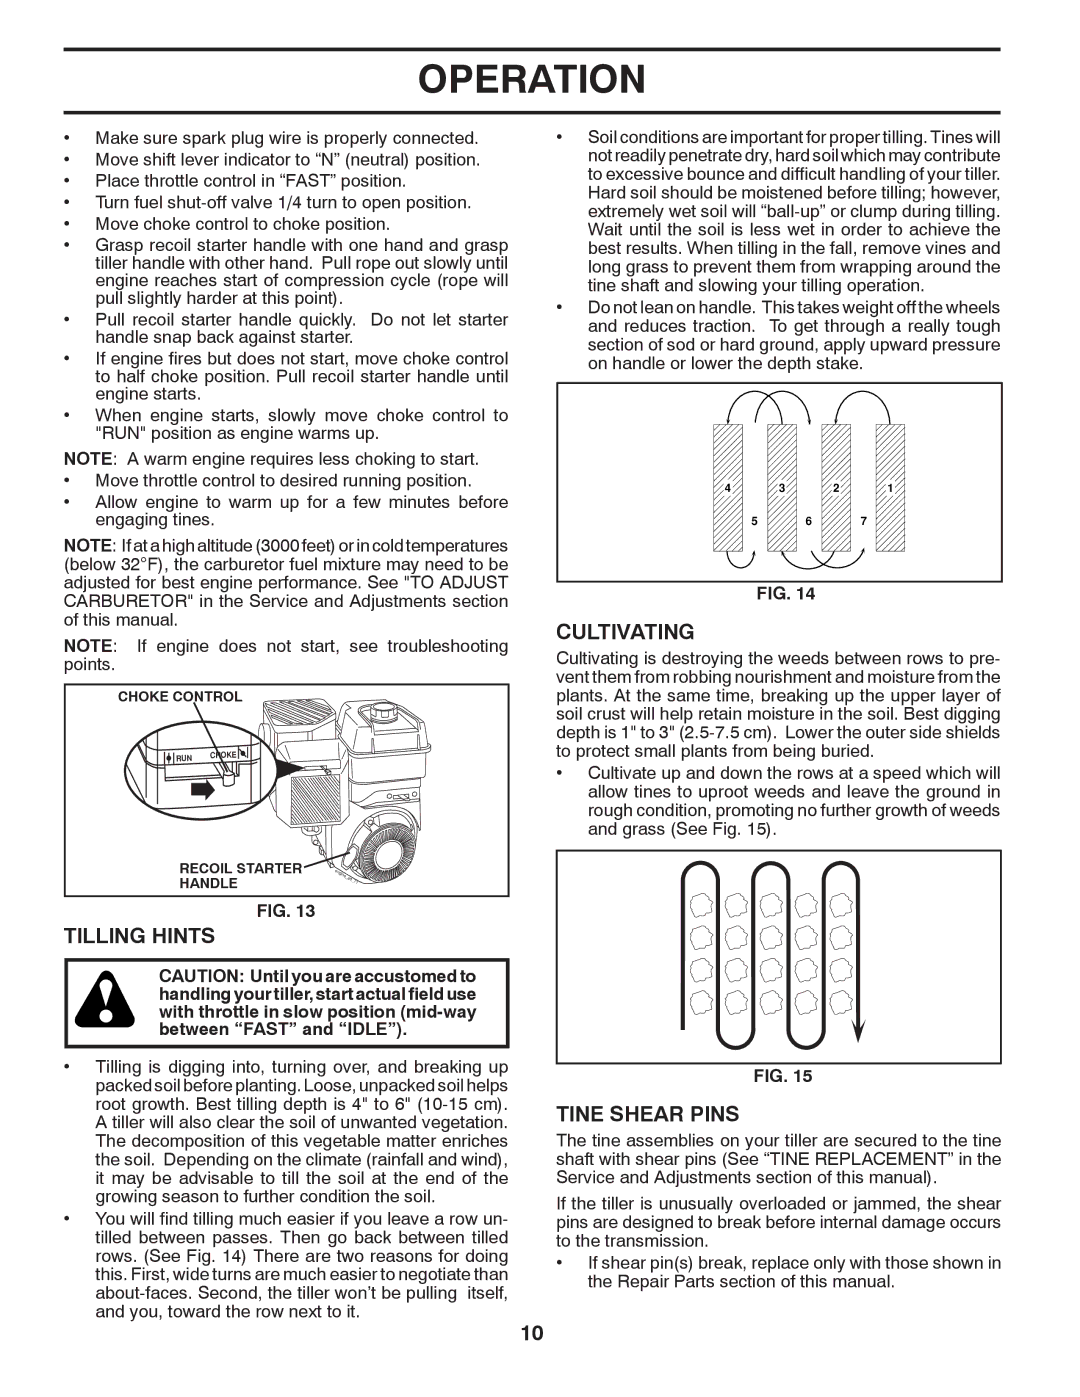
•You will find tilling much easier if you leave a row un- tilled between passes. Then go back between tilled rows. (See Fig. 14) There are two reasons for doing this. First, wide turns are much easier to negotiate than
and you, toward the row next to it.
•Soil conditions are important for proper tilling. Tines will not readily penetrate dry, hard soil which may contribute to excessive bounce and difficult handling of your tiller. Hard soil should be moistened before tilling; however, extremely wet soil will
•Do not lean on handle. This takes weight off the wheels and reduces traction. To get through a really tough section of sod or hard ground, apply upward pressure on handle or lower the depth stake.
4 | 3 | 2 | 1 |
5 | 6 |
| 7 |
FIG. 14
CULTIVATING
Cultivating is destroying the weeds between rows to pre- vent them from robbing nourishment and moisture from the plants. At the same time, breaking up the upper layer of soil crust will help retain moisture in the soil. Best digging depth is 1" to 3"
•Cultivate up and down the rows at a speed which will allow tines to uproot weeds and leave the ground in rough condition, promoting no further growth of weeds and grass (See Fig. 15).
FIG. 15
TINE SHEAR PINS
The tine assemblies on your tiller are secured to the tine shaft with shear pins (See “TINE REPLACEMENT” in the Service and Adjustments section of this manual).
If the tiller is unusually overloaded or jammed, the shear pins are designed to break before internal damage occurs to the transmission.
•If shear pin(s) break, replace only with those shown in the Repair Parts section of this manual.
10