
530086596, 2001-08 specifications
The Poulan 2001-08,530086596 is a robust and versatile addition to the line of outdoor power equipment. Known for its reliability and performance, this tool is particularly favored by both homeowners and landscaping professionals.One of its standout features includes a powerful engine designed for efficient operation in various tasks. The engine typically provides ample horsepower, making it suitable for cutting through thick underbrush and handling a range of yard maintenance jobs. The reliable ignition system further enhances starting efficiency, allowing users to get to work without the frustration of engine troubles.
The Poulan 2001-08,530086596 also comes with an ergonomic design that emphasizes user comfort. Its lightweight build allows for ease of movement, reducing fatigue during extended use. The handle is designed for a secure grip, which is particularly important for maintaining control while operating the equipment. The overall construction emphasizes both durability and functionality, ensuring that the tool can withstand the rigors of outdoor use.
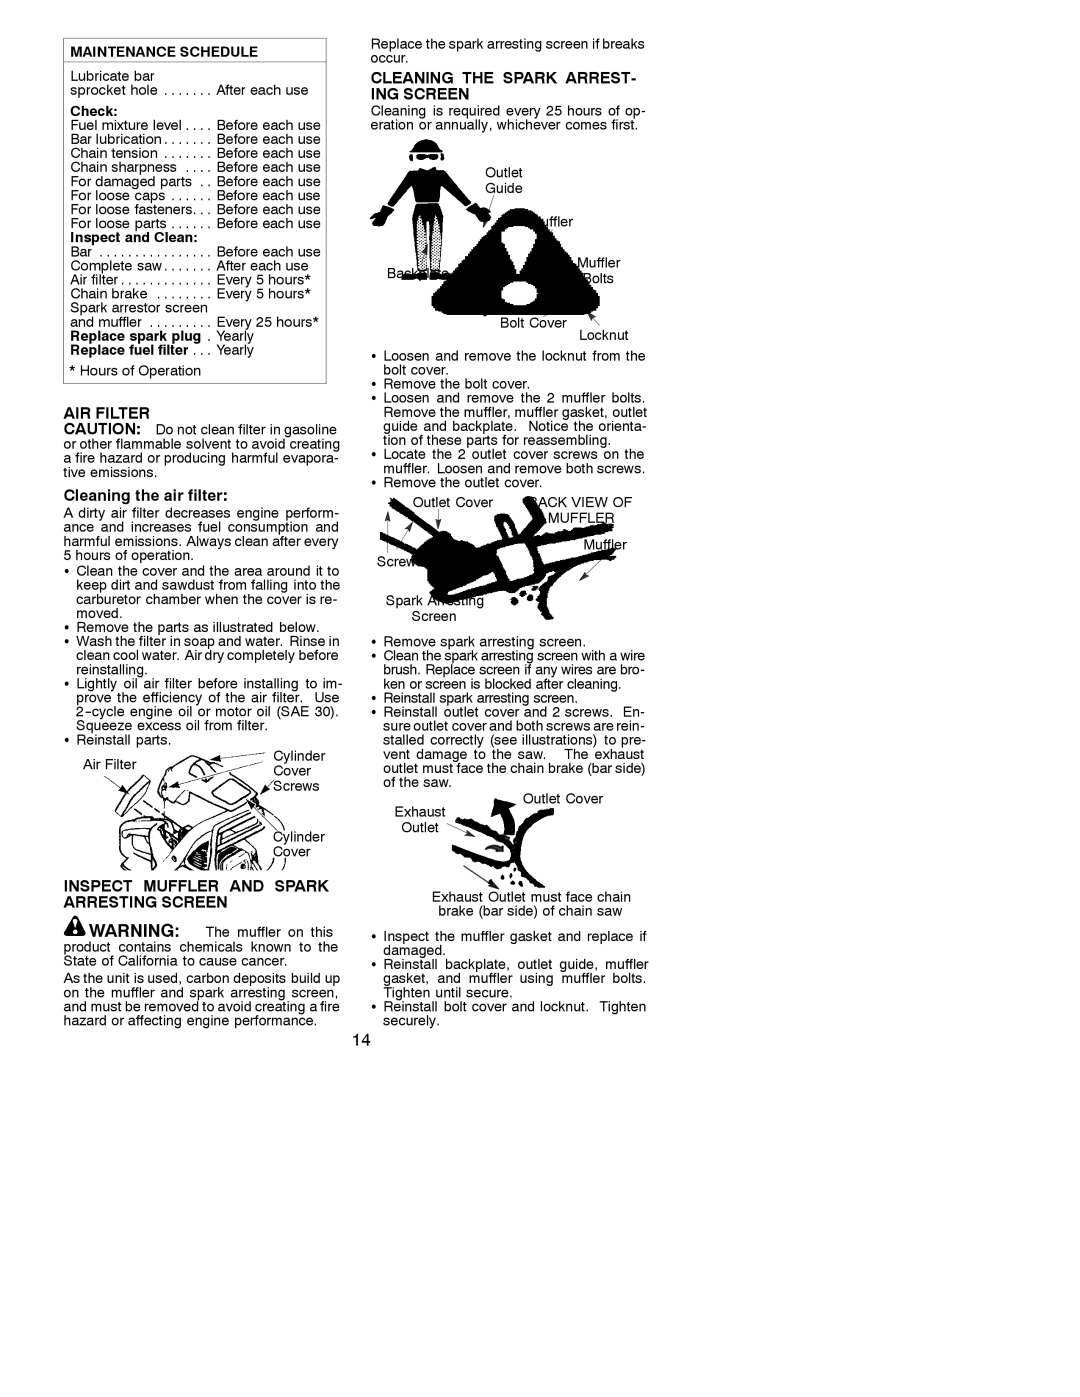
In terms of technology, this model incorporates advanced features that enhance its usability. The inclusion of automatic oiling systems is a notable advantage, providing consistent lubrication to the cutting mechanisms. This feature minimizes maintenance efforts, allowing users to focus on the task at hand rather than worrying about upkeep.
The cutting capabilities of the Poulan 2001-08,530086596 are particularly impressive. It typically features adjustable cutting heights, allowing users to customize the length of grass or brush they are dealing with. This flexibility is essential for achieving professional-quality results in yard care projects.
Safety has not been overlooked in the design of the Poulan 2001-08,530086596. It is equipped with safety mechanisms that prevent accidental starts and ensure secure operation. Such features are critical in maintaining safe working conditions, especially in environments where users may encounter hazardous debris.
In summary, the Poulan 2001-08,530086596 stands out for its powerful engine, ergonomic design, advanced technology, versatile cutting capabilities, and safety features. Whether you are a homeowner looking to maintain your garden or a professional landscaper handling large projects, this equipment provides the performance and reliability necessary to tackle the challenges of outdoor maintenance effectively.