SERVICE
![]() WARNING: Disconnect the spark plug before performing maintenance except for carburetor adjustments.
WARNING: Disconnect the spark plug before performing maintenance except for carburetor adjustments.
We recommend all service and adjustments not listed in this manual be performed by an authorized or Master Service Dealer.
HELPFUL TIP
IMPORTANT: Have all
repairs other than the rec- ommended maintenance described in the instruction manual performed by an authorized service dealer.
If any dealer other than an authorized service dealer performs work on the product, Electrolux Home Products, Inc., may not pay for repairs under war- ranty. It is your responsibility to maintain and perform general maintenance.
MAINTENANCE SCHEDULE
Check:
Fuel mixture level . . . . Before each use Bar lubrication . . . . . . . Before each use Chain tension . . . . . . . Before each use Chain sharpness . . . . . Before each use For damaged parts . . . Before each use For loose caps . . . . . . Before each use For loose fasteners . . . Before each use For loose parts . . . . . . Before each use
Inspect and Clean:
Bar . . . . . . . . . . . . . . . . Before each use Complete saw . . . . . . . After each use Air filter . . . . . . . . . . . . . Every 5 hours* Chain brake . . . . . . . . . Every 5 hours* Spark arresting screen
and muffler . . . . . . . . . . Every 25 hours* Replace spark plug . Yearly Replace fuel filter . . . Yearly
*Hours of Operation
Each hour of operation is approximately 2 tanks of fuel.
GENERAL RECOMMENDATIONS
The warranty on this unit does not cover items that have been subjected to operator abuse or negligence. To receive full value from the warranty, the operator must main- tain unit as instructed in this manual. Various adjustments will need to be made periodical- ly to properly maintain your unit.
SOnce a year, replace the spark plug, air filter, and check guide bar and chain for wear. A new spark plug and air filter assures proper
CHECK FOR DAMAGED OR WORN PARTS
Contact an authorized service dealer for re- placement of damaged or worn parts.
NOTE: It is normal for a small amount of oil to appear under the saw after engine stops. Do not confuse this with a leaking oil tank.
S ON/STOP Switch
S Fuel Tank
SOil Tank
CHECK FOR LOOSE
FASTENERS AND PARTS
SBar Nuts S Chain
S Muffler
S Cylinder Shield S Air Filter
S Handle Screws S Vibration Mounts S Starter Housing S Front Hand Guard
CHECK CHAIN SHARPNESS
A sharp chain makes wood chips. A dull chain makes a sawdust powder and cuts slowly. See CHAIN SHARPENING.
CHECK GUIDE BAR
Conditions which require guide bar mainte- nance:
SSaw cuts to one side or at an angle. S Saw has to be forced through the cut. S Inadequate supply of oil to bar/chain.
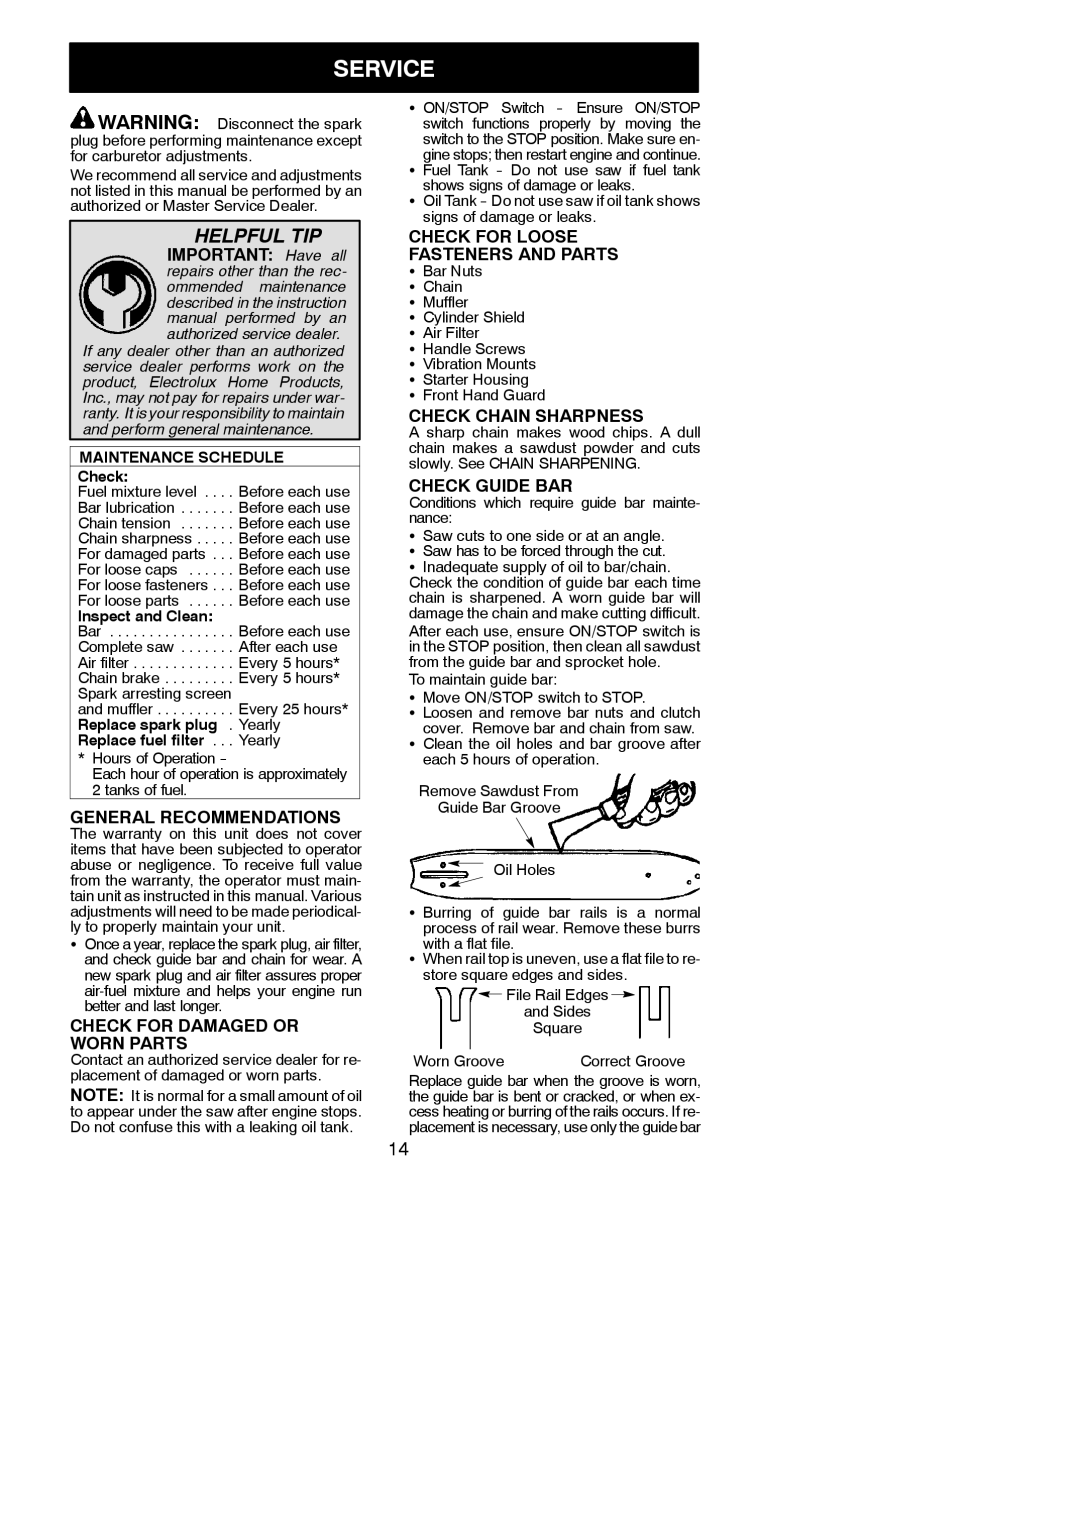
Check the condition of guide bar each time chain is sharpened. A worn guide bar will damage the chain and make cutting difficult. After each use, ensure ON/STOP switch is in the STOP position, then clean all sawdust from the guide bar and sprocket hole.
To maintain guide bar:
S Move ON/STOP switch to STOP.
S Loosen and remove bar nuts and clutch cover. Remove bar and chain from saw.
S Clean the oil holes and bar groove after each 5 hours of operation.
Remove Sawdust From
Guide Bar Groove
Oil Holes
S Burring of guide bar rails is a normal process of rail wear. Remove these burrs with a flat file.
SWhen rail top is uneven, use a flat file to re- store square edges and sides.
File Rail Edges ![]()
and Sides
Square
Worn Groove | Correct Groove |
Replace guide bar when the groove is worn, the guide bar is bent or cracked, or when ex- cess heating or burring of the rails occurs. If re- placement is necessary, use only the guide bar
14