Always release the trigger switch as soon as the cut is completed, allowing the motor to stop. Keep the cord away from the cutting area. Position cord so it will not be caught on branches and the like during cutting.
PRUNING
![]() WARNING: Be alert for and guard against kickback. Do not allow the moving chain to contact any other branches or ob- jects at the nose of the guide bar when prun- ing. Allowing such contact can result in seri- ous injury.
WARNING: Be alert for and guard against kickback. Do not allow the moving chain to contact any other branches or ob- jects at the nose of the guide bar when prun- ing. Allowing such contact can result in seri- ous injury.
IMPORTANT POINTS
SWork slowly, keeping both hands firmly gripped on the pruner. Maintain secure footing and balance.
SPlan cut carefully. Check direction branch will fall.
SWatch out for springpoles. Springpoles are small size limbs which can catch the chain and whip toward you or pull you off balance.
Use extreme caution when cutting small size limbs or slender material.
SWatch out for branches immediately be- hind the branch being pruned. If the chain hits the rear branch, damage to the unit
may occur.
SBe alert for springback. Watch out for branches that are bent or under pressure. Avoid being struck by the branch or the
pruner when the tension in the wood fi- bers is released.
SKeep a clear work area. Frequently clear branches out of the way to avoid tripping over them.
SLong branches should be removed in several pieces.
PRUNING TECHNIQUE
When ready to cut, squeeze trigger switch and allow unit to reach full speed. Apply a light cutting pressure. DO NOT use back and forth sawing action.
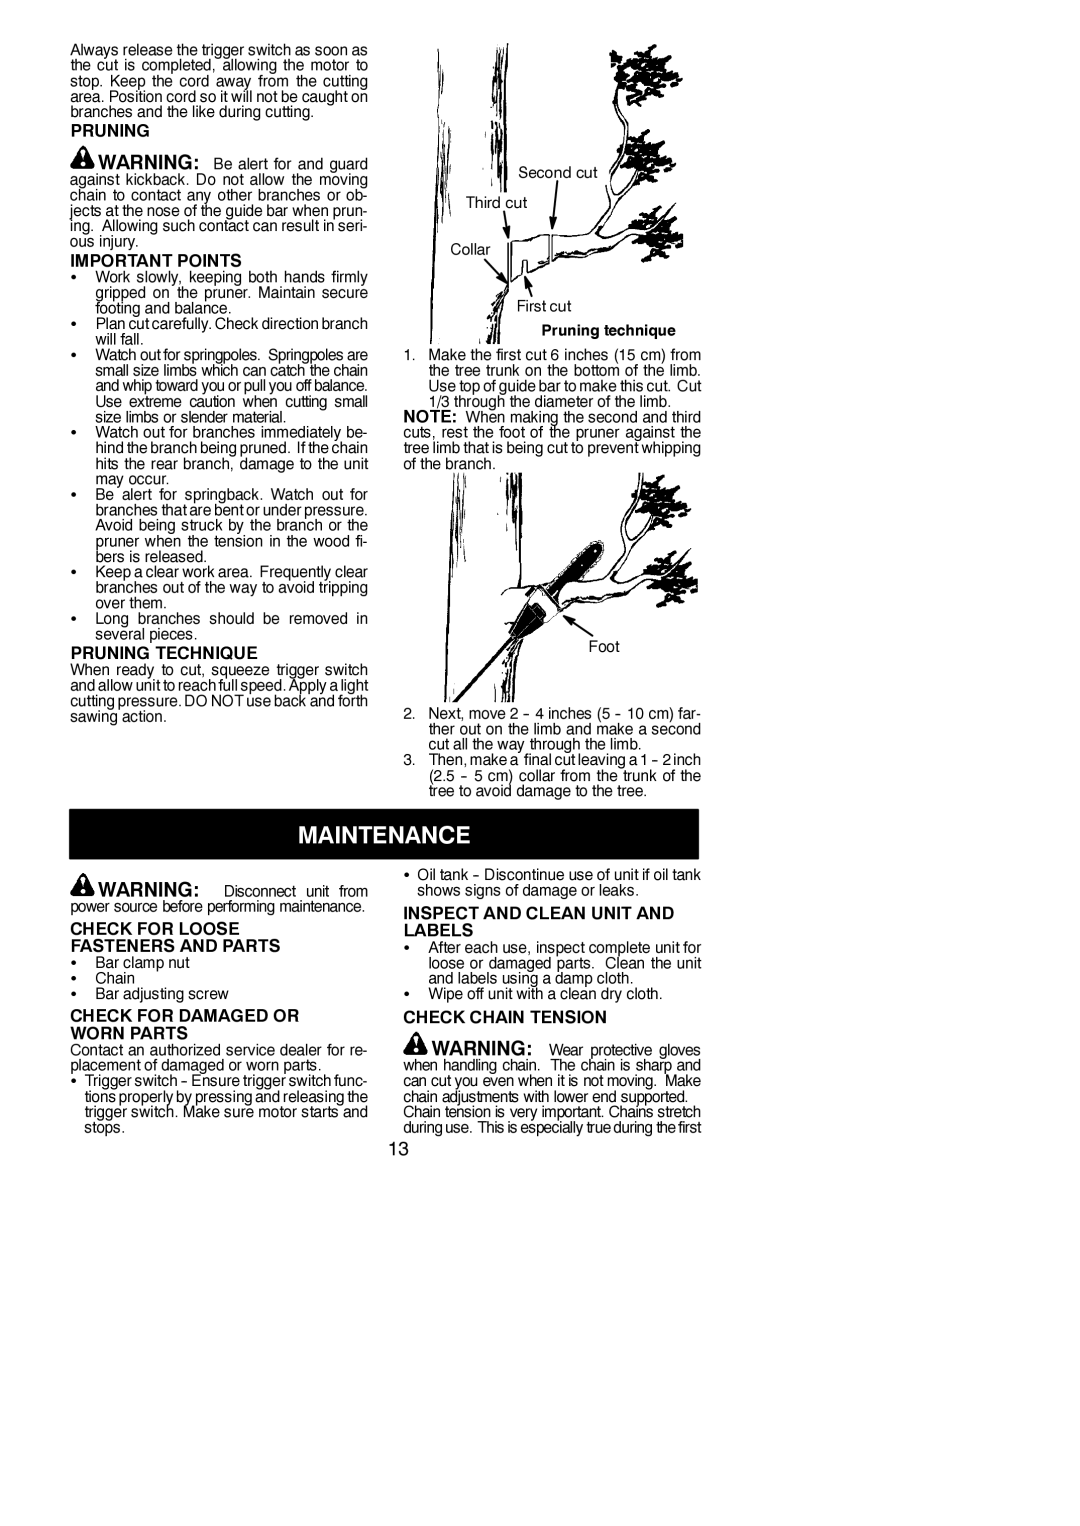
Second cut
Third cut
Collar ![]()
First cut
Pruning technique
1.Make the first cut 6 inches (15 cm) from the tree trunk on the bottom of the limb. Use top of guide bar to make this cut. Cut
1/3 through the diameter of the limb. NOTE: When making the second and third cuts, rest the foot of the pruner against the tree limb that is being cut to prevent whipping of the branch.
Foot
2.Next, move 2
3.Then, make a final cut leaving a 1
MAINTENANCE
![]() WARNING: Disconnect unit from power source before performing maintenance.
WARNING: Disconnect unit from power source before performing maintenance.
CHECK FOR LOOSE
FASTENERS AND PARTS
SBar clamp nut S Chain
S Bar adjusting screw
CHECK FOR DAMAGED OR WORN PARTS
Contact an authorized service dealer for re- placement of damaged or worn parts.
STrigger switch
SOil tank
INSPECT AND CLEAN UNIT AND LABELS
SAfter each use, inspect complete unit for loose or damaged parts. Clean the unit
and labels using a damp cloth.
SWipe off unit with a clean dry cloth.
CHECK CHAIN TENSION
![]() WARNING: Wear protective gloves when handling chain. The chain is sharp and can cut you even when it is not moving. Make chain adjustments with lower end supported.
WARNING: Wear protective gloves when handling chain. The chain is sharp and can cut you even when it is not moving. Make chain adjustments with lower end supported.
Chain tension is very important. Chains stretch during use. This is especially true during the first
13