ASSEMBLY
RETAINER
SPRING
PIN
SHOULDER
BOLT
ADJUSTING
BAR
GAUGE |
|
|
WHEEL | 3/8 WASHER | |
| ||
| LOCKNUT | |
|
|
FIG. 4
I M P O R T A N T : F O R S H I P P I N G P U R P O S E S , T H E MULCHER PLATE WAS PREATTACHED TO YOUR MOWER. THE MULCHER PLATE MUST ONLY BE USED WITH THE MULCHING BLADES THAT CAME PACKED SEPARATELY IN THE CARTON.
YOUR MOWER CAME FACTORY EQUIPPED WITH HIGH PERFORMANCE BLADES, WHICH ARE THE BEST BLADES FOR BAGGING AND DISCHARGING. TO USE YOUR MOWER WITH THE HIGH PERFORMANCE BLADES THE MULCHER PLATE MUST BE REMOVED FROM THE MOWER (SEE FIG. 5).
TO SET UP YOUR MOWER FOR MULCHING (See Fig. 5)
•Turn the mower over to allow access to blades.
•Remove hex bolt, lock washer and flat washer and remove high performance blades. Store in safe place.
•Install mulcher blades with trailing edge up towards deck as shown.
IMPORTANT: TO ENSURE PROPER ASSEMBLY, CENTER HOLE IN BLADE MUST ALIGN WITH STAR ON MANDREL ASSEMBLY.
•Reassemble hex bolt, lock washer and flat washer in exact order as shown.
•Tighten bolt securely
IMPORTANT: BLADE BOLT IS GRADE 8 HEAT TREATED.
•Install mulcher plate if previously removed.
TRAILING EDGE UP | MANDREL |
| ASSEMBLY |
BLADE
CENTER
HOLE
FLAT
WASHER
HEX BOLT | STAR | |
(GRADE 8)* | ||
|
LOCK
WASHER
*A GRADE 8 HEAT TREATED BOLT CAN BE IDENTIFIED BY SIX LINES ON THE BOLT HEAD.
FIG. 5
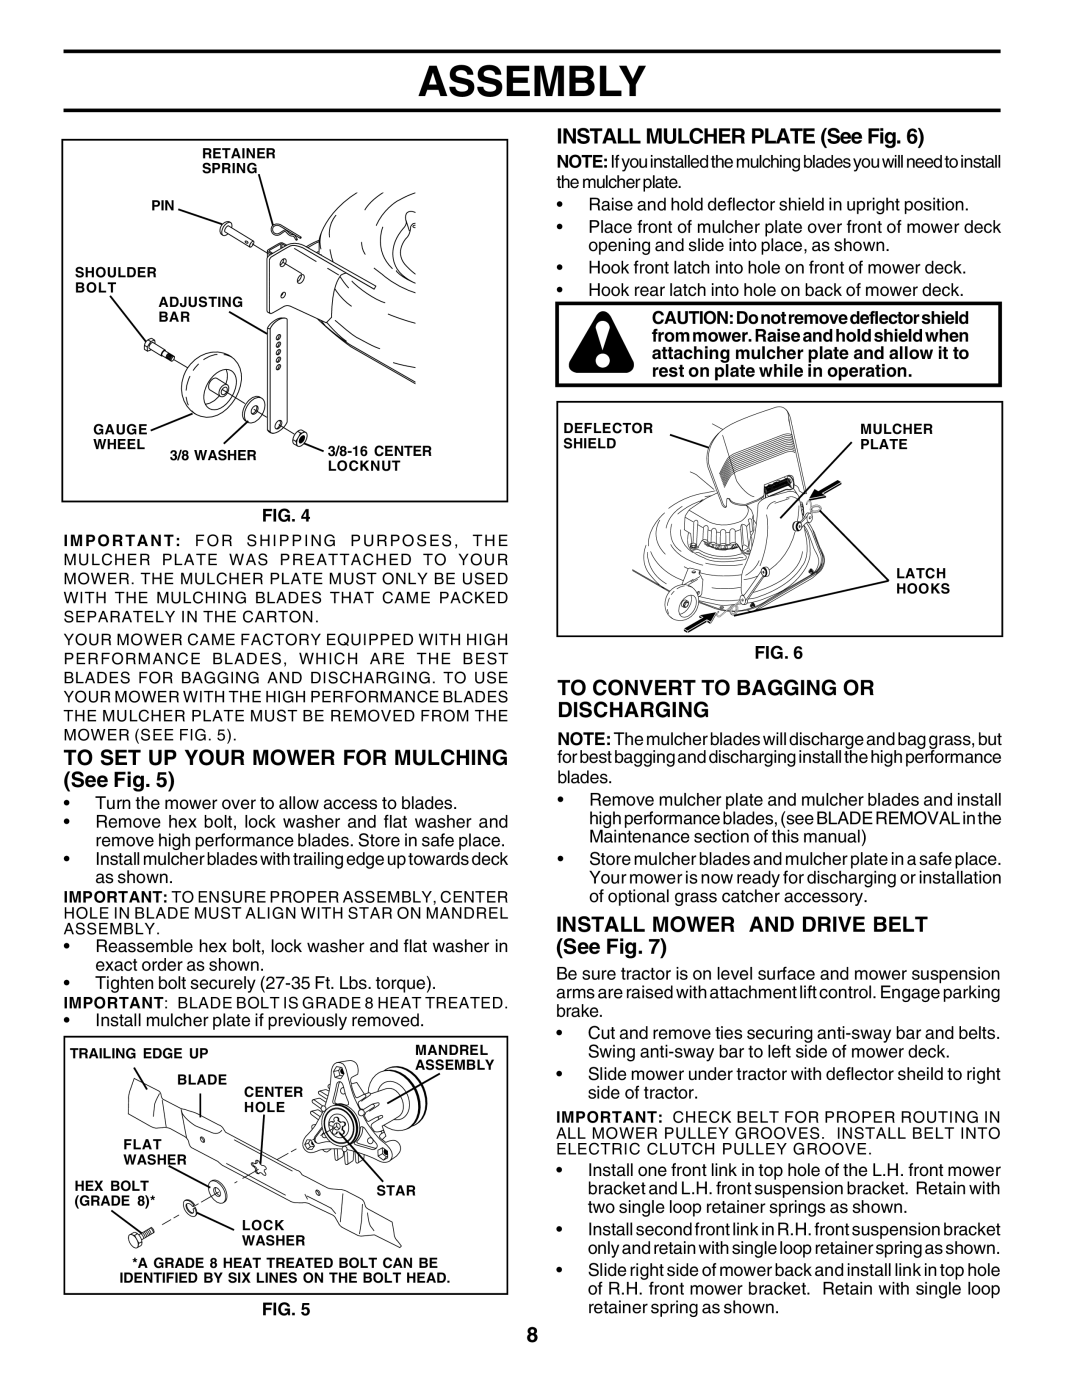
INSTALL MULCHER PLATE (See Fig. 6)
NOTE: If you installed the mulching blades you will need to install the mulcher plate.
•Raise and hold deflector shield in upright position.
•Place front of mulcher plate over front of mower deck opening and slide into place, as shown.
•Hook front latch into hole on front of mower deck.
•Hook rear latch into hole on back of mower deck.
CAUTION:Donotremovedeflectorshield from mower. Raise and hold shield when attaching mulcher plate and allow it to rest on plate while in operation.
DEFLECTOR | MULCHER |
SHIELD | PLATE |
| LATCH |
| HOOKS |
FIG. 6
TO CONVERT TO BAGGING OR
DISCHARGING
NOTE: The mulcher blades will discharge and bag grass, but for best bagging and discharging install the high performance
blades.
•Remove mulcher plate and mulcher blades and install high performance blades, (see BLADE REMOVAL in the Maintenance section of this manual)
•Store mulcher blades and mulcher plate in a safe place. Your mower is now ready for discharging or installation of optional grass catcher accessory.
INSTALL MOWER AND DRIVE BELT (See Fig. 7)
Be sure tractor is on level surface and mower suspension arms are raised with attachment lift control. Engage parking brake.
•Cut and remove ties securing
•Slide mower under tractor with deflector sheild to right side of tractor.
IMPORTANT: CHECK BELT FOR PROPER ROUTING IN ALL MOWER PULLEY GROOVES. INSTALL BELT INTO ELECTRIC CLUTCH PULLEY GROOVE.
•Install one front link in top hole of the L.H. front mower bracket and L.H. front suspension bracket. Retain with two single loop retainer springs as shown.
•Install second front link in R.H. front suspension bracket only and retain with single loop retainer spring as shown.
•Slide right side of mower back and install link in top hole of R.H. front mower bracket. Retain with single loop retainer spring as shown.
8