2.With a 3/8" wrench, reach through the motor opening in the stand and tighten the square head setscrew (A, Figure 8) into the groove of the shaft. (NOTE: The groove will be in the proper position if the end of the shaft is made flush with the opposite side of the trunnion hole.) Then tighten the hex nut (B, Figure 8) up against the trunnion.

3.The upright member of the rear splitter support (C, Figure 9) must be oriented toward the right of the shaft, as observed from the rear of the saw.

4.Mount the splitter assembly to the two adjusting screws. See Figure 9. Place the two flanges of the splitter assembly onto the screws as shown. Snug the screws. (NOTE: Make sure the front shield (D, Figure 9) faces in toward the blade)

5.The splitter and guard assembly must be aligned with the blade before operating the saw. Adjust the splitter according to the directions on page 13, "Splitter Alignment."

Motor Cover

1.Locate the two 1/4-20 self tapping sheet metal screws and install them in the punched holes on the saw cabinet. Do not screw down all the way, but leave the heads about 1/4" from the surface. See Figure 10.

2.Lift the motor cover over these screws with the cover's bottom lip inside the saw's cabinet.

3.Tighten the two screws.

Figure 9

Figure 10

Grounding Instructions

Electrical connections must be made by a qualified electrician in compliance with all relevant codes. This machine must be properly grounded to help prevent electrical shock and possible fatal injury.

A power plug is not provided with the Model 66. You may either connect the proper UL/CSA listed plug or “hardwire” the machine directly to your electrical panel provided there is a disconnect near the machine for the operator. Consult electrical drawings on pages 33-36 for further clarification of wiring setup.

This machine must be grounded. Grounding provides a path of least resistance to help divert current away from the operator in case of electrical malfunction.

Recommended Gauges (AWG) of Extension Cords


Extension Cord Length *


Amps

25

50

75

100

150

200

feet

feet

feet

feet

feet

feet


< 5

16

16

16

14

12

12


5 to 8

16

16

14

12

10

NR


8 to 12

14

14

12

10

NR

NR


12 to 15

12

12

10

10

NR

NR


15 to 20

10

10

10

NR

NR

NR


21 to 30

10

NR

NR

NR

NR

NR


*based on limiting the line voltage drop to 5V at 150% of the rated amperes.

NR: Not Recommended.

Figure 11

10

Page 10
Image 10
Powermatic 66 operating instructions Grounding Instructions, Motor Cover

66 specifications

The Powermatic 66 is an iconic table saw that has earned a reputation for excellence among woodworkers and professionals alike. Introduced in the mid-20th century, this machine combines finely crafted engineering with user-friendly features, making it a staple in many workshops.

One of the standout features of the Powermatic 66 is its robust 3-horsepower motor. This powerful motor not only ensures efficient cutting but also provides the necessary torque for handling dense hardwoods and other tough materials. The motor is paired with a precision-ground cast-iron tabletop, which measures a generous 27 inches by 40 inches, providing ample workspace for larger projects while delivering stability and reducing vibration during operation.

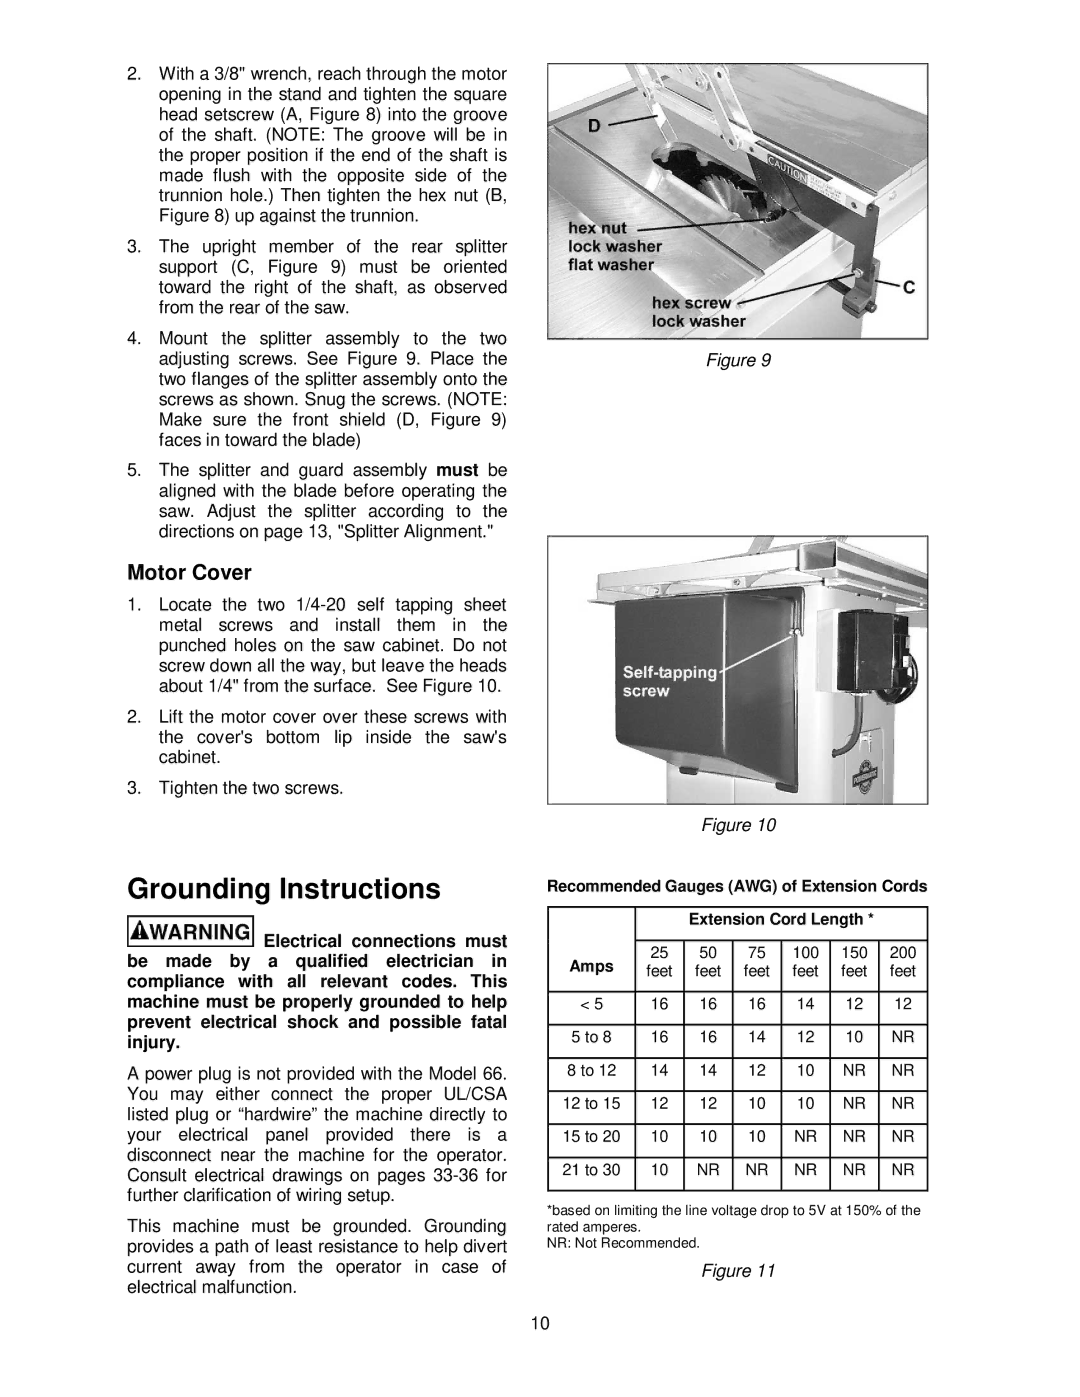
The saw's design incorporates a unique cabinet-style base that offers exceptional durability and strength. The all-steel construction enhances rigidity, which aids in achieving precise cuts. Additionally, the heavy-duty base includes storage for accessories and blades, catering to the needs of woodworkers who value organization and convenience.

Another key feature of the Powermatic 66 is its advanced fence system, the Biesemeyer-style fence. Known for its accuracy, this fence glides smoothly along the rails and can be easily adjusted to different widths. It locks securely in place, allowing for repeatable cuts and maximum efficiency. The measuring scale is clearly marked, further enhancing usability.

The saw also boasts a 10-inch blade, capable of cutting through a variety of material thicknesses. The Blade Enclosure System allows for easier access when changing blades and minimizes dust buildup, which is critical for maintaining a clean work environment.

Safety is prioritized with features that include an anti-kickback pawl system and a blade guard, ensuring a reduced risk of accidents during operation. The Powermatic 66’s ingenuity extends to its dust collection capabilities, with an integrated port designed to work efficiently with shop vacuums, helping maintain cleanliness in the workspace.

In summary, the Powermatic 66 exemplifies the combination of power, precision, and safety, making it an indispensable tool for woodworkers. With its heavy-duty construction, innovative technology, and user-friendly features, the Powermatic 66 stands as a hallmark of quality in the woodworking industry. This saw is not just a machine; it’s a reliable partner for those who are serious about their craft.