Adjustments
Table Movement
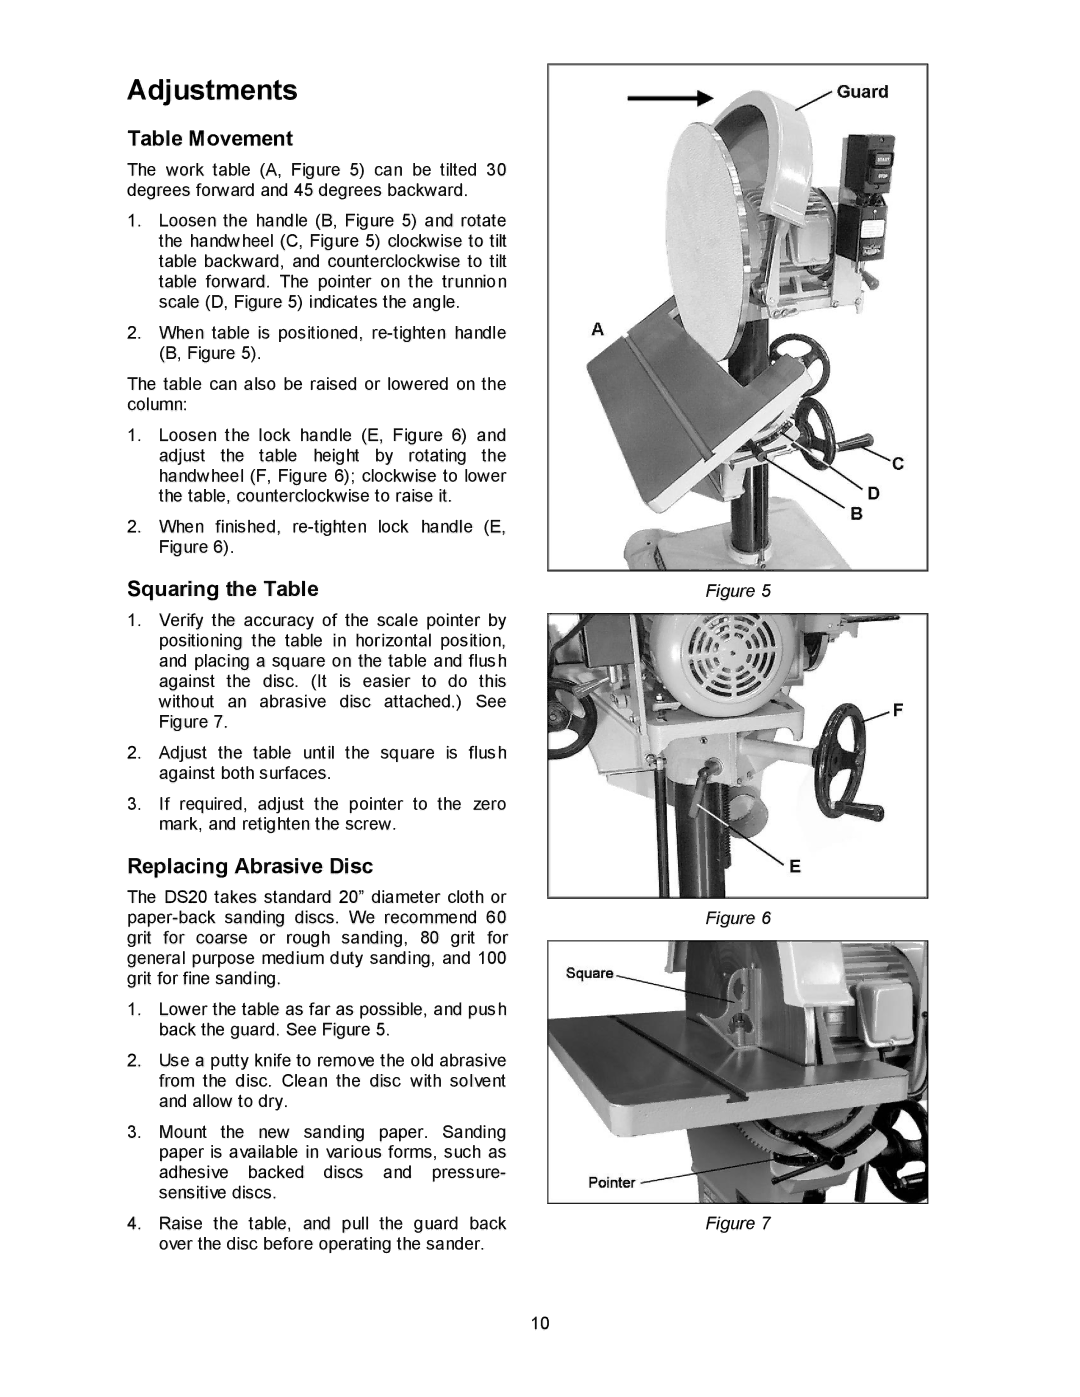
The work table (A, Figure 5) can be tilted 30 degrees forward and 45 degrees backward.
1.Loosen the handle (B, Figure 5) and rotate the handwheel (C, Figure 5) clockwise to tilt table backward, and counterclockwise to tilt table forward. The pointer on the trunnion scale (D, Figure 5) indicates the angle.
2.When table is positioned,
The table can also be raised or lowered on the column:
1.Loosen the lock handle (E, Figure 6) and adjust the table height by rotating the handwheel (F, Figure 6); clockwise to lower the table, counterclockwise to raise it.
2.When finished,
Squaring the Table | Figure 5 |
1.Verify the accuracy of the scale pointer by positioning the table in horizontal position, and placing a square on the table and flush against the disc. (It is easier to do this without an abrasive disc attached.) See Figure 7.
2.Adjust the table until the square is flush against both surfaces.
3.If required, adjust the pointer to the zero mark, and retighten the screw.
Replacing Abrasive Disc
The DS20 takes standard 20” diameter cloth or |
| |
Figure 6 | ||
grit for coarse or rough sanding, 80 grit for |
| |
general purpose medium duty sanding, and 100 |
| |
grit for fine sanding. |
| |
1. | Lower the table as far as possible, and push |
|
| back the guard. See Figure 5. |
|
2. | Use a putty knife to remove the old abrasive |
|
| from the disc. Clean the disc with solvent |
|
| and allow to dry. |
|
3. | Mount the new sanding paper. Sanding |
|
| paper is available in various forms, such as |
|
| adhesive backed discs and pressure- |
|
| sensitive discs. |
|
4. | Raise the table, and pull the guard back | Figure 7 |
| over the disc before operating the sander. |
|
10