Handles
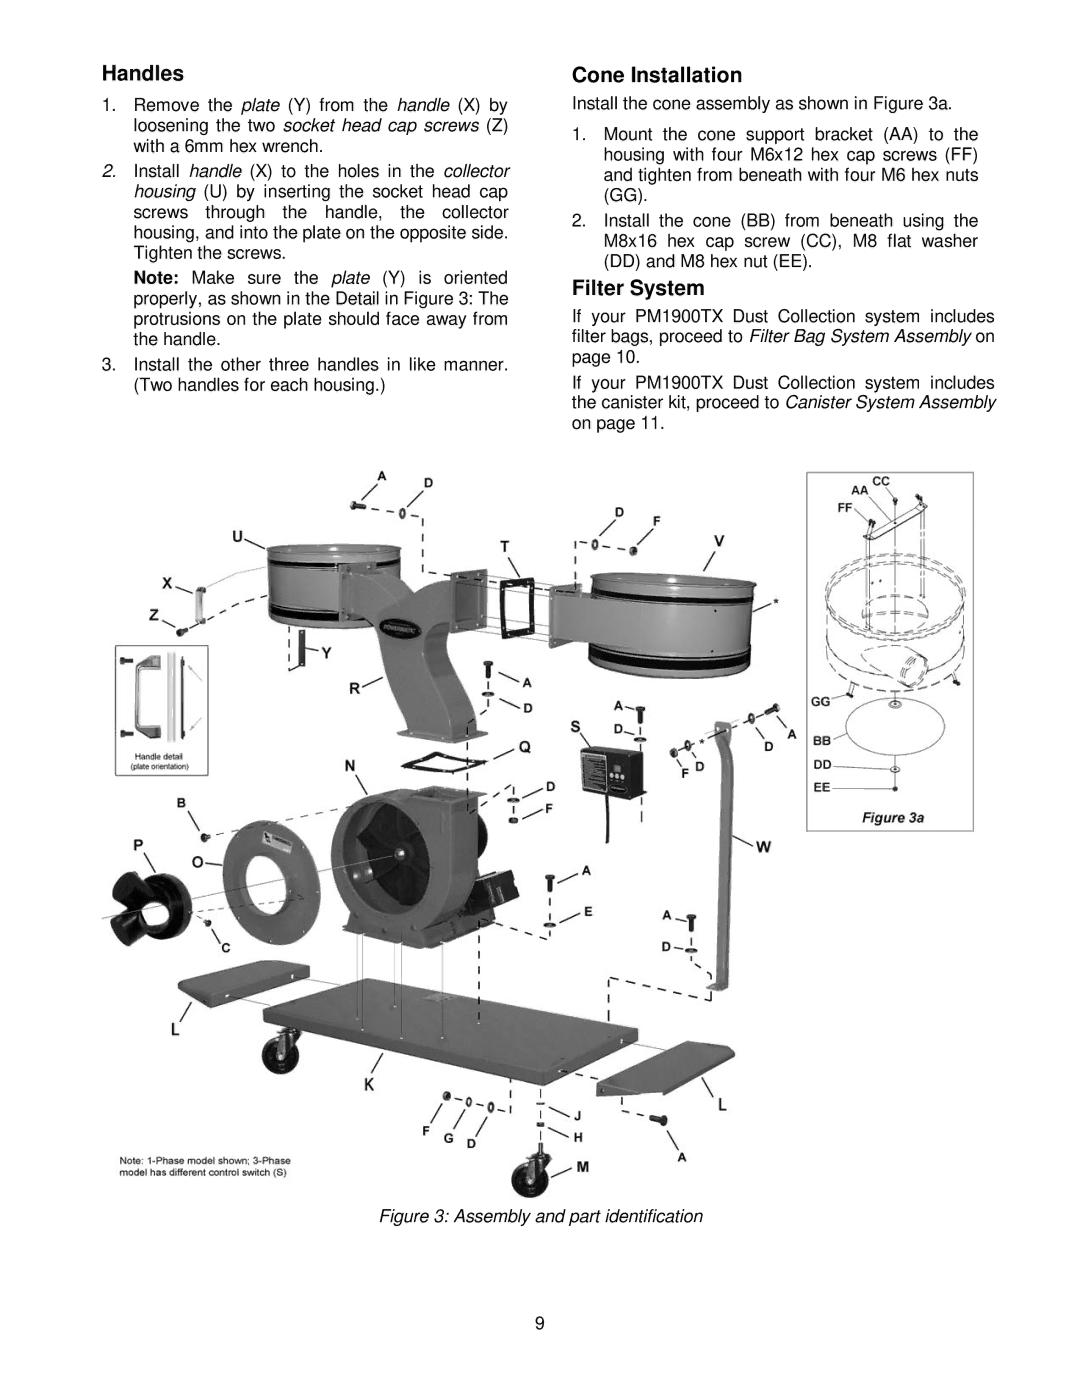
1.Remove the plate (Y) from the handle (X) by loosening the two socket head cap screws (Z) with a 6mm hex wrench.
2.Install handle (X) to the holes in the collector housing (U) by inserting the socket head cap screws through the handle, the collector housing, and into the plate on the opposite side. Tighten the screws.
Note: Make sure the plate (Y) is oriented
properly, as shown in the Detail in Figure 3: The protrusions on the plate should face away from the handle.
3.Install the other three handles in like manner. (Two handles for each housing.)
Cone Installation
Install the cone assembly as shown in Figure 3a.
1.Mount the cone support bracket (AA) to the housing with four M6x12 hex cap screws (FF) and tighten from beneath with four M6 hex nuts
2.Install the cone (BB) from beneath using the M8x16 hex cap screw (CC), M8 flat washer
(DD)and M8 hex nut (EE).
Filter System
If your PM1900TX Dust Collection system includes filter bags, proceed to Filter Bag System Assembly on page 10.
If your PM1900TX Dust Collection system includes the canister kit, proceed to Canister System Assembly on page 11.
Figure 3: Assembly and part identification
9